
Do you want to create premium, luxurious images of food? The kind that graces the pages of the world’s best food magazines? Are you thinking of becoming a professional food photographer, but feel you need to step up your game first? Tired of finding the same beginner tips online?
There’s a lot of elements that go into creating premium images in food photography, so where do you start and what do you focus on to make your images scream premium magazine worthiness?
Here are 5 secrets the professionals use to get premium food photography images.
1. The Background is the Backbone of the Shot. Go for Textured and Neutral.
Great things are built on a solid foundation, and your food images is are no different. The background that you choose is the backbone of your food scene. It will set the tone of the story you are trying to capture. Choose a background that isn’t premium and say goodbye premium and hello mediocre.
The key to a premium background is one that subtly adds to the overall feel of an image instead of competing with the food. Choose backgrounds that have inconspicuous texture and aren’t too busy with lines and fall within a neutral colour palette, whites, greys, hues of blue or desaturated browns.
Stay away from warm coloured woods with yellow/orange tones. The reason for this is that food looks fresher, crisper and more enticing when the temperature of your shot is more towards the blue end of the spectrum. Warm coloured woods can be too saturated and overpower the other colours in your shot. Just flick through any prestigious food magazine and you’ll see a tendency to stick away from this type of background.
Need inspiration for a premium background? Get my favourite FREE DIY Background Technique – White Plaster Coat.

2. Rent a Signature Prop to Take it up a Notch.
You don’t need to spend a lot of money on props or have the biggest prop collection in order to create premium-looking images. You just need to focus on signature pieces, and by signature pieces I mean those props that will define the quality and story of a dish.
I do a lot of client work, so my prop rotation needs to be kept fresh and interesting, not to mention tailored to the concept that’s being created. I collect standard, multi-use props I can use over and over and rent/borrow signature props for each job that are going to add an element of quality to an image.
For less than $10 I can rent a really premium piece that takes my image from good to ‘WOW’! Even better yet, you can approach local brands or ceramists and borrow a new piece they’re working on for a plug on social media and often use it for free.

3. Incorporate at Least Three Layers Into Your Dish.
Now, I’m an Aussie gal married to a Canadian, and he often tells me when I complain about cold weather is ‘there is no such thing as cold weather, just inappropriate layering’. Well the same goes for food photography. If your image is lacking that premium element, chances are you need to focus on getting your layers right.
If you are asking what a ‘layer’ is in food photography, it is simply the number of elements that you have on your set on top of one another. (For example, napkin, dish, garnish would be three layers and would appear on top of one another. I don’t count the food/recipe as a layer as it’s the subject).
As a rule of thumb, use at least three layers to give your images quality characteristics. Your layers can be very subtle too. Take the layers in this chocolate cake for example; 1. Cracks in the cake, 2. Powered sugar, 3. Texture of the cake tin where the slice is missing, 4. Tea strainer prop. While the composition is simple, visualise how much less impactful this shot would be without these layers.

4. Use Mixed Lighting Sources.
Do you ever stare endlessly at the images in the best food magazines and think, why doesn’t my light look like that? It’s more than likely because they’re using mixed lighting. Mixed lighting is the use of a combination of lighting sources, most commonly being natural light mixed with artificial.
If you’re feeling like you’ve mastered natural light, but don’t like artificial lighting, and are looking to pick up your lighting game, then try a mixed lighting set up. If you have an off camera flash or artificial light, then have a play around combining the light from your window and an artificial light source.
To get started, use the natural light as your primary source, and the artificial source to create direction, add highlights, or fill in shadows.
In this image I used a north facing window with light coming from the top of the image to create backlighting, and a Profoto B1 from the top right-hand corner to create directional light and enhance the highlights.

5. Forget the Rule of Thirds and Think Diagonals.
Most of you will be familiar with the rule of thirds composition technique because it is something every photographer is taught is what makes a strong composition, but it is actually a very limiting technique to solely focus on especially in food photography.
To make your composition richer and more interesting, forget the rule of thirds and start using diagonals to guide your composition. Use diagonals to place objects within your scene, look out for how lines and edges of props are intersecting with the frame. Are they intersecting diagonally?
Is the direction of your spoons, knives or folks intersecting in diagonals? It looks weird when they are all pointing in the same direction.
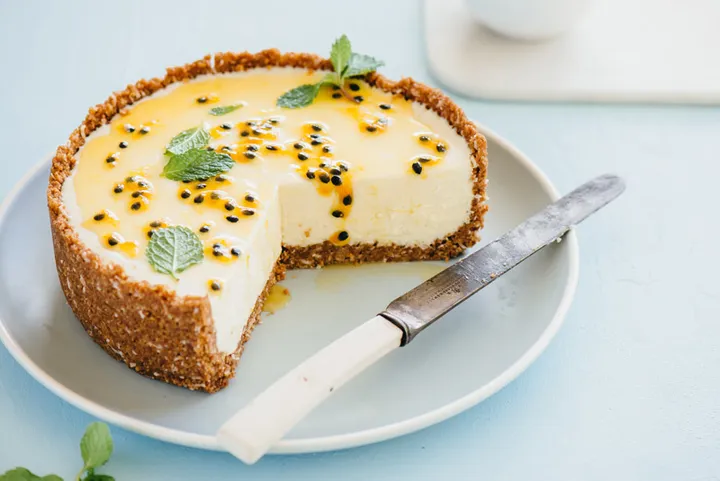
Take a look at the image below, all but one of the elements is being intersected by the diagonal lines, make for an interesting composition rather than ‘random’ placement.

Putting it All Into Action
Now that you’ve unlocked a couple of secrets that professionals use without even thinking about it, you’re ready to put them into action.
I’ve shared these tips and techniques with you from easiest to implement to advanced professional concepts. Work through them one by one at your own pace. Secret 4 and 5 will come with practice and a bit of patience. Remember that food photography, like any photography, is a journey not a destination. It takes time and a lots of love.
You’re here because you want to get better. You’re ready. Now remember, nothing worth doing is easy right?
Don’t wait, get started today by getting my FREE DIY Background Technique – White Plaster Coat.
Author Bio: Rachel is a self-taught professional food photographer sharing tips, tricks and techniques at TwoLovesStudio.com to enable fellow creatives to unlock their potential and enhance their photography game.