

There's never a better time to organize your studio than the week after New Year's Day.
The gifts have been opened, vacations have ended and resolutions have been set. Your creative space has either recently been neglected in favor of holiday revelry or filled to the brim with new materials collected over days of Secret Santas and bargain shopping. Any way you spin it, the beginning of January -- ushering in a new month and a new year -- is just begging you to dive into the corners of your painting or photography studio and make room for inspiration.
In honor of 2015, we've collected together our guide to getting it together in the new year. Behold, 21 hacks to help you organize your art studio:
1. Organize your paint with cake tins and stands. Just replace cupcakes with paint bottles. Glue cake tins to the stand if you want to prevent toppling.
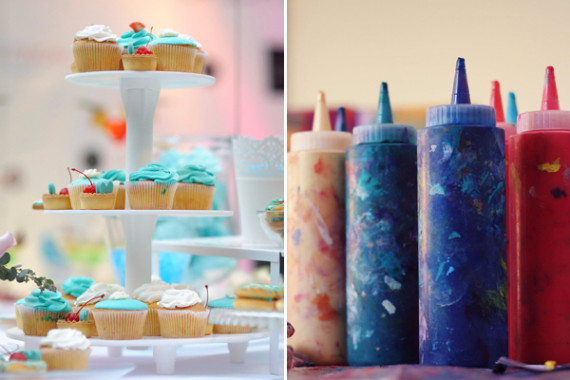
(via Pinterest/Photos: Getty)
2. Or magnetize your paint containers to store them upside down.
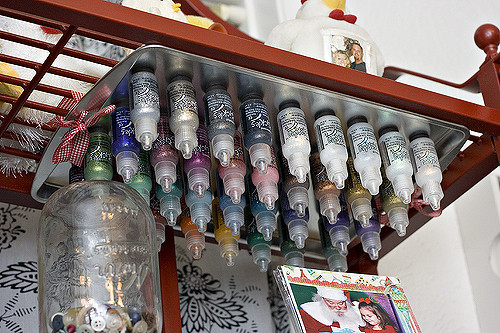
(via BeaOriginal)
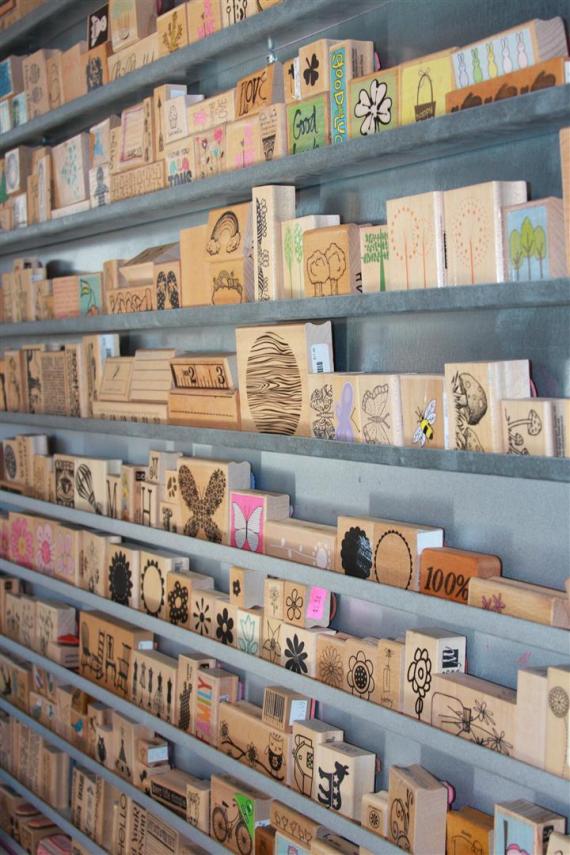
3. Fashion your own sewing thread shelf. Bonus: use nails to keep your bobbins in sight.
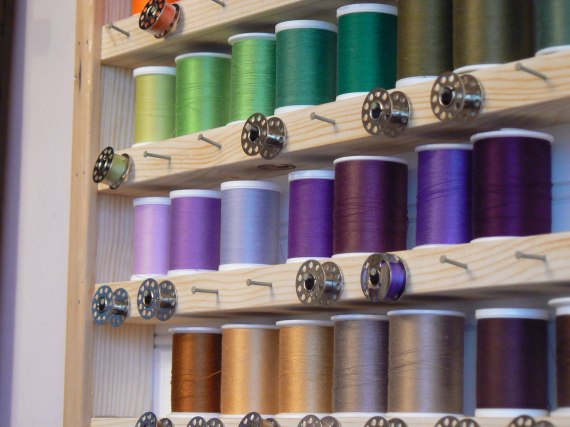
(via The Creative Homemaker)
4. Use a wine rack and glasses to store your pens and pencils.
(via My C.A.S.E. Studies)
5. Keep your paintbrushes straight by stashing them in a planter.
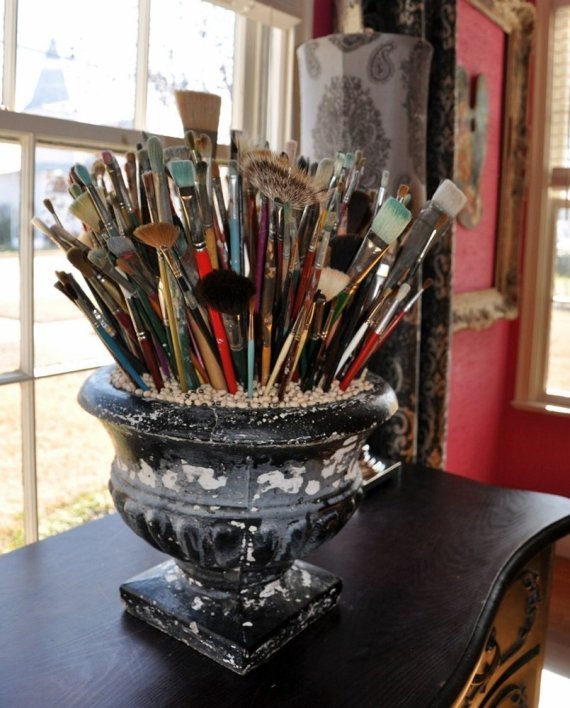
(via Apartment Therapy)
6. Convert a hanging shoe organizer into a space for storing loose canvases and paper. Just cut out the bottoms of a few segments to make room for the length of your materials.
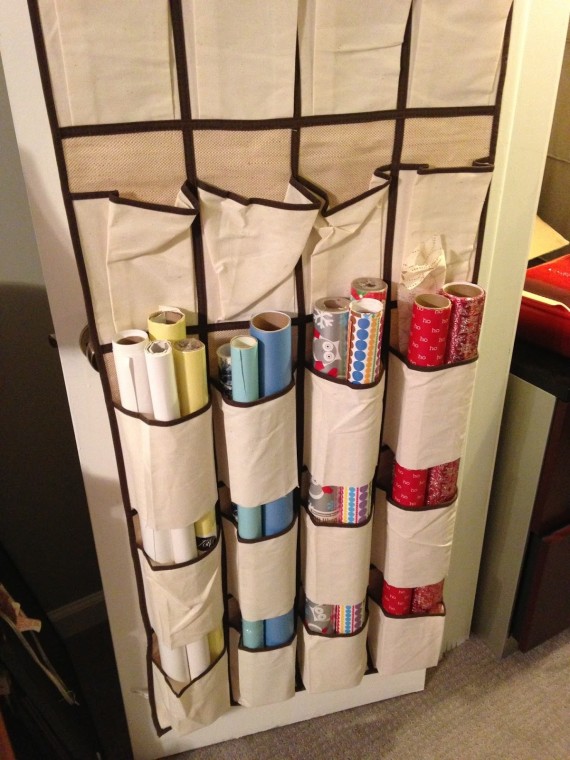
(via Tenth Avenue South)
7. Reuse baby food jars for keeping beads, jewels or even pigments in order. Wash out, stack and voila.
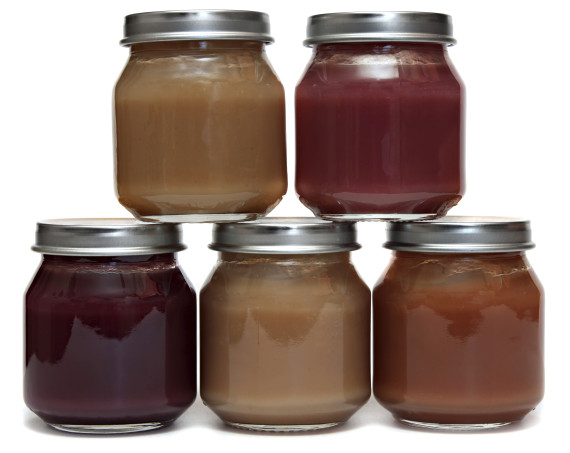
(via Apartment Therapy)
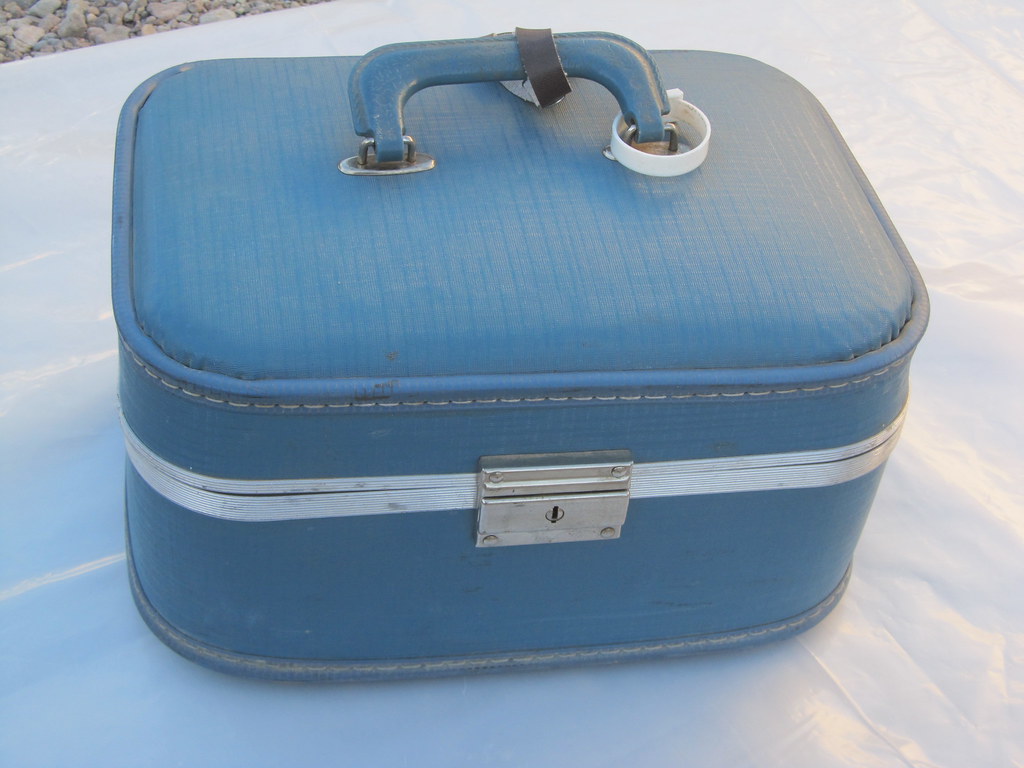
8. Use a vintage train case for organizing collage materials -- buttons, paper scraps, knick knacks.
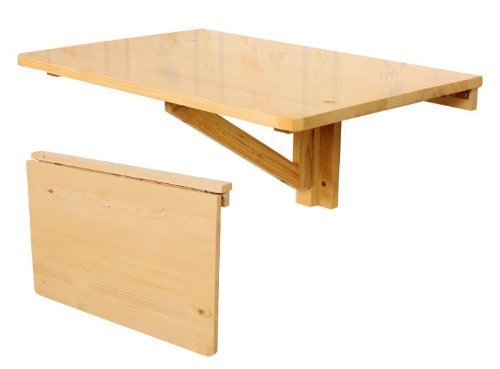
9. Turn a drop-down table into a DIY cutting table. Just add a cutting mat to the top.
10. Drape your miscellaneous fabric in an empty closet with hangers.
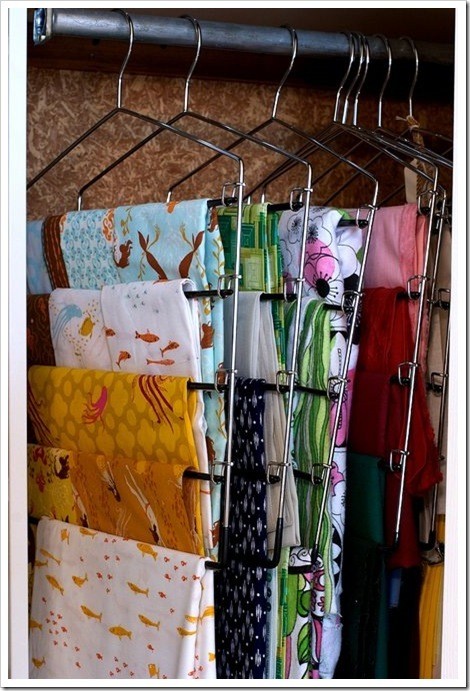
(via Matters of Style/Photo: Everything Etsy)
11. Make a multi-roll tape dispenser.
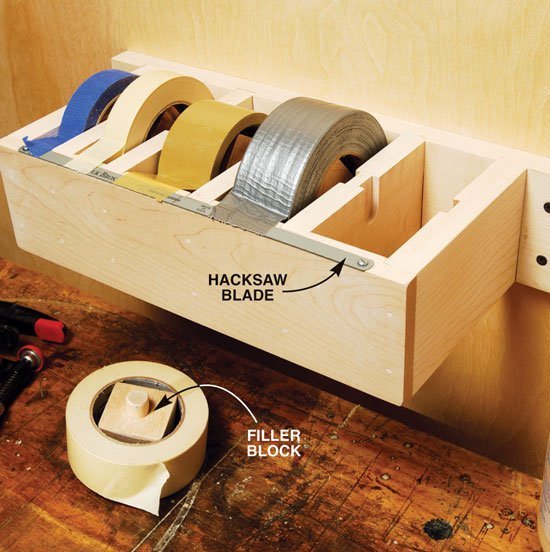
(via Makezine)
12. Keep your inspirations straight with magnets and vintage serving trays. Mount the metal trays on the wall and use magnets to post your photographs, to-do lists, sketches and other bits of inspiration.

(via Lisa Pace)
13. Organize your sketches with an old lampshade. Just add paperclips and dangle.
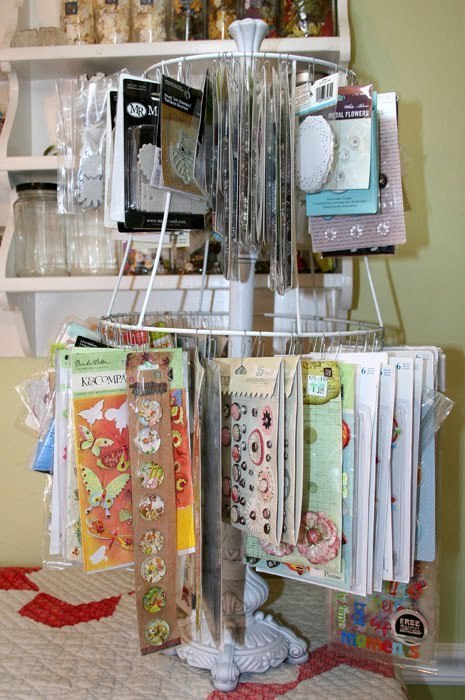
(via Creatively Savvy)
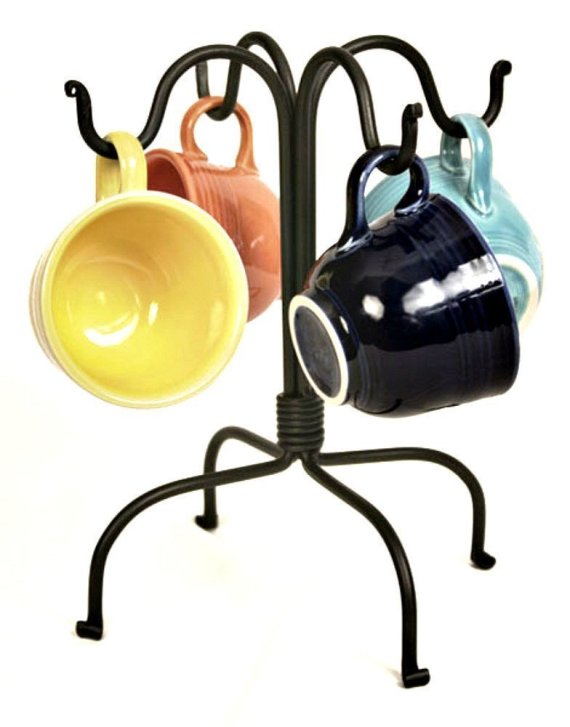
14. Turn a mug tree into a scissor tree. Replace mugs with scissors.
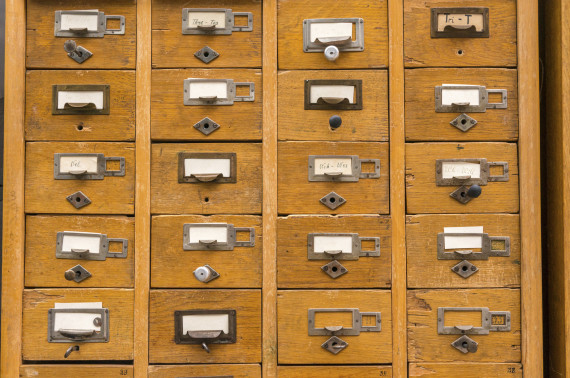
15. Buy used card catalog cabinets or hardware storage cabinets and organize away. This is a genius piece of furniture for any studio.
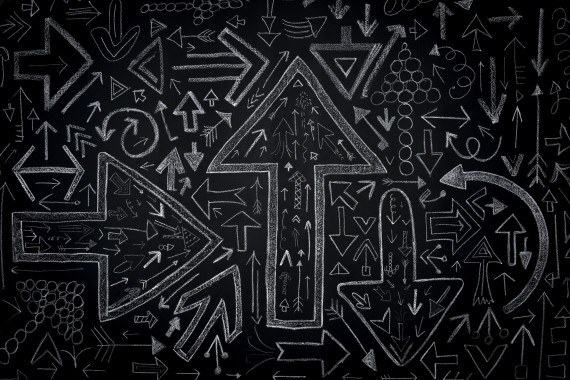
16. Chalkboard paint, chalkboard paint, chalkboard paint. Paint it on jars, on cabinet drawers, on the wall -- it's great for taking notes, posting reminders or labeling materials.
(via Design Improvised)
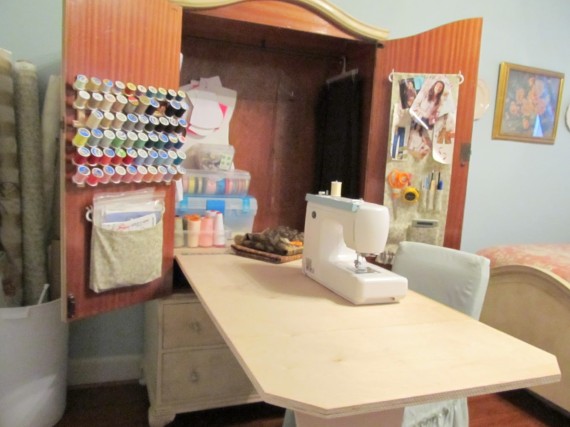
17. Turn an old wardrobe into your sewing station
(via Pinterest/Photo: Cottage Hill)
18. Use gutters to organize your printing equipment
(via Pinterest/Photo: Polka Dot Whimsy)
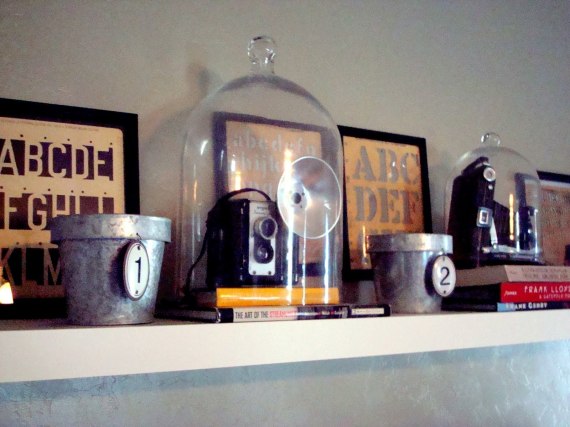
19. Use bell jars to contain your retro camera equipment (and show it off too)
20. Turn paper clips and clothespins into hanging devices. You can hang pieces in process on the walls, which is good for decoration and preserving ongoing work.
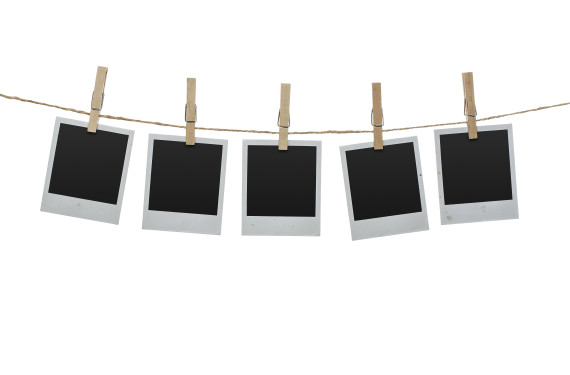
(via Pinterest)
21. Keep your camera lenses, cords and SD cards in the same place. And coordinate them. Lenses on one side and matching equipment on the other.
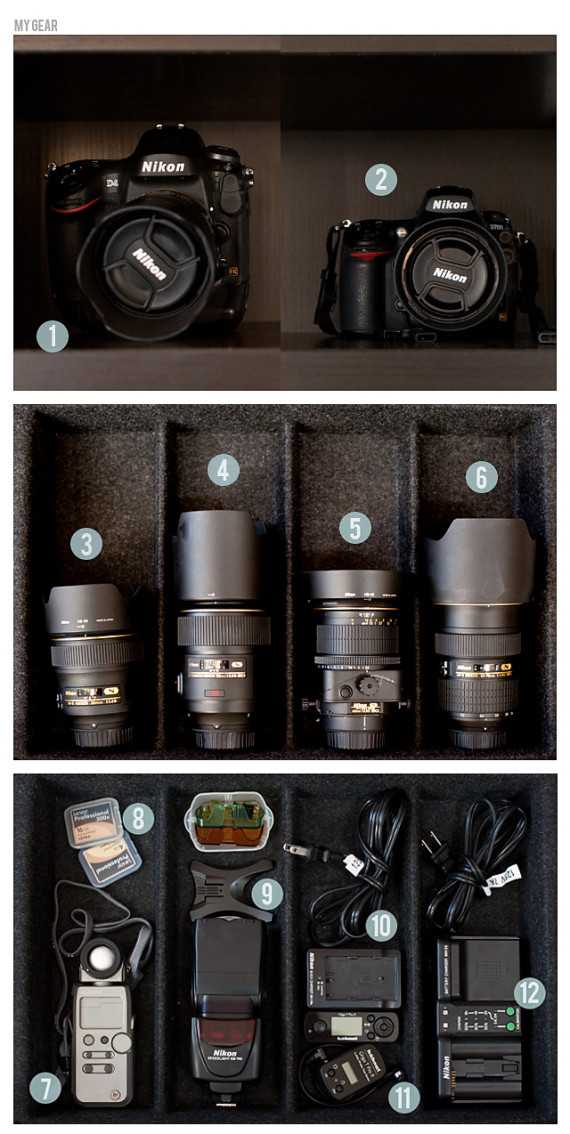
(via Clickin Moms)
Related
Before You Go
