The fitness industry is flooded with programs that move the body at quick velocities aiming to burn calories and to help people aesthetically look better. While this might seem great at face value, we must not forget about the other important factors such as stretching (check out the foam rolling and tennis ball article) and restoring proper range of motion through dynamic flexibility and even through corrective exercises and movement restoration. Movement restoration is an important missing link for the average fitness enthusiast because either people are too caught up in moving quickly within the small period of time they are given to train, or because these movements are how can I say this precisely -- not exciting?
So while the following routine might not burn calories and get your heart rate up, they are essential for your structure and for enabling your joints and muscles to work in synergy with one another for the workouts that are more demanding and higher in velocity.
The following routine are some corrective exercises that can be done before you train. These movements connect the body and mind together and are intended to be slow in speed, and precise in movement. If time is of concern, choose 3 of these movements at a time from each area. Focus on connecting your breath to the movements while remaining structurally in alignment the whole time.
According to Orthopedic Surgeon Dr. Raj of Beverly Hills Orthopedic Institute, "Ideally, for a person to decrease their risk of injury during sport or a high intensity fitness routine, one must teach the body how to move correctly and in alignment first. Slower and more precise biomechanical movements can connect the brain to the muscular movements which helps prepare the body to move efficiently during movements that are more dynamic in nature. After all, the goal is to remain uninjured, while gaining strength, endurance and power."
It is essential to not only do these exercises before you train, but to also incorporate the feeling it creates for the muscle group in focus when you train more dynamically. So in other words, for example, when you do the "Lying Pelvic Tilt" exercise, it is essential to utilize a neutral pelvis when you do a squat and even when you are running on the treadmill. This program is not in replacement of your doctor's orders, but it can certainly help with some of the postural deviations that might adversely impact your performance.
Do each exercise for 10 repetitions, resting for 30 seconds in between (or super-setting the other side), for 2-3 sets.
1. Lying Pelvic Tilt:
Problems to Address: Excessive lower back sway back and forward pelvis
How to Perform: Lie on the floor with your feet on the ground. Flatten your lower back to the ground creating an abdominal brace and lifting your hips slightly off the ground. Keep your lower back on the ground the entire time. Realize that this is a very small range of motion. To watch the video demonstration, click HERE.
2. Clam Shells:

Problems to Address: Flat Feet and Weak Glutes
How to Perform: Lie on your side with one leg on top of the other, bending your knees slightly. Keep your feet connected and your hips squared forward. Open up your top leg without rotating your hips upward. On the return, keep tension in the glute by not landing your top leg on the bottom leg in between reps. For a video demonstration, click HERE.
3. Side Lying Leg Raises:
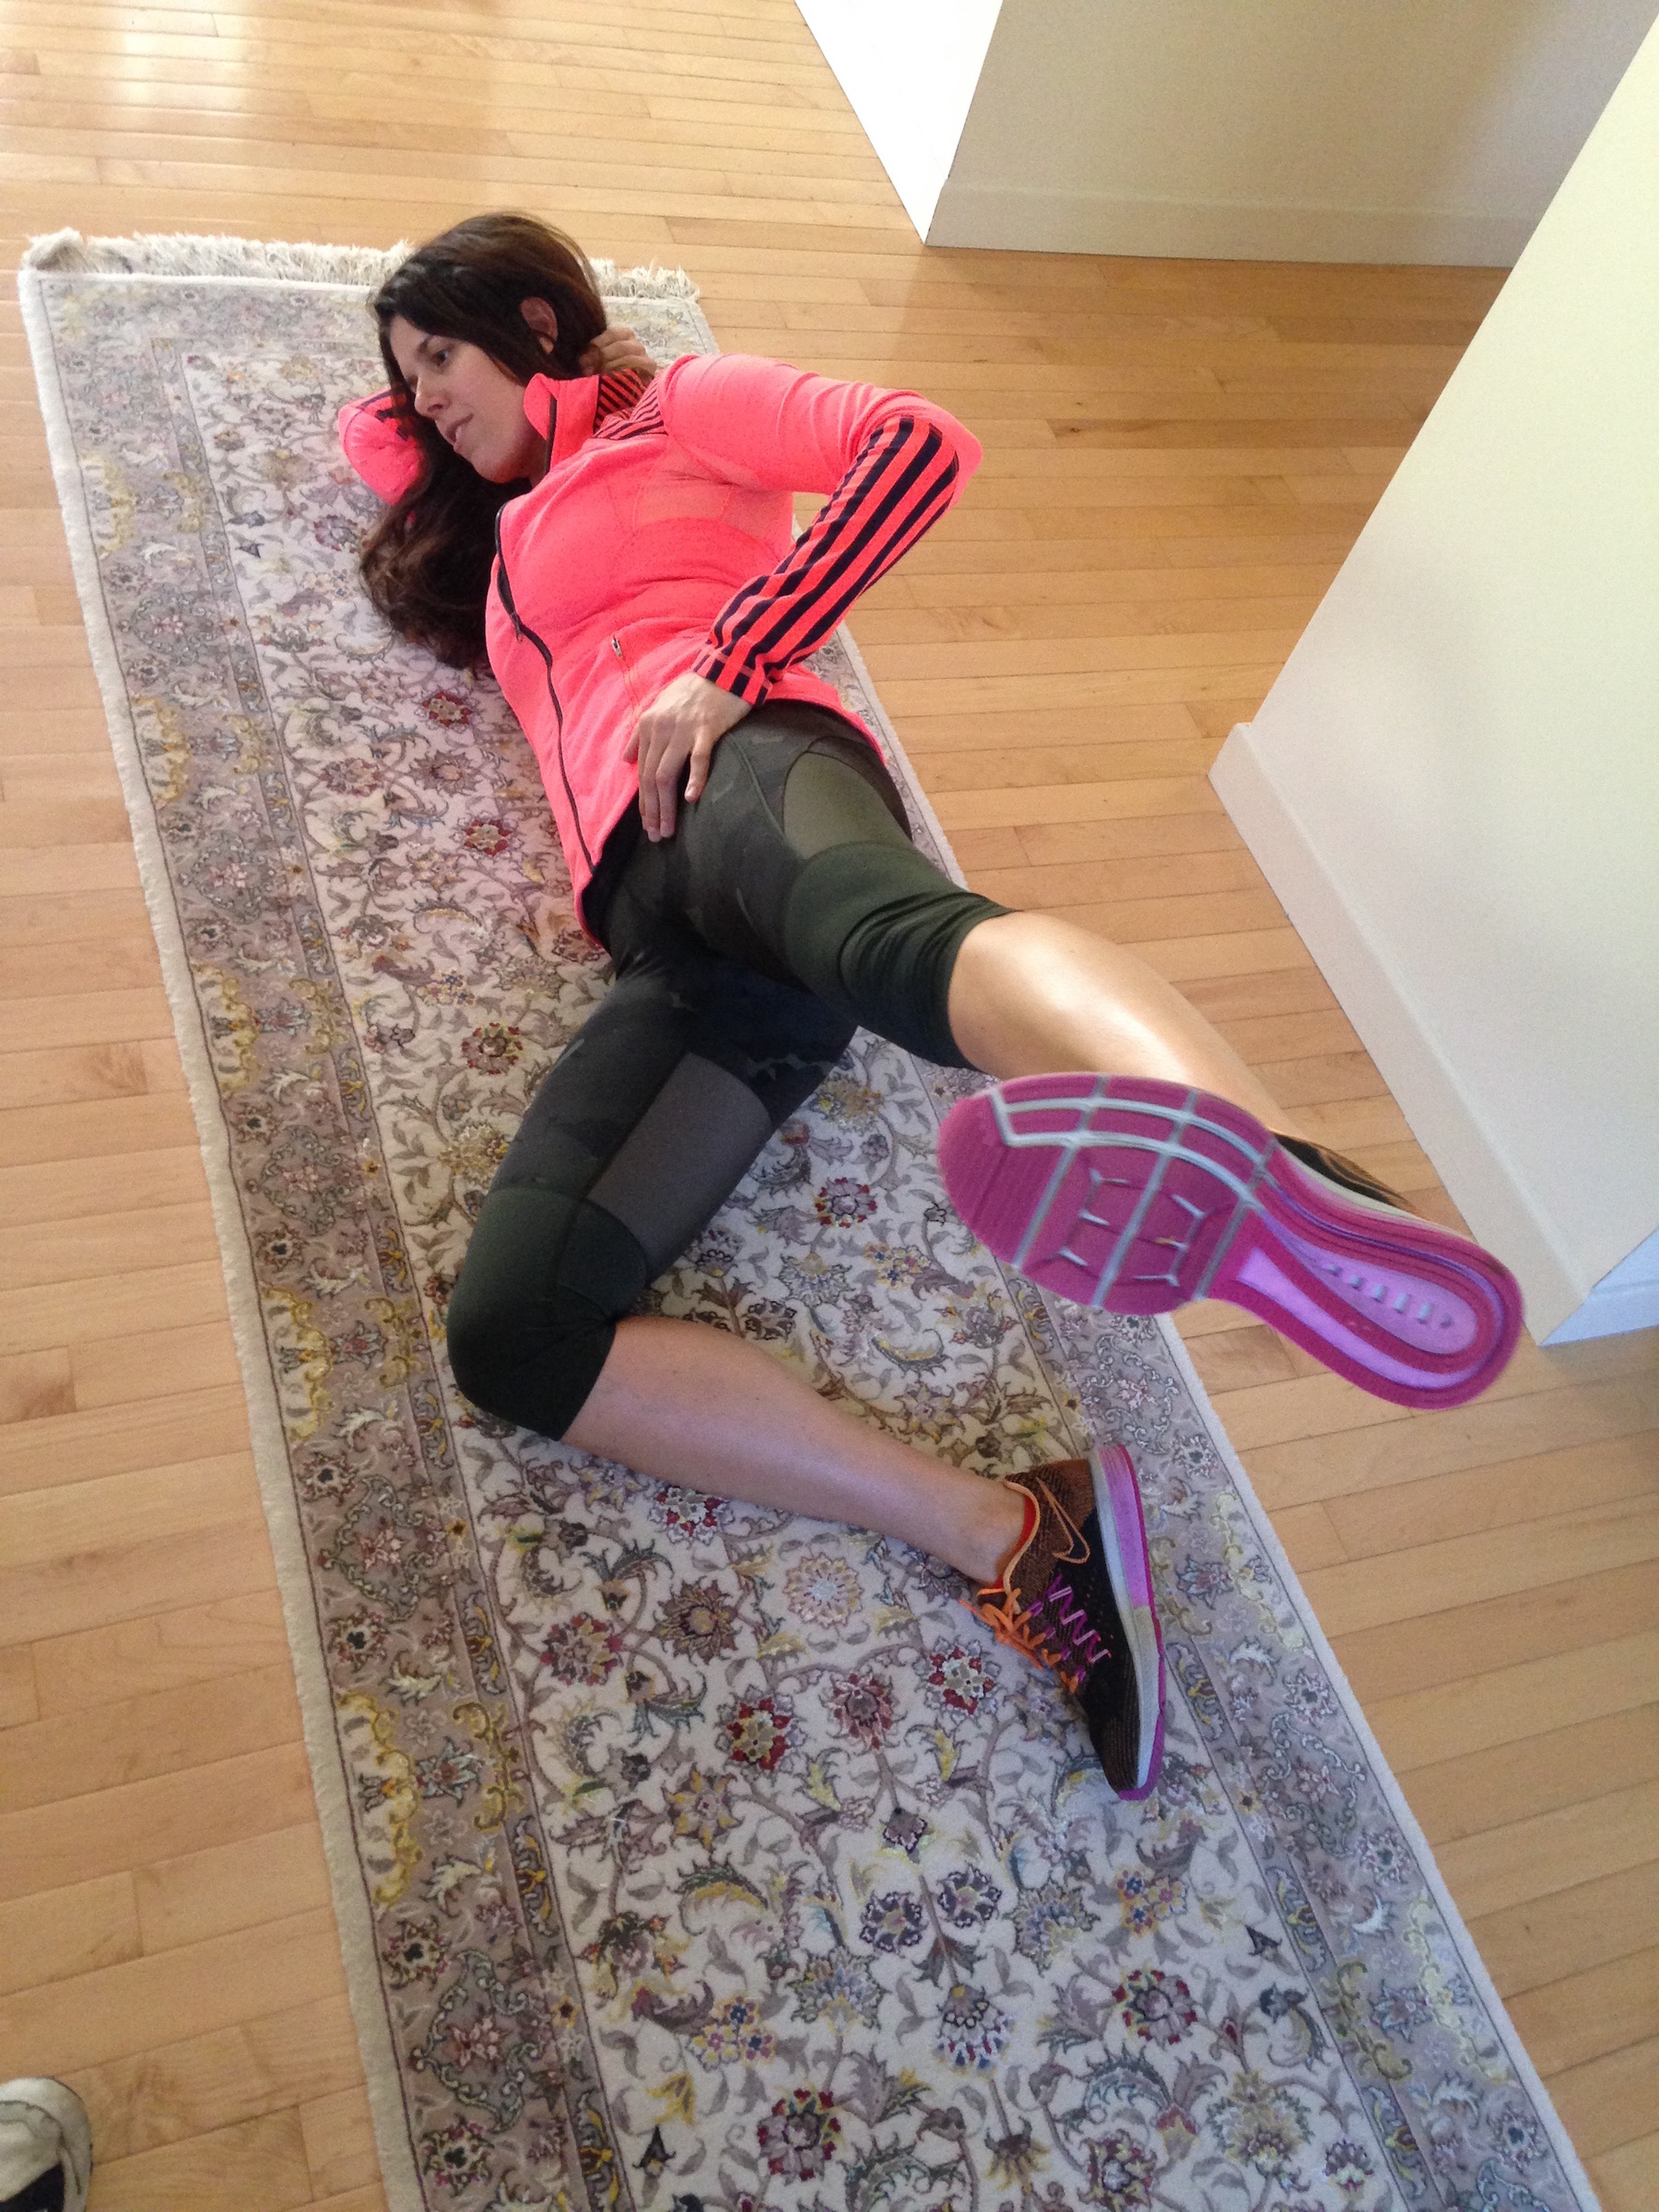
Problems to Address: Flat Feet and Weak Glutes
How to Perform: Lie on your side with one leg stacked on top of the bottom bent leg, and lift your top leg up to hover off the bottom leg as the starting position. With each repetition, lift the top leg up without rotating the hips. Return to starting position. For a video demonstration, click HERE.
4. Shoulder Rotators:
Problems to Address: Hunched upper back, forward shoulders
How to Perform: Lie on the floor with your feet on the ground and with cactus arms. Allow your shoulders to be pulled down to the ground with the backs of your hands touching the floor. If your shoulders are exceptionally tight, consider putting two small folded towels by where your hands should be which brings the ground up to you. Keeping your shoulders back and down, slowly rotate your elbows until your arms land in a ninety-degree angle. Slowly return to starting position. For a video demonstration, click HERE.
5. Shoulder Retractors: 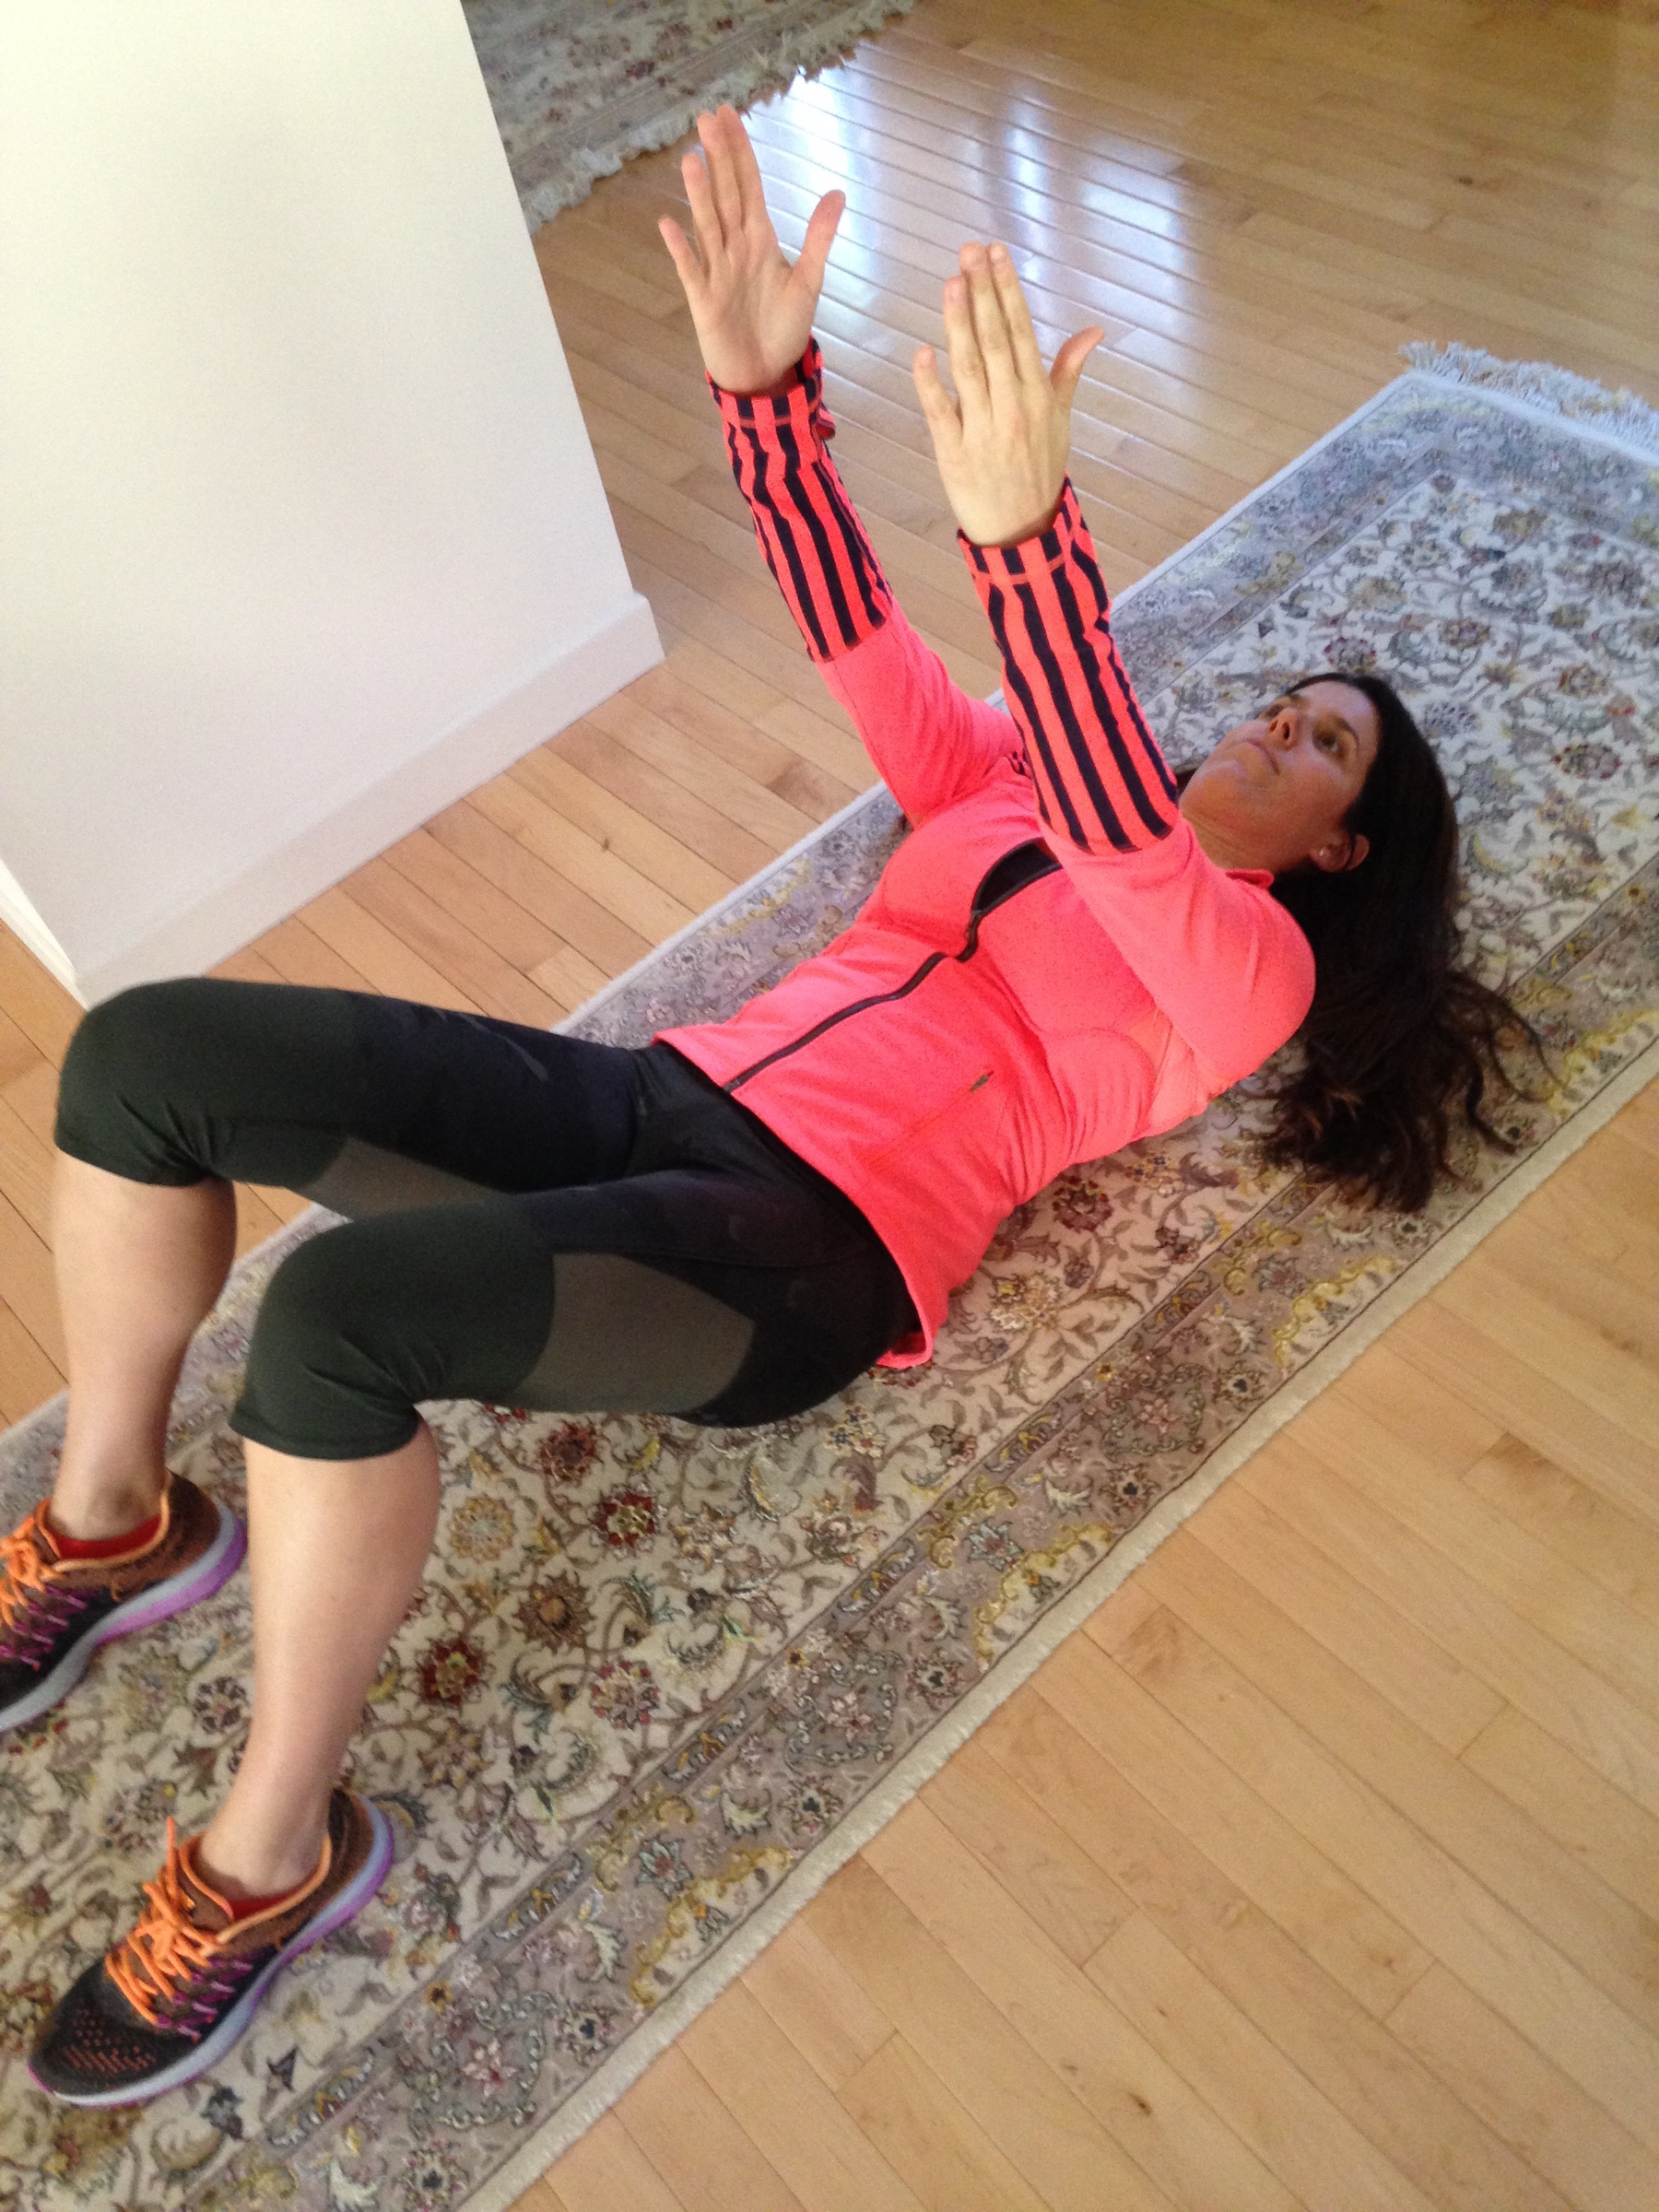
Problems to Address: Forward shoulders and internally rotated arms (from sitting a lot)
How to Perform: Lie on your back with your feet on the floor, knees bent. Bring your arms to the sky, keeping your shoulders down and back. Using the floor as a guide, pull your shoulder blades inward as if you are squeezing a pen in between the blades. Hold the squeeze for 4 seconds and release. For a video demonstration, click HERE.
6. Neck Flexion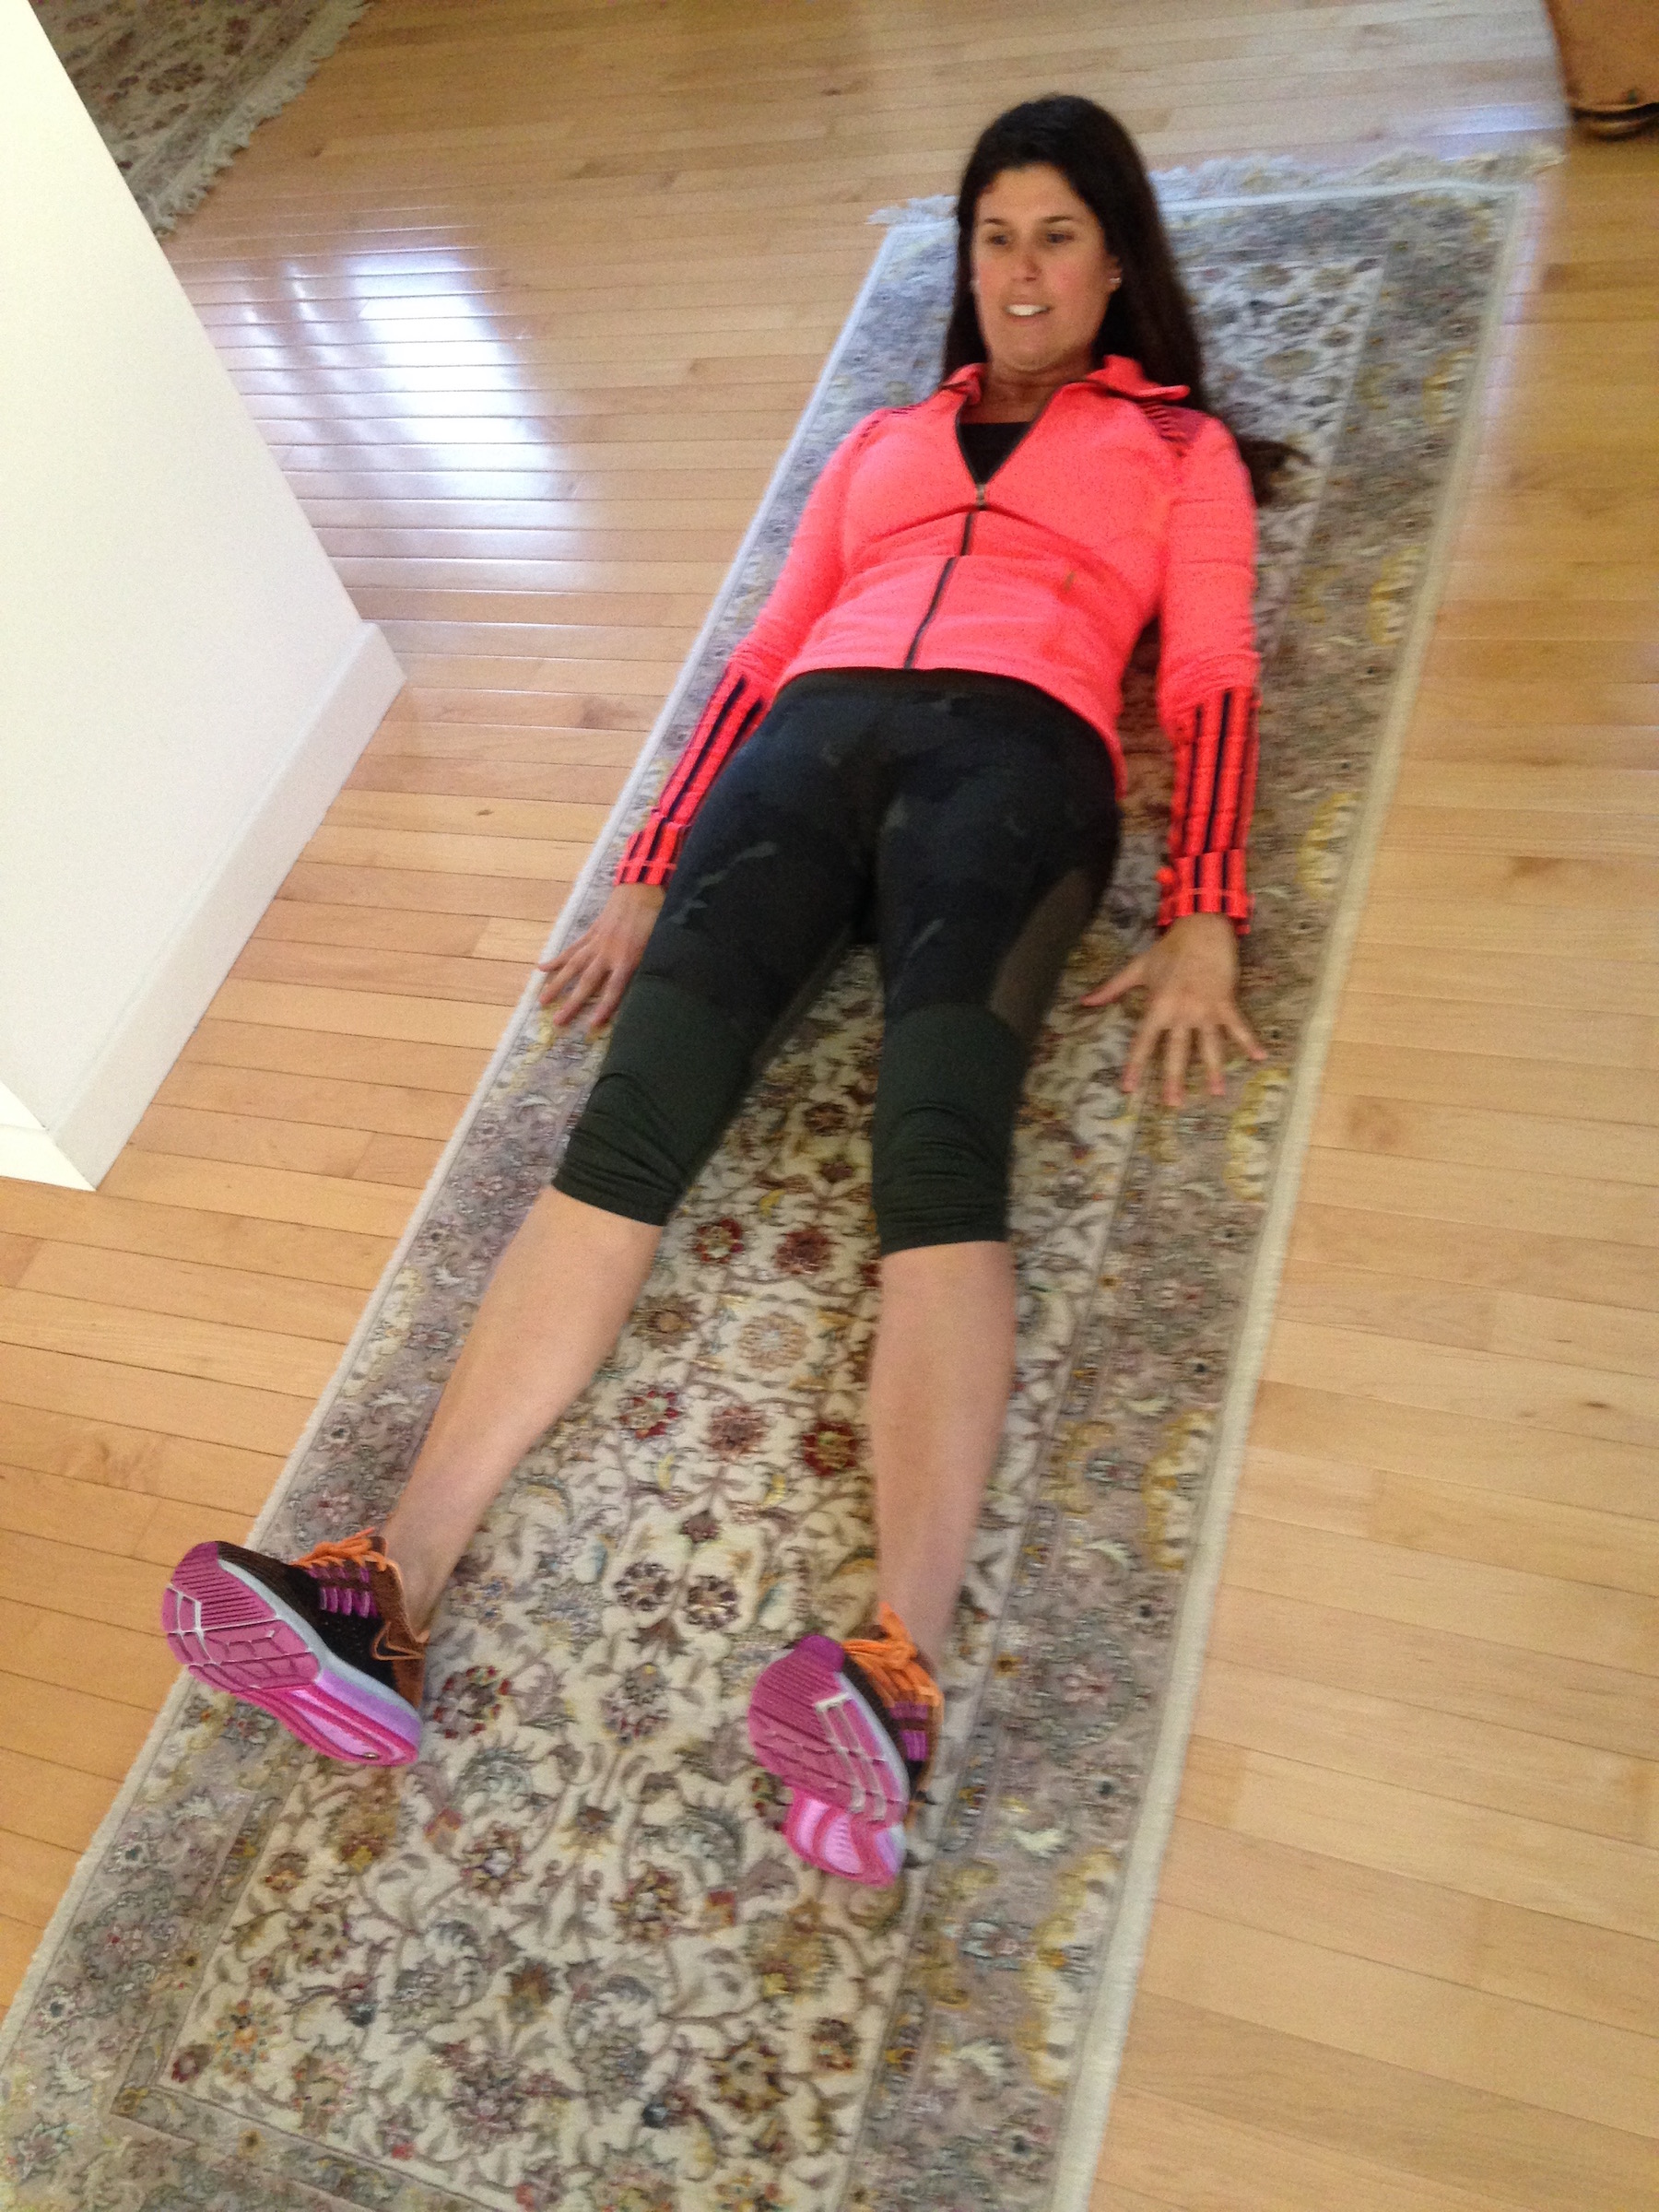
Problem to Address: Forward head
How to Perform: Lie down and pull your chin in and the crown of your head towards your chest and the crown of your head upwards to lengthen the back of your neck. Keep your shoulders down and your pelvis tilted the entire set. For a video demonstration, click HERE.
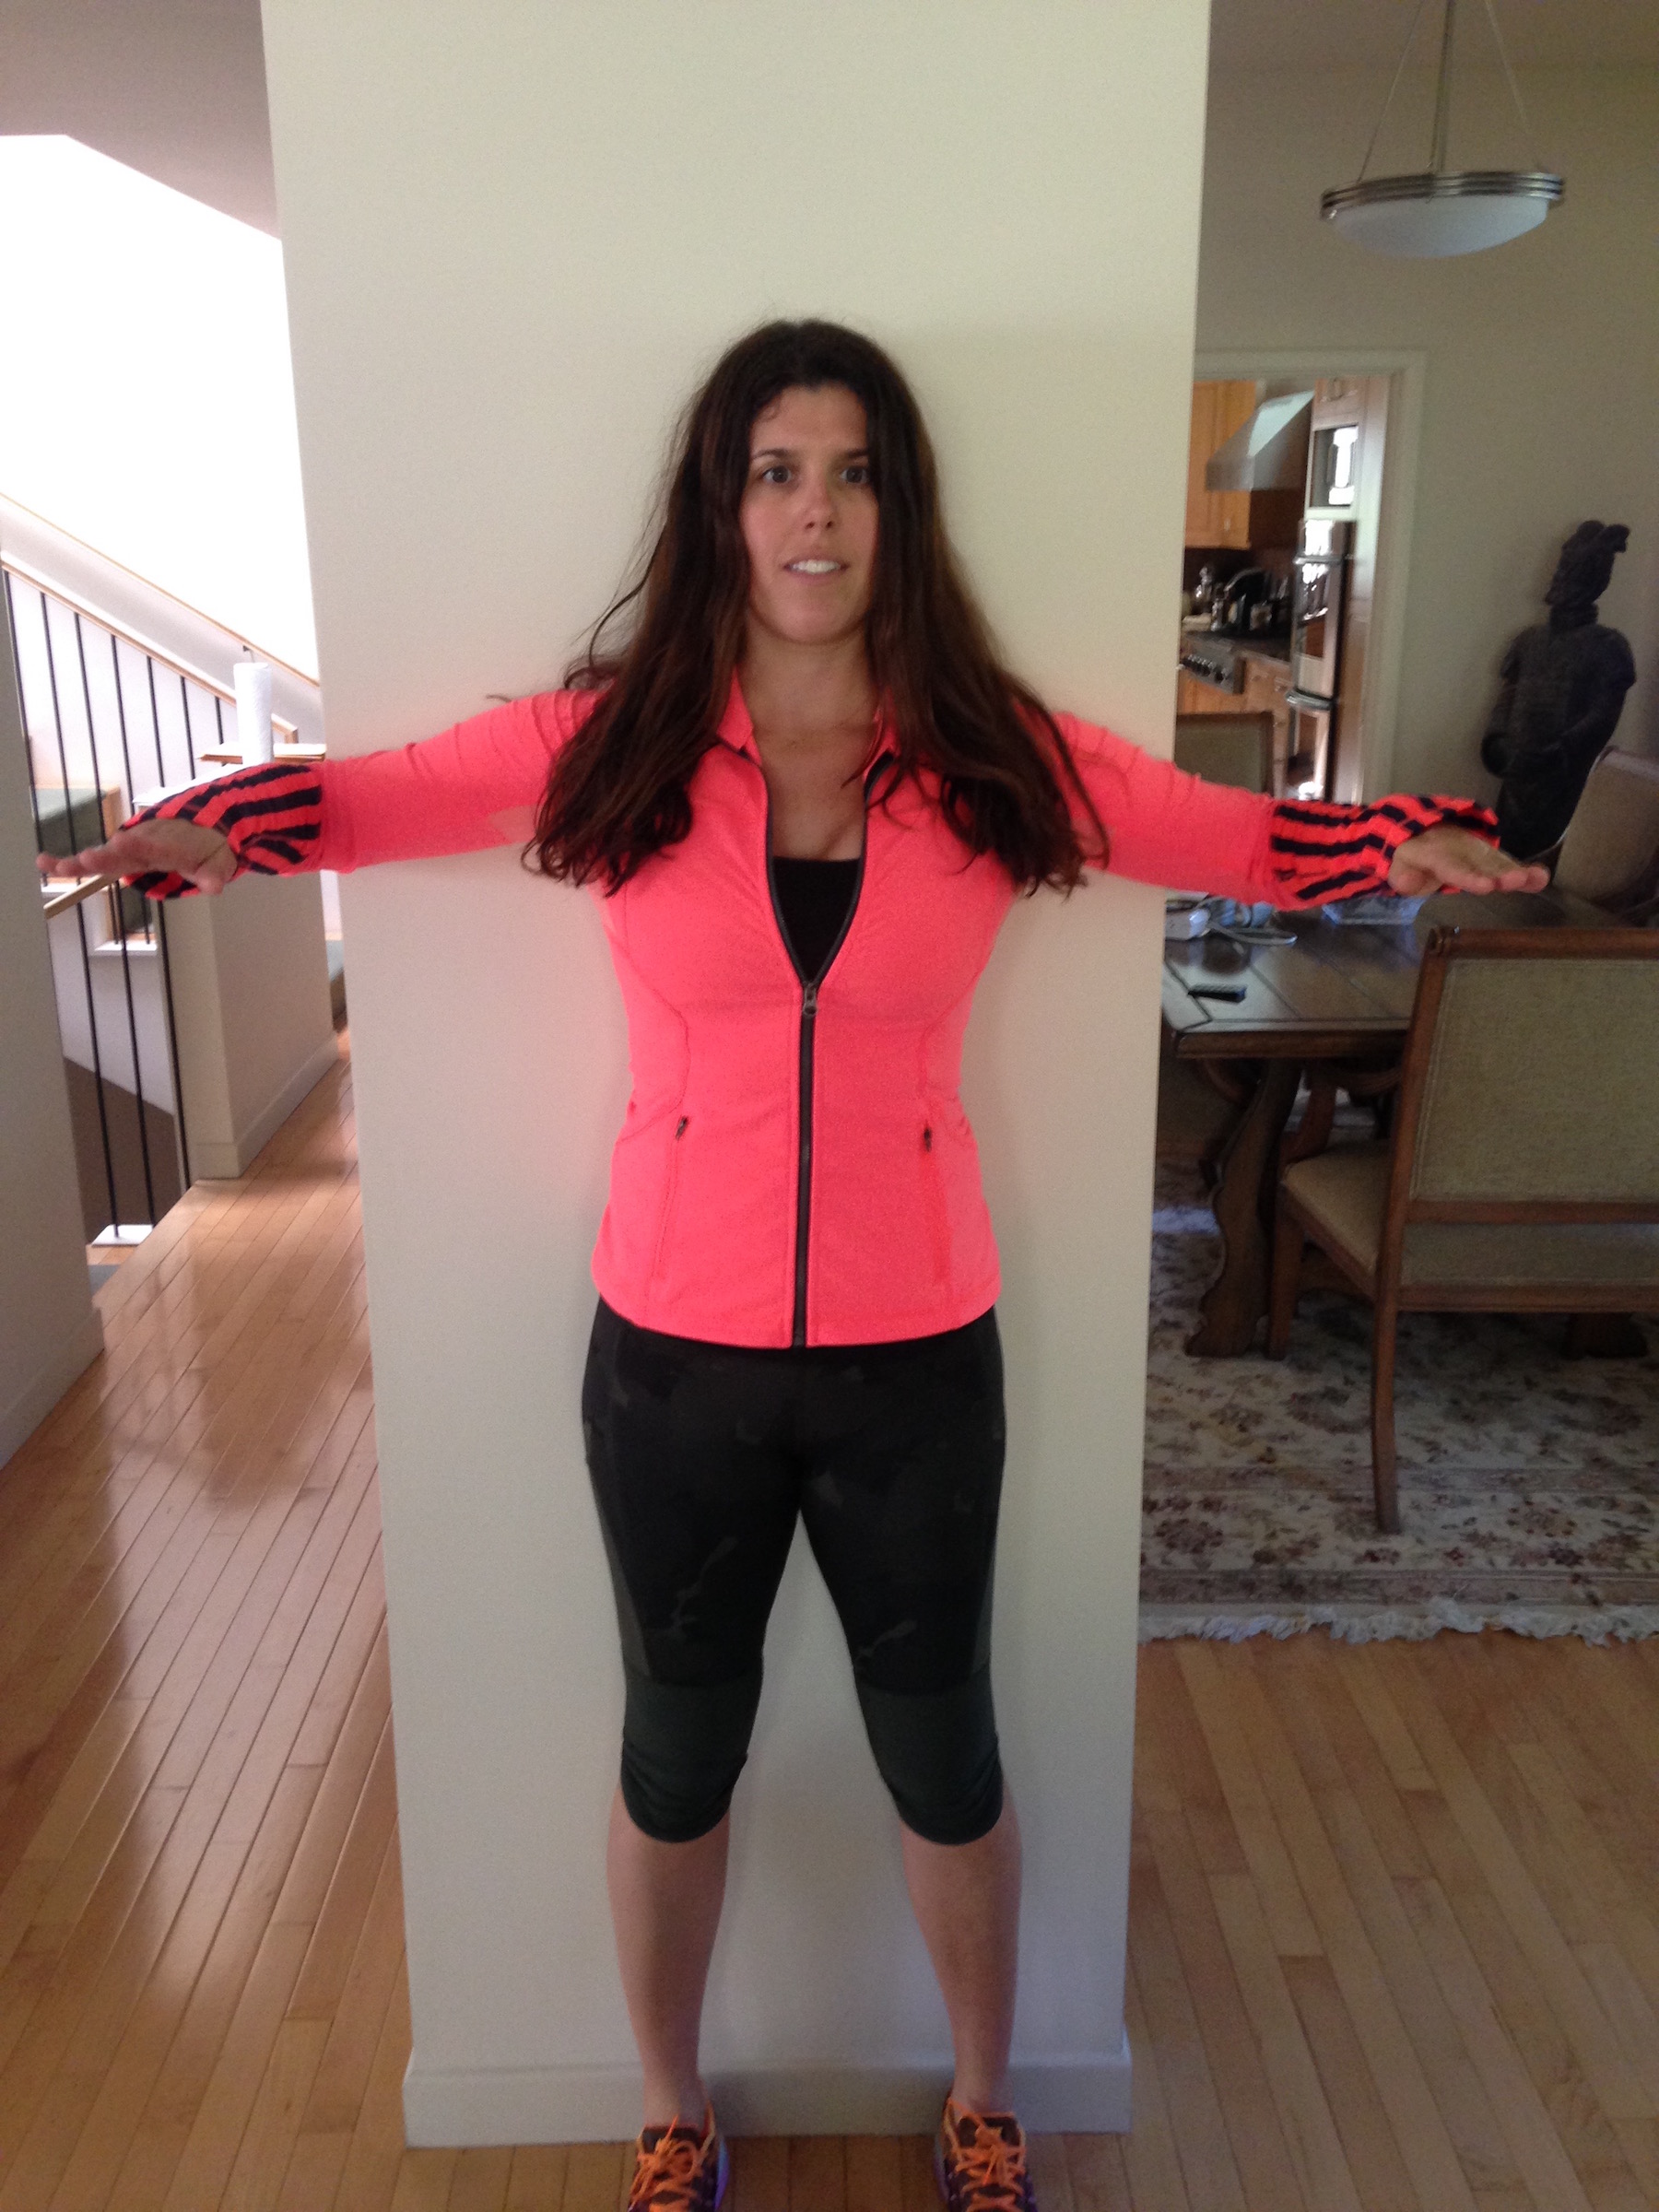
7. The Why:
Problems to Address: Elevated and tight shoulders
How to Perform: Stand upright with your pelvis in neutral (check lying pelvic tilt) with your arms out to the side and your palms facing forward. Visualize heavy weights attached to your wrists so that you feel your shoulders pull downward which will activate the muscles in the lower trapezius, thereby releasing the tension from your upper back. For a video demonstration, click HERE.
8. The Half Why: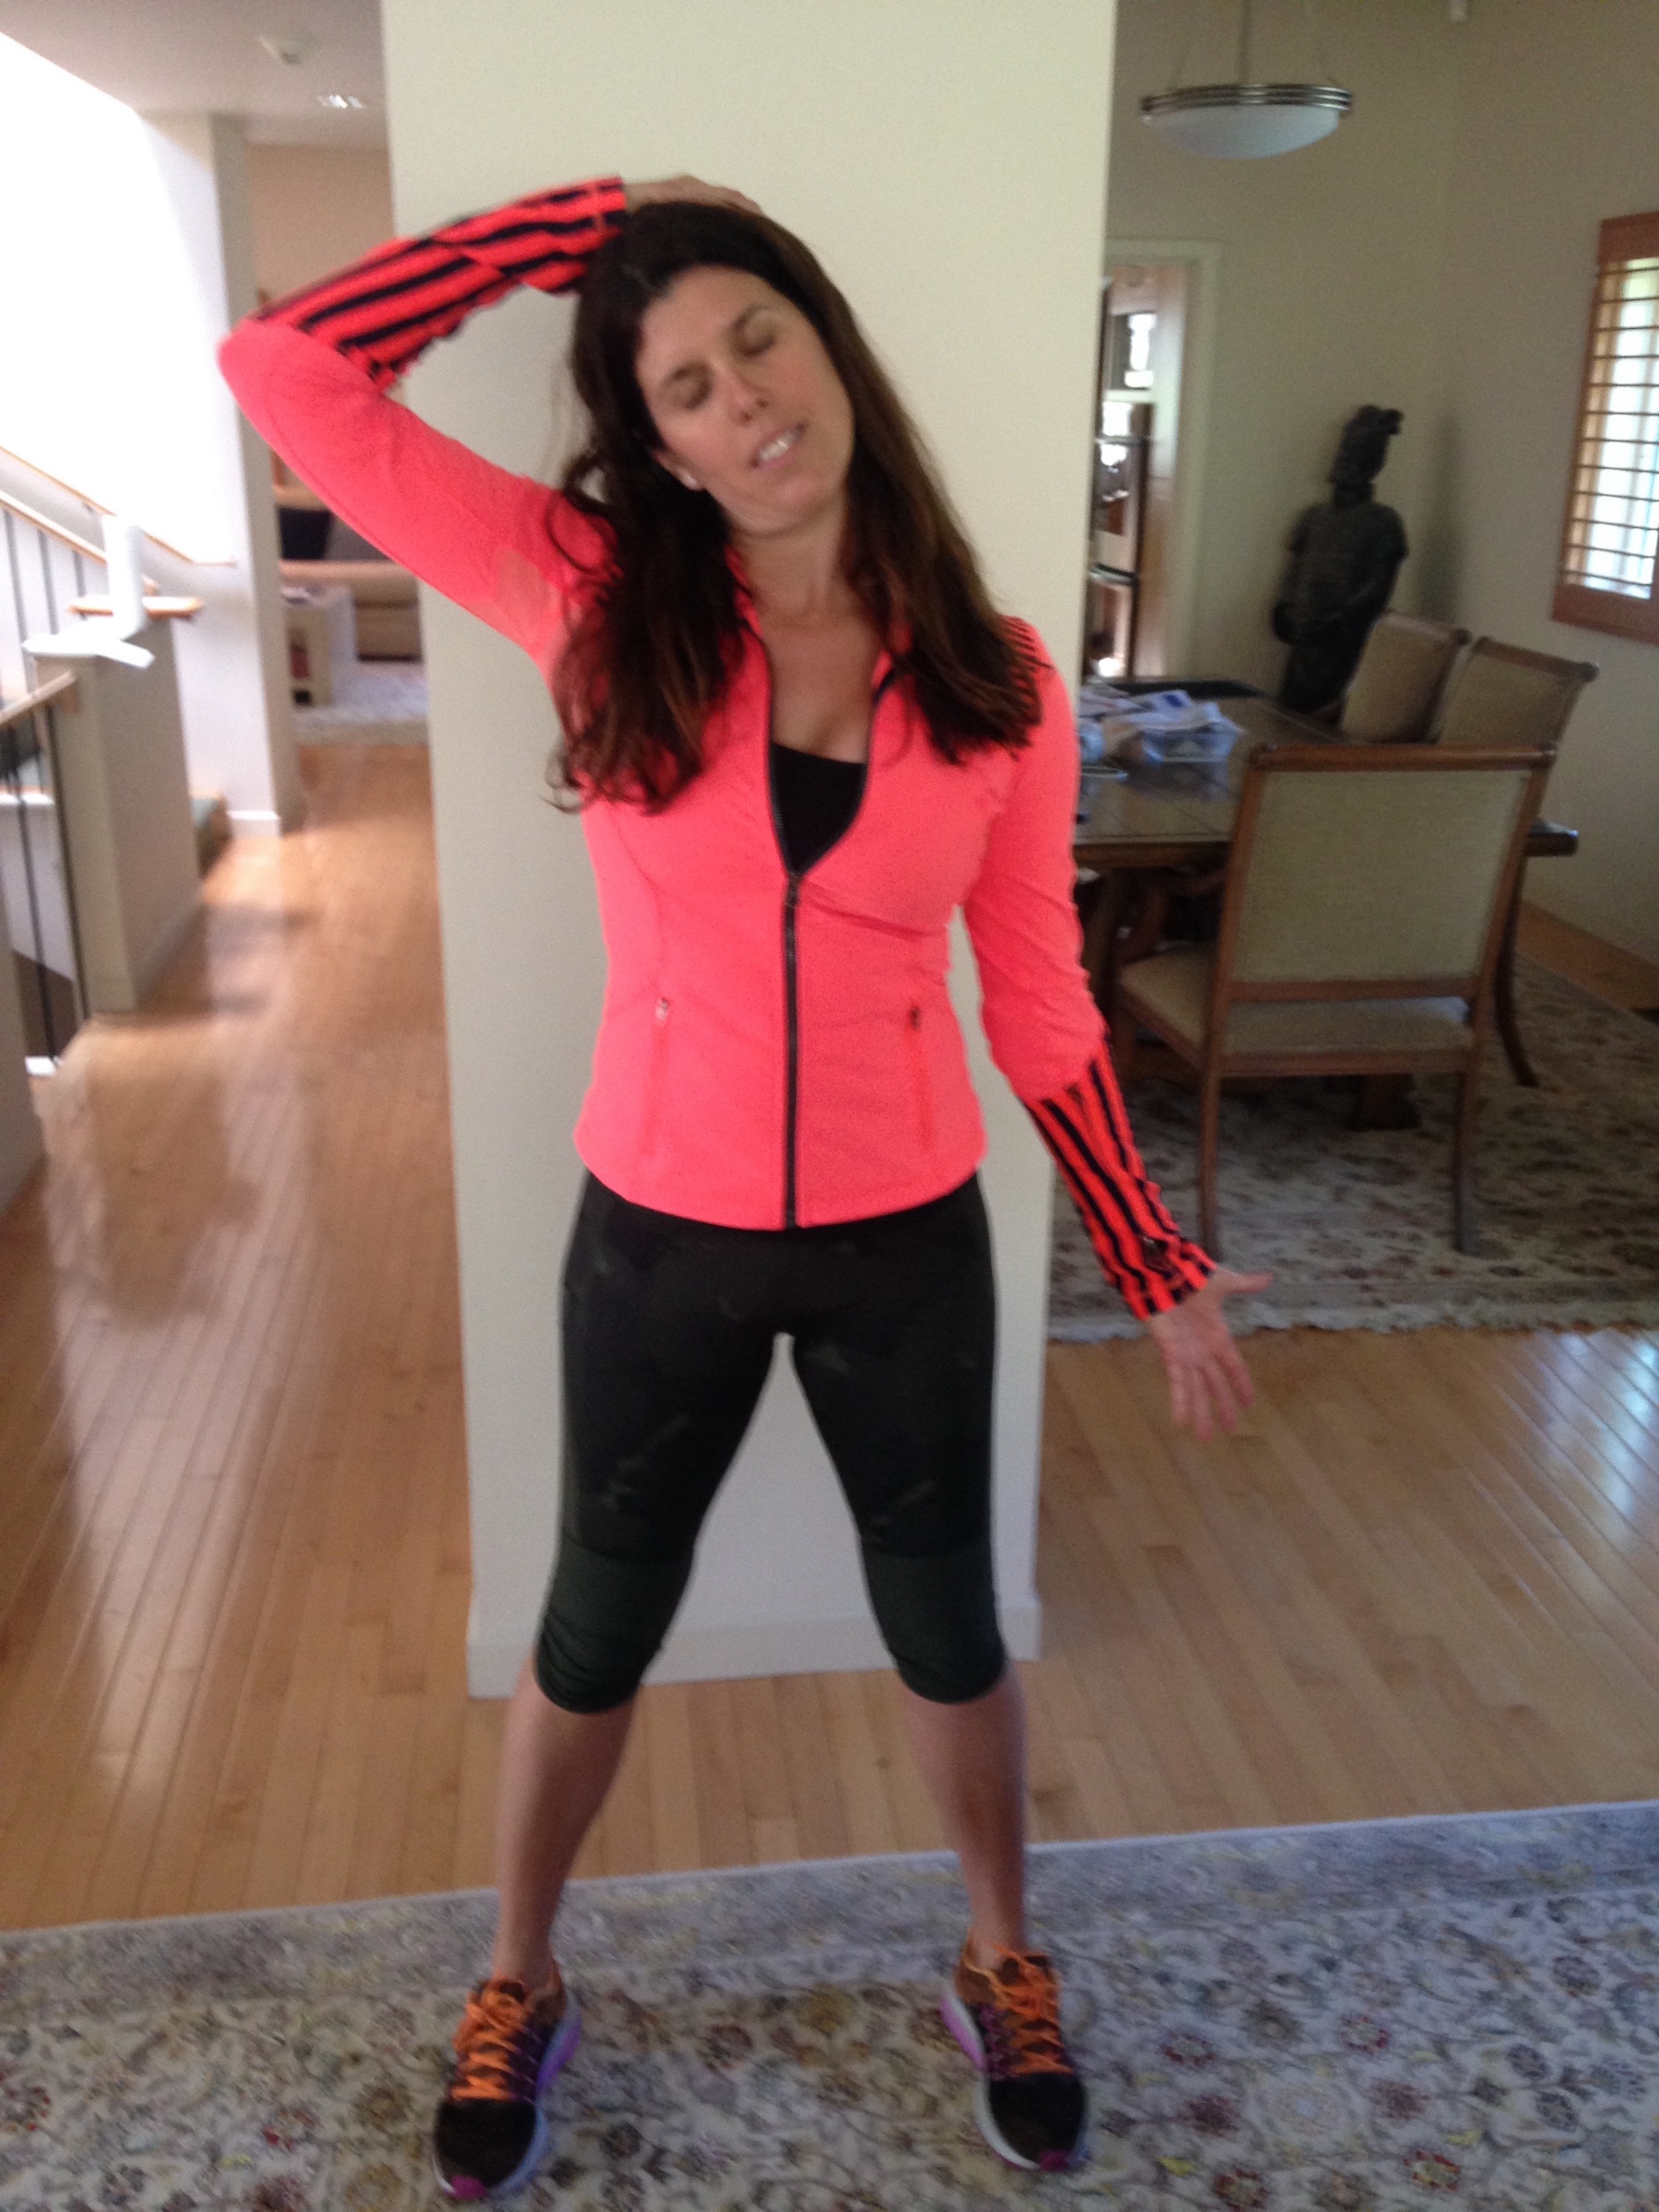
Problems to Address: Elevated and tight shoulders and neck
How to Perform: Follow the directions from the Why Pose but only on one side. While one arm remains down, use the opposite hand to gently slide your neck over to the opposite shoulder to stretch out the neck muscles. Keep energy through the fingertips of the half why to create a deeper stretch for the neck. For a video demonstration, click HERE.
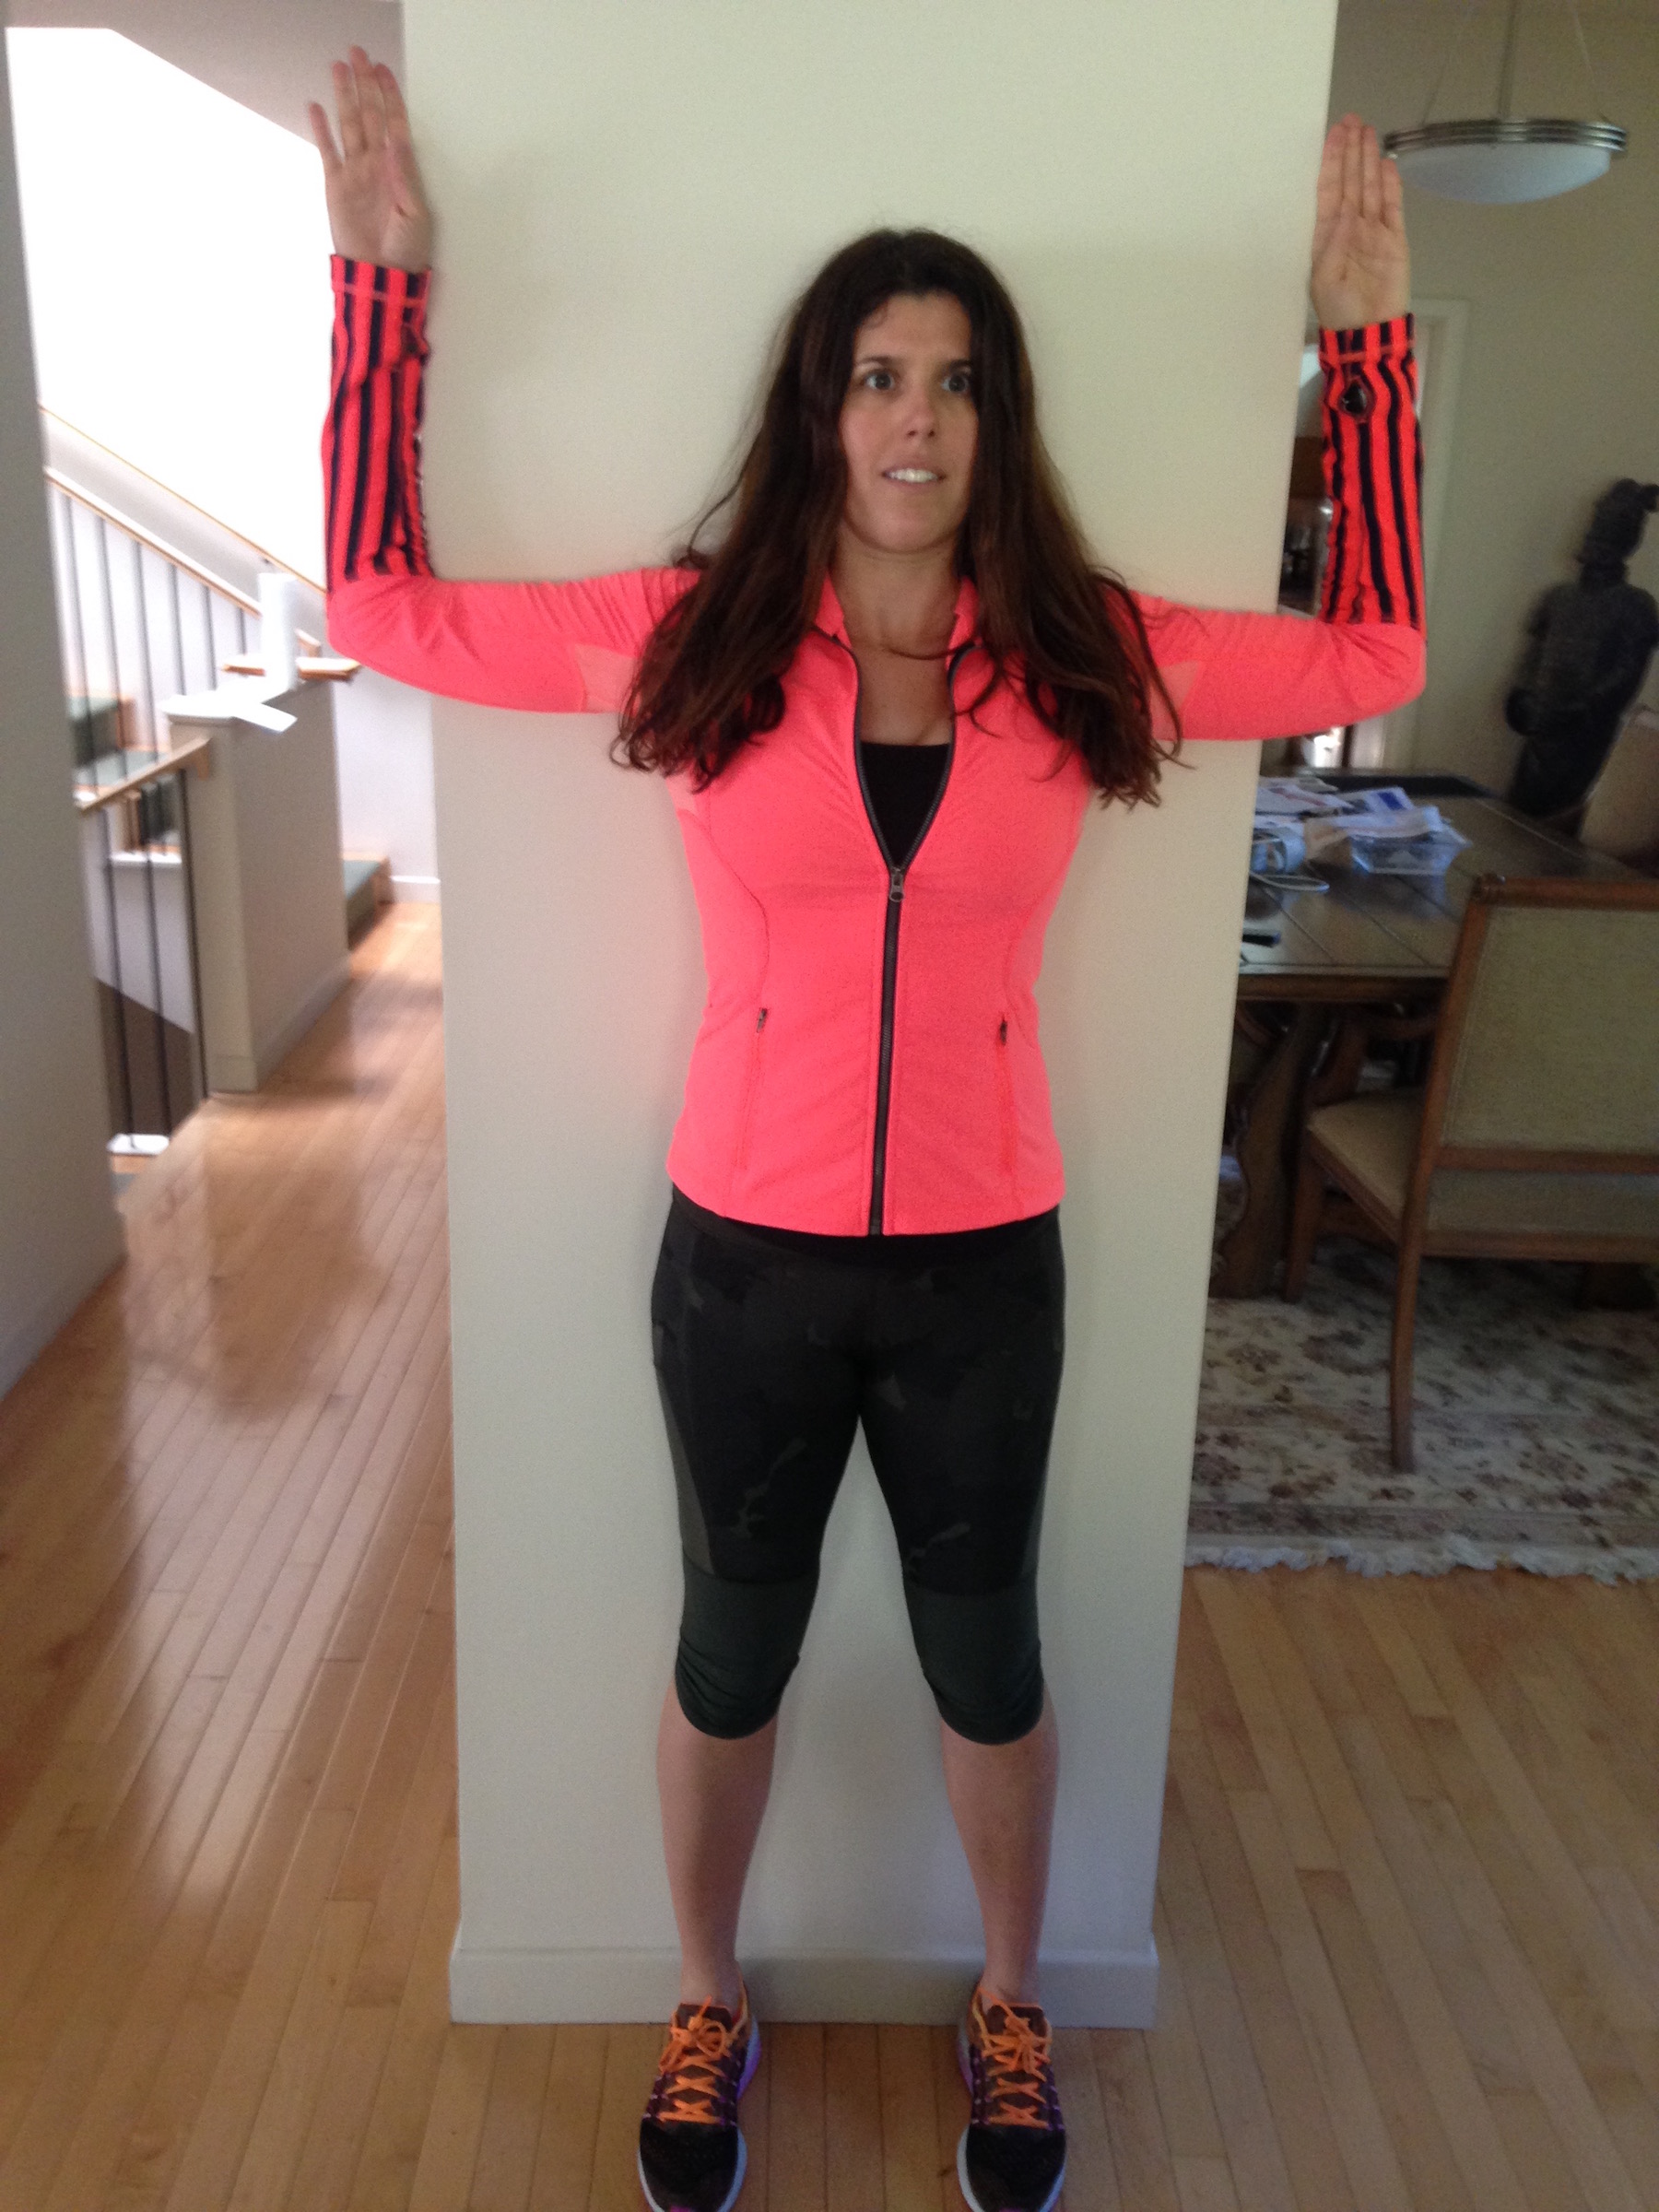
9. Overhead Arm Raises (can also be done on the floor): 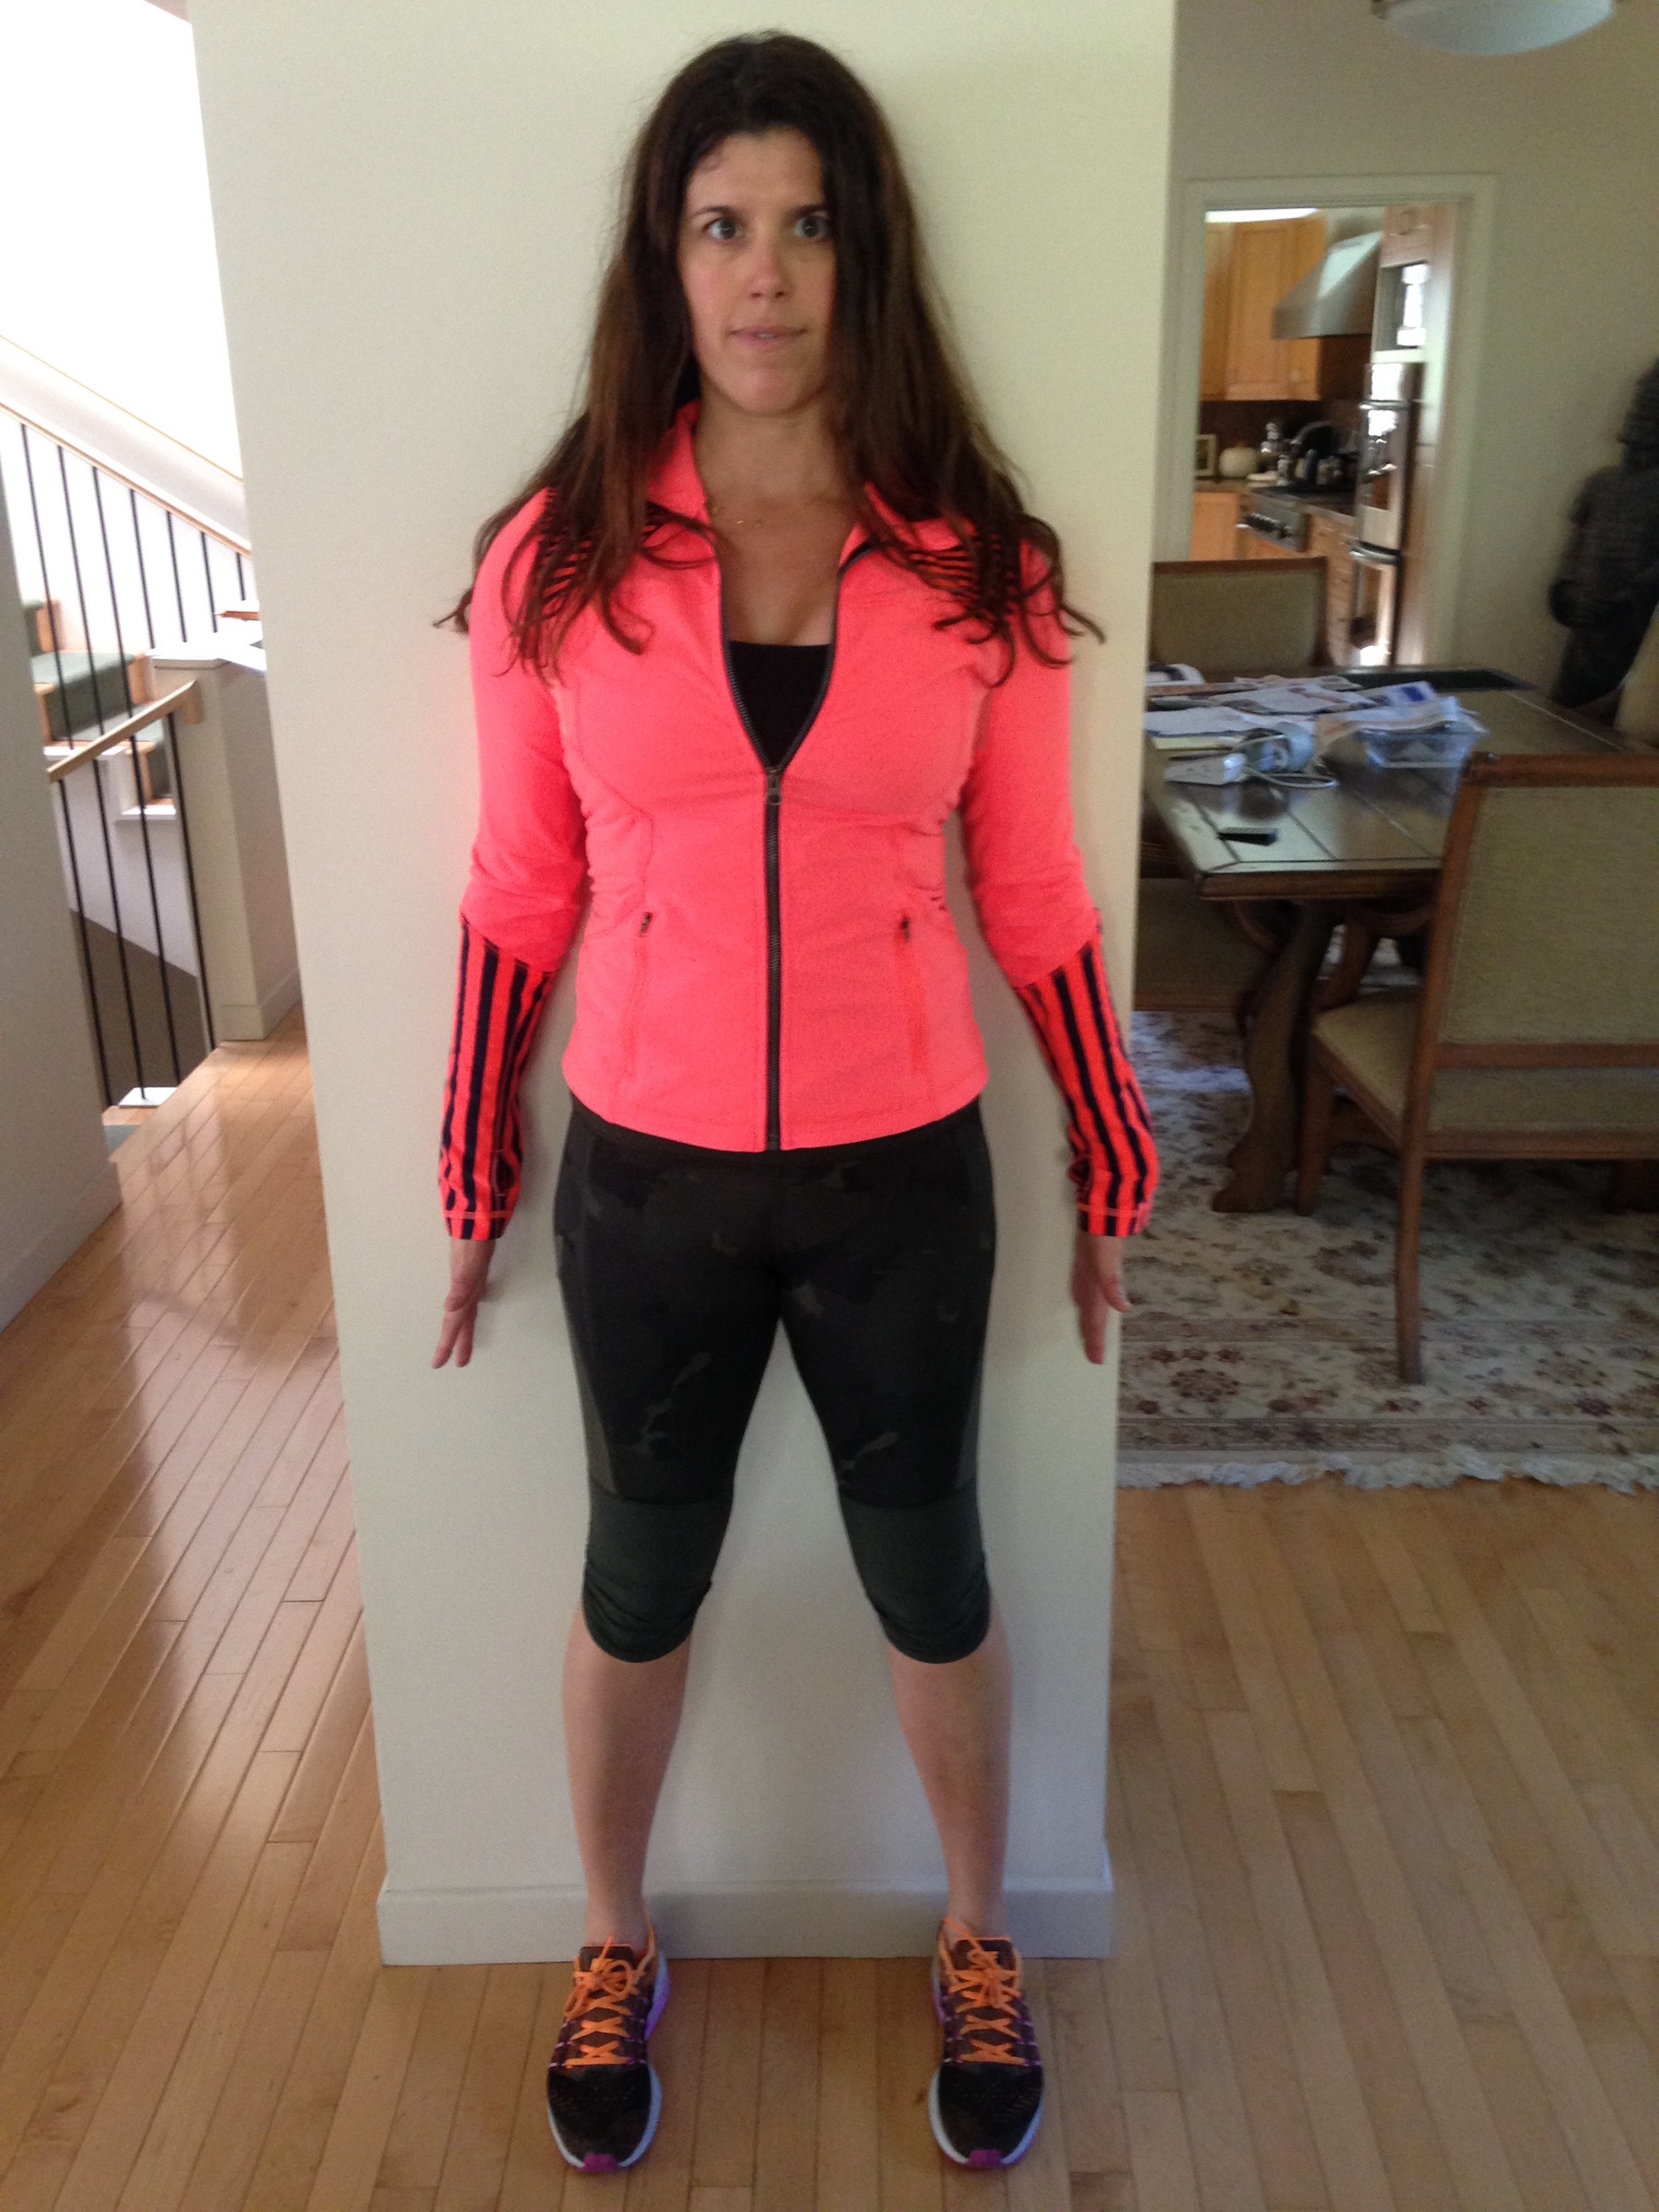
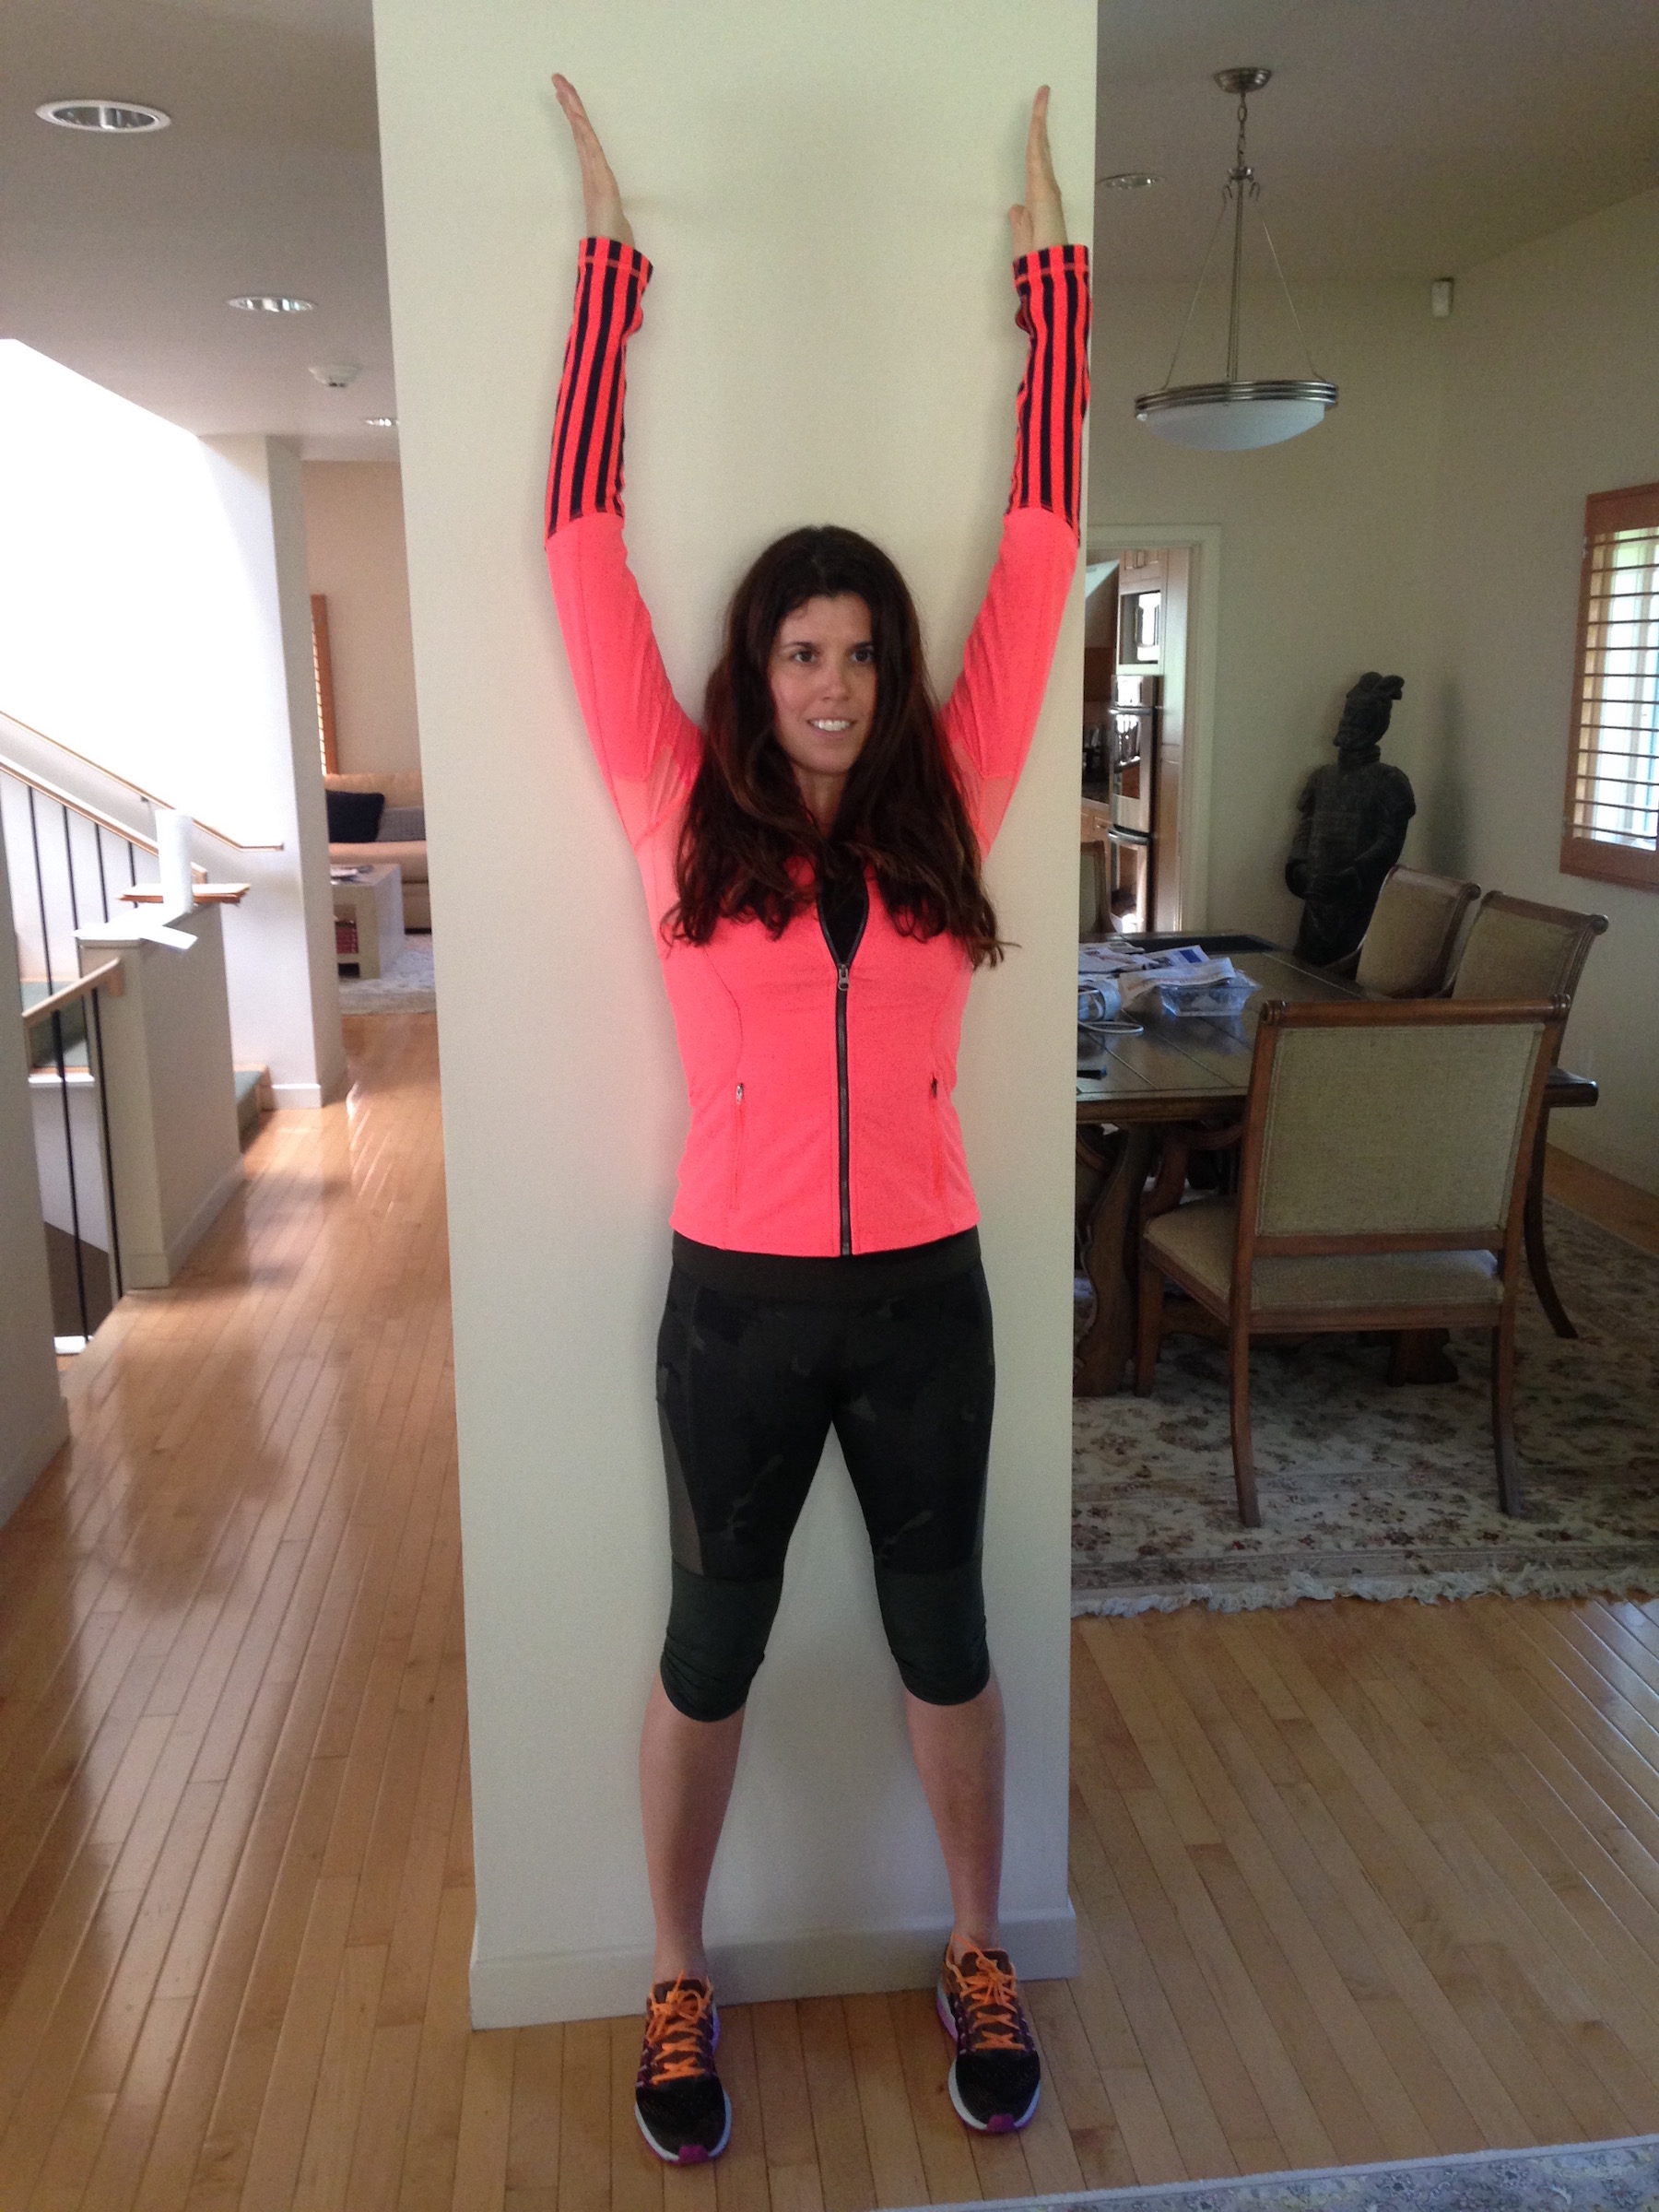
Problems to Address: Hunched upper back and tight shoulders
How to Perform: Stand up against a wall with your heels slightly forward, your glutes connected to the wall, along with your shoulders and back of your head. Use the coaching of the pelvic tilt exercise to maintain abdominal bracing. This will avoid your lower back from arching when you bring your arms overhead. Slowly raise your arms above your head while drawing your shoulders down. Use the wall as a guide to keep your shoulders down while driving your arms overhead. Touch your thumbs to the wall behind you. For a video demonstration, click HERE.
Photo and Video Credits: Mr Smith