After buying a fixer-upper 17 months ago, gutting it, building a 2-story addition, taking the old roof off and replacing it with a new one -- as well as raising the chimney -- I can comfortably say that laying new floor tile is within the scope of some DIYers.
There are a few prerequisites for a successful tile job. As with any home renovation project, preparation and some skill is key to achieving good or great results. Attention to detail is necessary and an understanding of each step is required. You'll also need tools, time and patience.
Start with a small tile job such as a bathroom, purchase tile and supplies, buy an inexpensive tile saw or rent one, set aside a weekend and do a dry fit first.
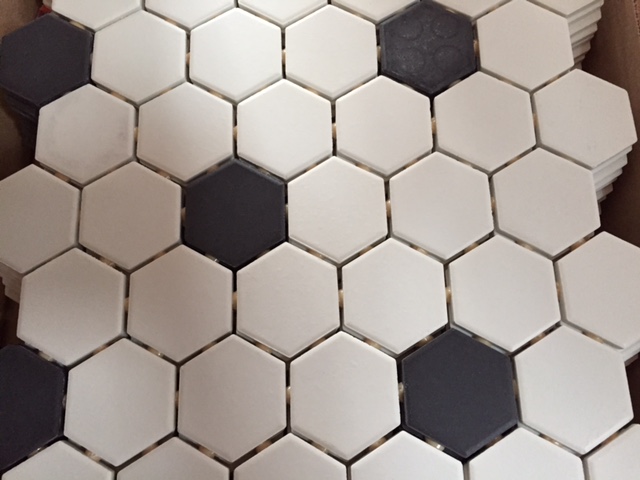
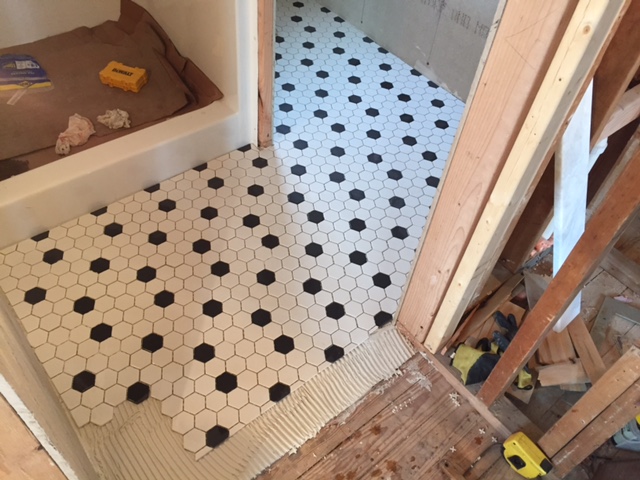
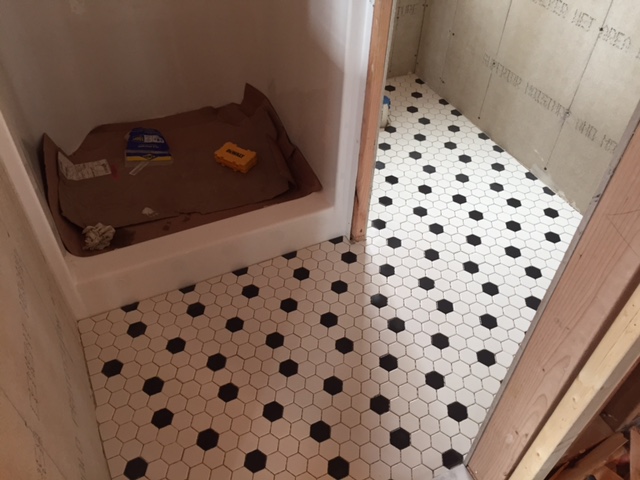
For my 6x6 guest bathroom floor, I chose Daltile's classic and timeless 2" hexagon black & white mosaic tile.
Mosaic tile is ideal for exteriors, interiors, pools, flooring, walls and countertops.
The beginning to end project steps: Measure floor, prepare underlayment, attach underlayment, cut tile for dry fit, apply thin-set mortar, place tiles down and use tile spacers, allow mortar to dry overnight, apply grout, wipe away excess grout, and finally, if necessary, apply grout sealer.
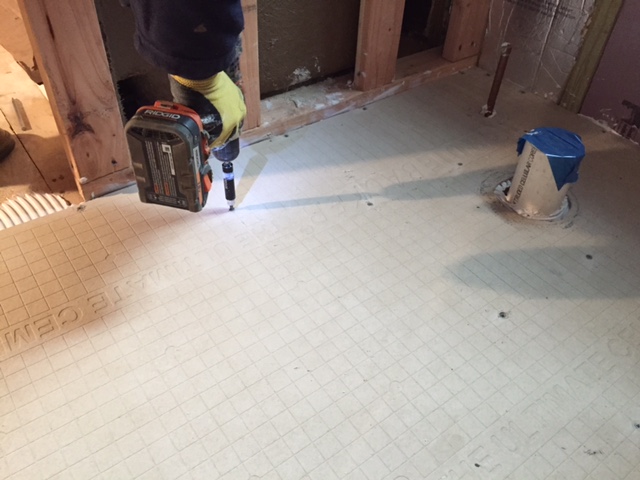
Use a drill with a square driver bit to attach backerboard screws to sub-floor with applied thin-set. Screws must rest flat once secured. (We used 1/4 " Hardieboard.)
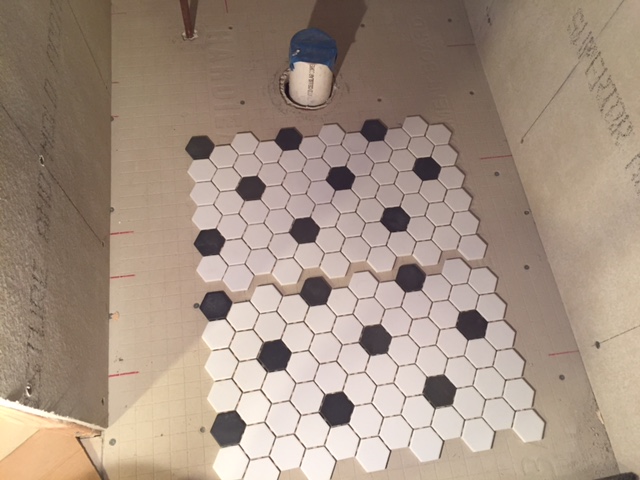
Before adhering to the subfloor, lay out sheets of mosaic tile for a dry-fit to determine the pattern. Sheet tiles can be cut with a utility knife. Once the pattern is set, use a tape measure to center the design.
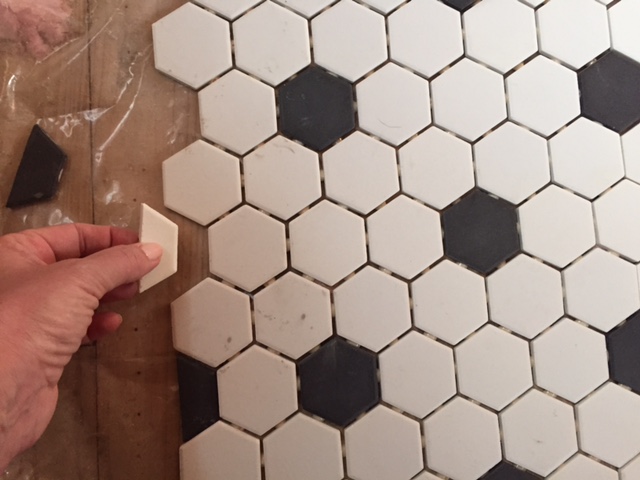
Make necessary cuts with wet saw. To make small cuts, use a tile nipper.
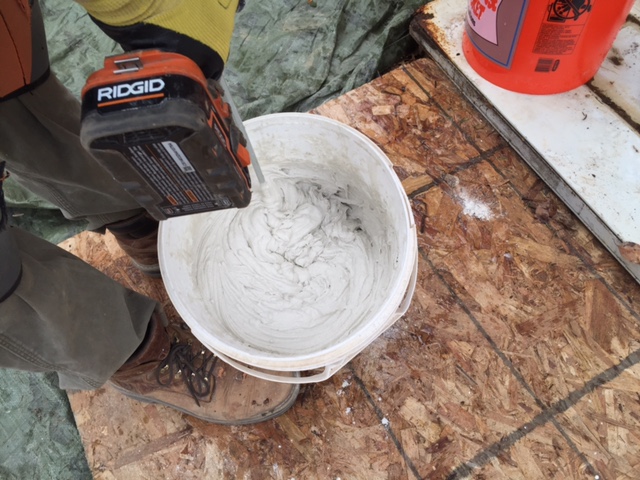
Mix thinset to a creamy consistency by adding water incrementally.
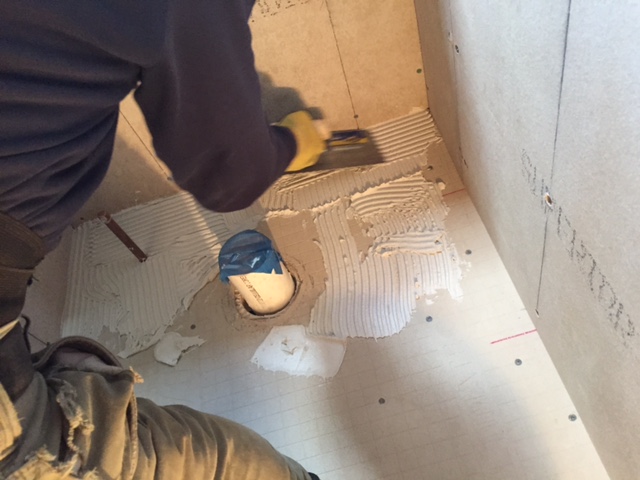
Use a 1/4" square notched trowel to apply thinset.
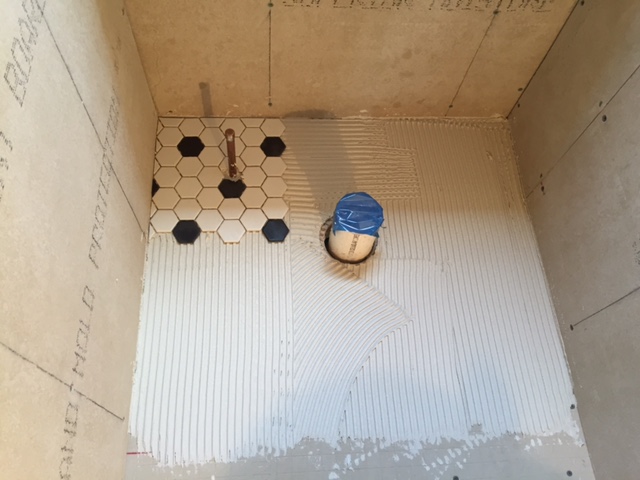
Place sheets of cut mosaic tile to complete floor layout. Make sure tile is placed evenly and use spacers to hold in position.
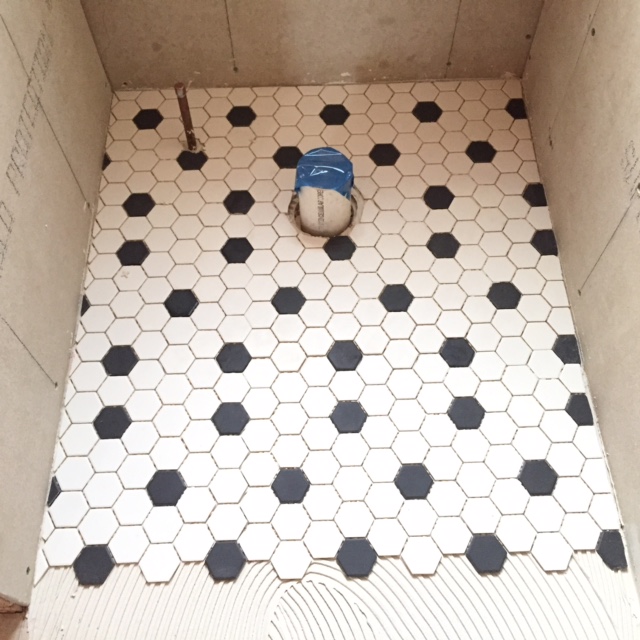
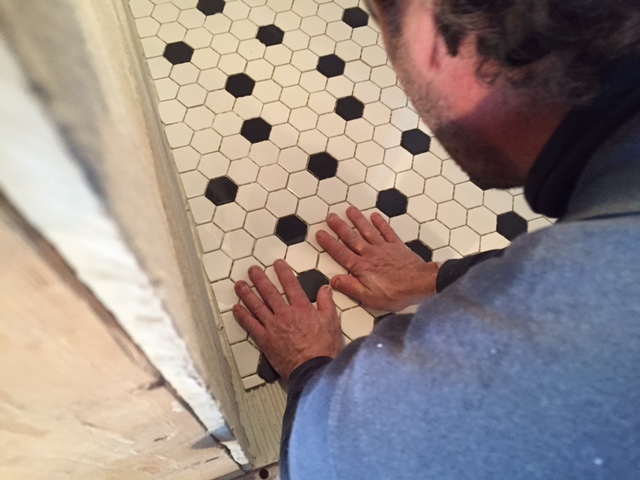
When tile is all in place, allow mortar to dry for 24 hours before applying grout.
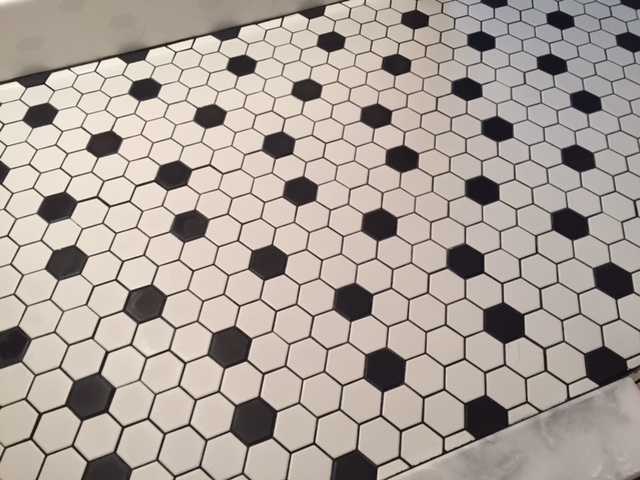
Once mortar is dry, remove spacers, apply grout with a grout float. Completely fill spaces between tiles. To see my 15-second video applying charcoal-colored grout to the mosaic tile floor, click here.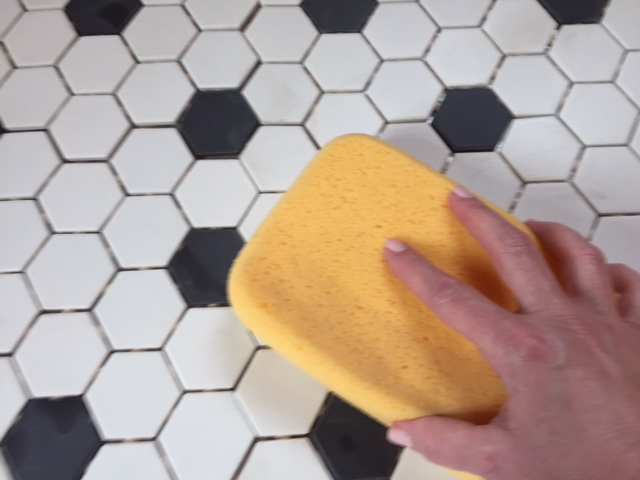
Final Step: After applying grout, use a damp sponge to wipe away excess grout. The tile floor will be ready to walk on in 24 hours, however may take longer to fully cure.
For more DIY projects, visit Brick House 319 a blog about a top to bottom renovation on the Main Line of Philadelphia.