By now, most educated exercisers have joined the foam rolling revolution. But while your IT bands may be intimately familiar with the tool's hurts-so-good loosening powers, limiting your experience to the lower body minimizes the total-body benefits. To that end, Master Trainer Josh Stolz has designed this head-to-toe rolling regimen. "Each of these rolling patterns address the most problematic areas where personal trainers and coaches find movement dysfunction and pain," he explains.
More from Q by Equinox:
How Much Should Your Workout Hurt?
Can You Really Get a Workout in 10 Minutes?
5 Surprising Ways to Use The Treadmill
In the gifs below, Stolz demonstrates the better, smarter way to roll. "You should spend 30 seconds to a minute or more on each individual movement," he explains. "If it's a regeneration or recovery day, take even more time, between 2 and 3 minutes for each move."
Target: Lats
Position yourself on your right side, with your right leg flat, knee bent 90 degrees, your left foot flat on the floor. Place the center of a foam roller beneath your right arm pit, perpendicular to your body, and extend your right arm straight, resting your left hand on the foam roller. (Reach that right arm as far as possible to create more of a stretch.) From this position, roll from your armpit about four inches down towards your waist, and back again, for 30 seconds to a minute. Switch sides; repeat.
Target: Thoracic Spine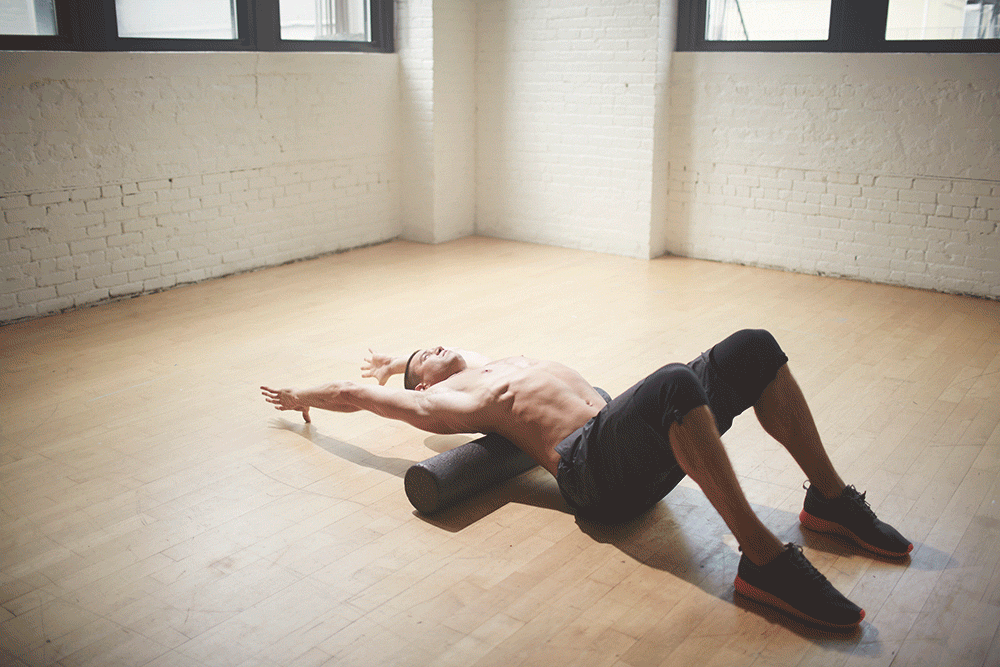
Lie faceup with feet shoulder-width apart and flat on the floor. Center a foam roller beneath your mid-back or shoulder blades so that it is perpendicular to your body. (Note: You can move the foam roller up and down to target different areas of the thoracic spine while still doing the extension motion.) Extend arms out from shoulders at a 45-degree angle. Reach arms back behind you towards floor and back again for 30 seconds to a minute. Make sure that the lower back doesn't extend -- think about pushing the lumbar spine into the ground as you are reaching back.
Target: Hamstrings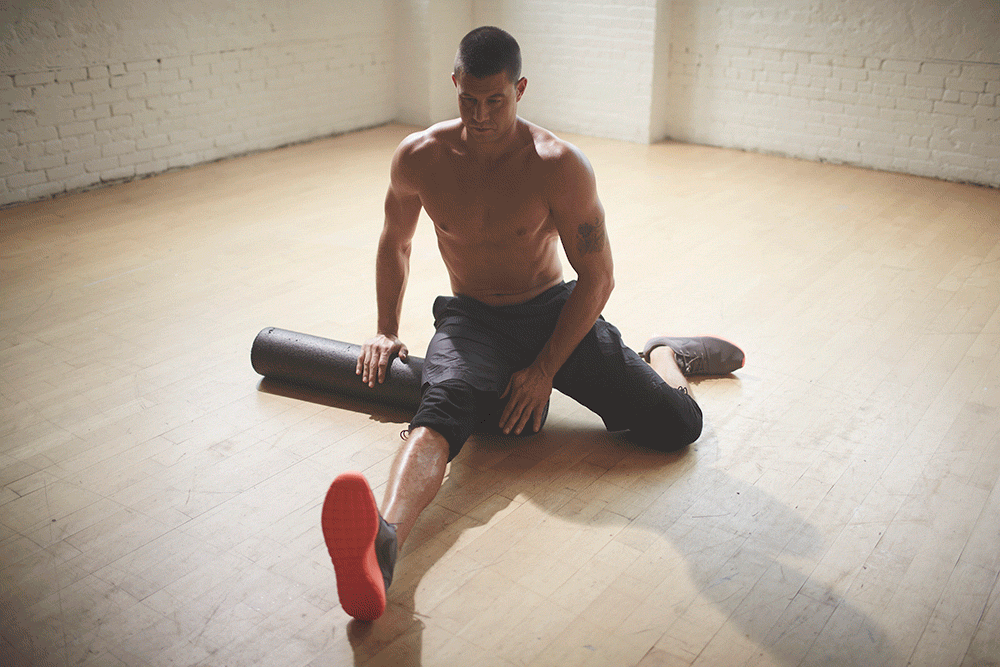
Lower yourself onto the floor, extending your right leg out in front of you, and bend your left knee so that your lower leg is behind you. Place the end of a foam roller beneath your upper right hamstring, just below the glute, and place your hands on the foam roller on either side of your leg. Roll your upper hamstring just enough so that your foot flexes down, and roll it back again, for 30 seconds to a minute; switch sides and repeat.
And there's more to the technique than you might think -- read on for Stolz's five most critical rules of foam rolling.
1. Hydrate Ahead Of Time
Even though foam rolling helps hydrate your tissue, you should down between 10 and 20 ounces of water beforehand, which helps prep the muscles for the work you're about to do. "In general, hydrated tissue is resilient and pliable while dehydrated tissue is glued-down and sticky, which creates adhesions and movement dysfunction," says Stolz.
2. Roll Before And After A Workout
Most of us wait until we wrap a session to hit the roller. Instead, Stolz suggests scrapping static stretching and using the tool for your pre-workout warm-up. "As much as it's a recovery tool, the foam roller is also a preparatory tool," says Stolz. "Think of foam rolling as a way to 'smooth' or 'iron out' the connective tissue and muscle. Foam rolling actually increases circulation so the connective tissue and muscle are getting more oxygen and water than if you just stretched."
3. Slow Your Roll
Foam rolling can hurt, and you're only human. But speeding through each movement is a wasted opportunity. "The biggest misuse I see is club members rolling extremely fast, most likely to avoid the discomfort of the roller," says Stolz. Instead, you want slow, purposeful motions. "If we go back to the ironing example, a quick-moving iron will not apply enough heat and/or steam and the article of clothing will still remain wrinkled. The key is to focus on these painful areas because they need the most attention and desperately need oxygen, water, and nutrients." (Note: Stolz may appear to be rolling quickly in the gifs, but that is an effect of the animation; his real-life movements are slow and concentrated.)
4. Move In Multiple Directions
It's not just up-and-down, up-and-down. "If you look at the angle of how the muscle and fascia attach, it's not straight up and down -- some fascial attachments run from front to back or in spirals," says Stolz. "The key is to not only slow down the foam rolling, but also add side-to-side movements, cross-friction (rubbing the spot being rolled side to side on the roller) and flexing and extending the joint being rolled."
5. Make It A Daily Ritual
Even on days that you're not in the gym, foam rolling should be part of your repertoire. "I try to use the foam roller daily as maintenance for my fascia," says Stolz. "It's kind of like flossing -- you need to do it every day to make a difference even if it's only for 5 minutes." But deep cleaning is necessary, too. "I think an important fact to remember is that foam rolling doesn't take the place of a great massage or body working session."
Photography by Mike Rosenthal
Related
Before You Go
