Wall art and air plants will always tickle us pink. What can we say -- we just can't get enough! We've shown you how to create nail string art air plant holders and copper piping air plant holders, so this time we are using air dry clay! This DIY idea came from our friends over at Design Love Fest. We loved their use of material and color and decided to give a few different shapes a try. Check out what we came up with below!

Materials:
- air dry clay
- paper
- paint
Tools:
- rolling pin
- X-ACTO knife
- sand paper
- pencil
- paint brush

Instructions:
1. Create the base shape for your planter on a piece of paper. Cut it out to create a stencil.
2. Roll out a piece of clay that is approximately a half inch thick. Put your stencil on top, and use the X-ACTO knife to cut out the shape. Fold the top of your stencil down to create the pocket portion of your plant holder. Cut out another piece of clay using this version of the stencil.
3. Score the edges of the base and pocket pieces. Crumple your stencil into a ball, place it on the bottom portion of your base piece and lay the pocket on top.
4. Use your fingers to work the pocket and base piece together to form a seam. Then clean up the edges and make them straight using your X-ACTO knife. Add a hole at the top of the plant holder so that you can easily hang it on the wall.
5. Let your plant holder dry for the next 36 hours, or the recommended time on the clay package instructions. Once completely dry, sand the clay as smooth as possible, and remove the crumpled paper inside the pouch.
6. Use paint to add a pop of color to your piece, and then add your favorite air plant.
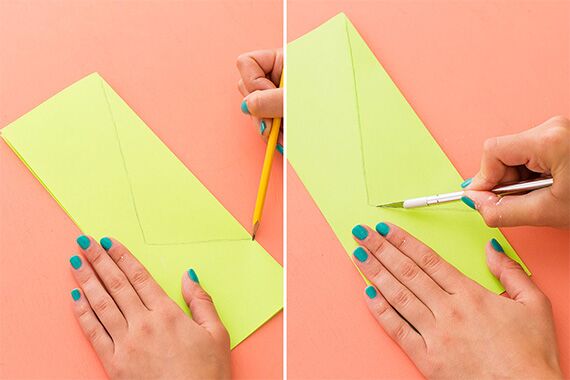
Use a piece of paper to determine the size and shape of your planter. By folding the paper in half you will be sure to create an even shape. Draw your shape, and cut it out with an X-ACTO knife.
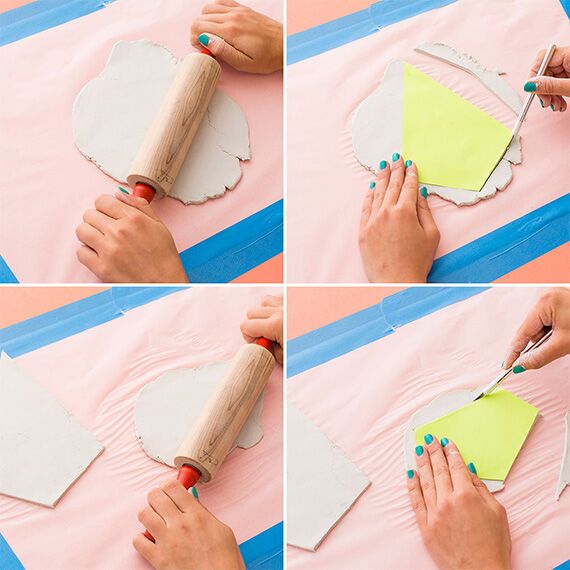
Roll out a piece of air dry clay that is about a half inch thick. Lay your stencil on top, and cut the clay using the X-ACTO knife. To create your pocket, fold your stencil in half. Cut out a second piece of clay using this version of the stencil.
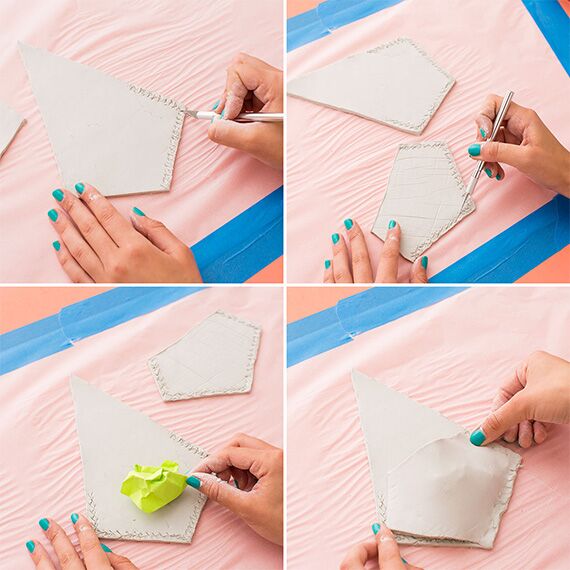
Score the edges of the base and pocket pieces of clay. Crumple up your stencil, place it on the bottom section of the planter and then lay the pocket piece on top. Use your fingers to pinch the clay together and form a seam.

Grab the X-ACTO knife and clean up the edges of the planter. Carve a hole at the top to make hanging a breeze.

Drying the clay will take some time. Allow about 36 hours or follow the clay packet instructions. Once completely dry, grab a piece of sandpaper and sand all the bumps away.

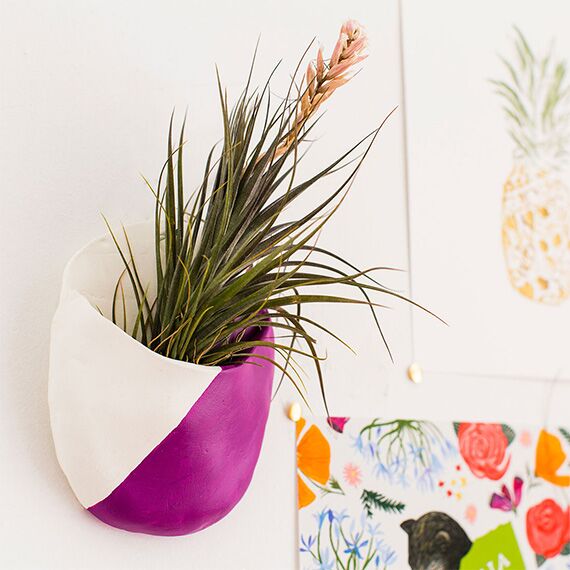
Time to add a pop of color in true B+C fashion. We, of course, created a color blocked effect, but the possibilities are endless. Get creative!
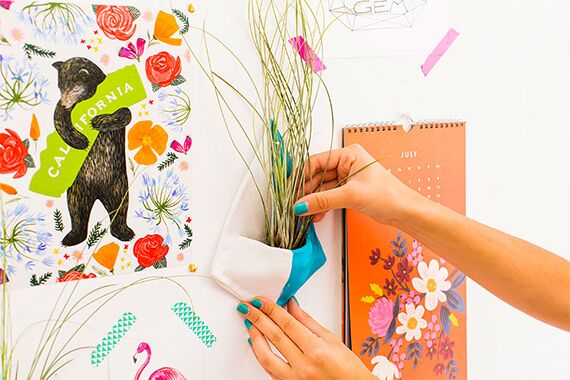
Once dry, add a tack to the wall, hang up your planter and pop in your air plant. We love the texture that this long grassy air plant brings to our salon wall.
We also tried the oval pocket and are equally as obsessed. Add a dash of color and a fun air plant to give the planter some life.
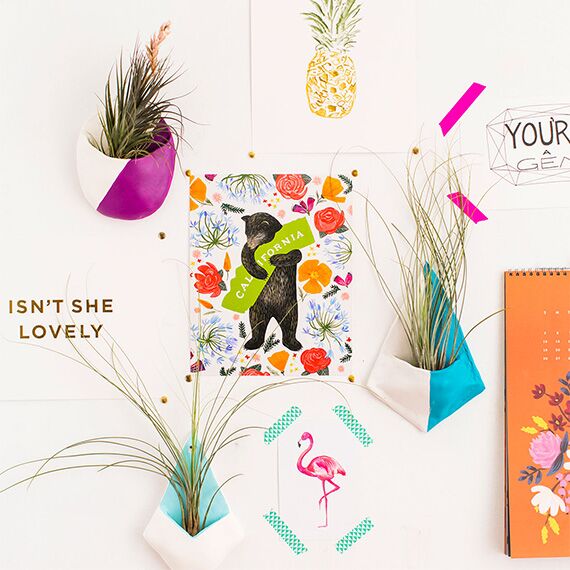
Plants and prints -- what more could you want? Check out the B+C Shop for an amazing selection of prints for your wall.
Check out more DIY projects on brit.co!