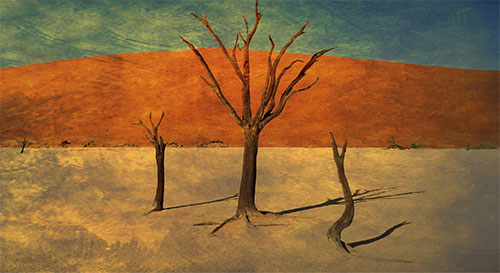
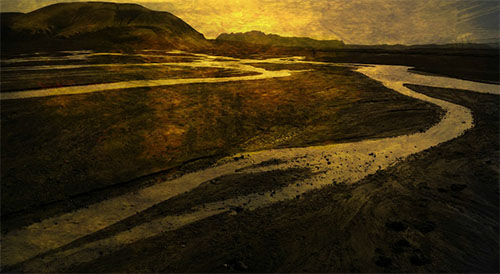
Two images cropped to panoramic format.
Think Outside The Frame
No one needs to learn to "think outside the box" more than photographers. The frame, literally a box, is often our greatest ally. Learning to see photographically is in part learning to see within the limits of this box and use them creatively. But there are times when this limits our vision unnecessarily. Once we've learned to see within the box, we then need to learn to see outside the box -- and start extending the frame to perfect select compositions. There are three ways to do this; crop (after exposure), sweep (make extended format exposures in camera), or stitch (blend separate exposures together); or combine all three. Extending format techniques aren't just for panoramic image formats. They can be used to give you the extra inch that can make all the difference in the world for your compositions.
Visualizing Extended Formats
With practice anyone can learn to generally pre-visualize the differences between panoramic and standard formats. Doing this precisely is very challenging, even with practice. This may be the reason why so many photographers shoot a little more of the scene than they plan to include and crop precisely later. You may find, as I do, some apps (like 645 Pro) offer multiple aspect ratio previews that aid visualizing the impact of different formats on scenes. Apps like this won't increase resolution as panoramic scanning/stitching functions do. So, you will most likely find that there will be times when you'll use one app to visualize and another app to produce.
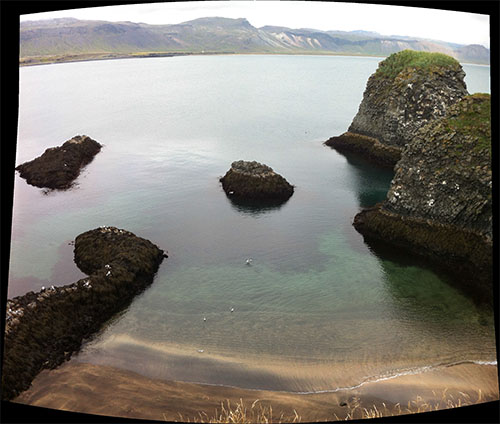
iPhone Automatic
The iPhone Camera app's Panorama option makes taking panoramic photographs as easy as tapping a setting and sweeping your camera across a scene. You'll see the results in seconds -- and they're often great. Don't sweep too fast or jagged slicing artifacts will appear in your images (unless of course you want them). Whether you're sweeping horizontally or vertically, be aware of moving into brighter areas as they will often become over exposed. Whenever possible, start with the brightest area and sweep to the darkest. When you create extreme panoramic formats, you'll find that straight lines will become curved. Post processing in other formats can correct this, a little or a lot, but if you plan to do this try to shoot loose as you'll need extra image information to compensate for the distortion of the frame this produces. Finally, note that images produced with the Camera app's Panoramic function tend to contain more noise, which can sometimes be removed effectively by post-processing with other apps. If the artifacts produced by the Panoramic function are insurmountable consider another approach.

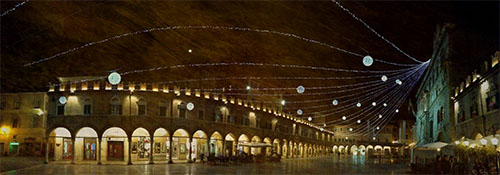
Two images made with iPhone's Camera app Panorama function.
AutoStitch
Though not as fast as the Camera function, the app AutoStitch, though not as fast as the in camera function, is also simple to use and it opens up many more options. You can stitch images made with any app. You can use HDR techniques to render more shadow and highlight detail in high dynamic range scenes. You can change aspect ratio and increase resolution in two directions simultaneously.
Using AutoStitch is easy. Simply select the images that you would like to merge and let AutoStitch do the rest. Despite the fact that there are not controls to adjust the stitch, AutoStitch will merges images convincingly. AutoStitch tends to produce slightly stronger perspective distortions than camera functions. The only advantage to shooting images with AutoStitch is that its interface previews the overlap of separate exposures while you're making them, which helps avoid the classic mistake of not overlapping stitched images enough to make successful merges. Regardless of which app I make exposures for stitches with, I like saving the separate exposures I make just in case I decide to stitch them with more sophisticated off-phone software like Photoshop.

Two separate images shot for panoramic stitching.
Stitched results using the app AutoStitch
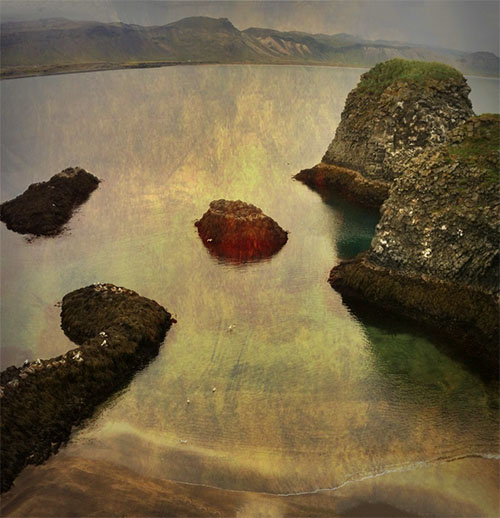
The final processed, cropped, and retouched results.
Post-Merge Distortion
Panoramic formats often produce distortions inside the frame, the most common being straight lines become curved. Plan to use them -- or lose them. You can correct some of these distortions with apps like FrontView (See my review of the app FrontView) or off-phone software like Photoshop. You'll be amazed how much straightening a horizon line or correcting perspective will do to improve many images. That said, many photographers successfully use these kinds of distortions to add a dramatic new dimension to the subjects they're photographing. My recommendation is that you keep your options open while you're shooting and experiment both during and after exposure.
Cropping And / Or Retouching
If you stitch separate exposures, you'll find the frame is distorted, as much or more than the image information inside it. To restore a rectangular shape requires one of two moves - or a little of both. One, crop. This eliminates some image information along the edges. Ensure that significant information is not lost in the final merged image by framing loosely during exposure. Two, retouch. Try the app Retouch (See my review of the app Retouch.) to convincingly fill in gaps left by distortion, in seconds. This is sophisticated retouching and may or may not be appropriate for making certain kinds of images, like those intended to be used in journalism or forensics.
Hand-held Exposure Techniques
Several practices can help you make better hand-held exposures for panoramic merges.
Don't shoot separate exposures edge to edge. Instead, overlap your exposures by a third or better yet a half. Without enough overlap, images won't blend correctly, if at all.
Shoot a little loose, including more in your composition than you plan to use in the final composition; top and bottom and left and right. Perspective correction in photo merges often result in irregular borders that beg cropping -- or retouching, if appropriate. The extra wiggle room you gain from shooting loose will allow you to crop the final results more precisely.
Keep the horizon level in each exposure; varying rotation can cause improper alignment and/or require excessive cropping and/or retouching. (The iPhone's panoramic interface has a centerline and arrow that usefully guide you as you sweep across scenes.)
Make separate exposures with the opposite orientation as the final image orientation; if you're making a horizontal composition shoot with a vertical camera orientation and if you're making a vertical composition shoot with a horizontal camera orientation. This does two things. One, it increases the number of frames, and thus vanishing points, reducing the tendency for the required perspective correction to produce distortion artifacts. Two, it increases resolution -- a tendency that becomes compounded with each added pass in multi-column and/or multi-row exposure sequences. Increasing resolution will be one of the reasons some photographers will adopt stitching techniques typically associated with panoramic merges, but the results don't need to deliver panoramic formats. Instead of shooting an image with one exposure you could shoot it with two exposures (shoot a horizontal merge with two vertical exposures) and almost double your resolution or with four exposures (shoot a square image with four exposures) and almost quadruple it.
Think about changes in brightness between the beginning and end exposures.
If you're sweeping with your smart phone's camera function, start from the lightest side and sweep to the darkest side; you may lose shadow detail, but you'll be assured of maintaining highlight detail. When stitching multiple shots, each exposure can be optimized separately and then blended, making stitching a better choice for scenes with large brightness shifts. You can even make HDR merges of each section and then stitch them together into a panorama to overcome the challenges of scenes with extremely high dynamic ranges.
Stitching has multiple functions, making an essential skill for today's photographer. Regardless of whether you use panoramic aspect ratios, the practice of extending format through photo merges can help you perfect many compositions in ways that are often challenging and in some cases impossible to do otherwise. It can help you choose a better angle of view without eliminating essential information or include essential information when you either can't or don't have time to change angle of view. When this skill becomes second nature, you'll find that you've become visually more versatile, flexible, productive, and accomplished. Extended format techniques offer new ways of seeing.