Face it -- the art of contouring has always been one of hollywoods best kept beauty secrets. From playing up your cheekbones, to reshaping your nose, professional makeup artists have been using contouring for years. While it used to be a technique known only to celebrities, the tricks to highlighting and contouring are now common knowledge to makeup aficionados. Loved by beauty gurus and A-listers alike, contouring your face can create a truly three dimensional look by enhancing bone structure and shadowing the face.
If the nuances of highlighting and shading still mystify you, fret not. Just follow these steps I learned from Boston's top makeup artist Tavi De La Rosa on a recent shoot I did with Eric Levin of Elevin Studios for a new project I'm working on to solve all of your contouring woes.
Step 1: Prime Time
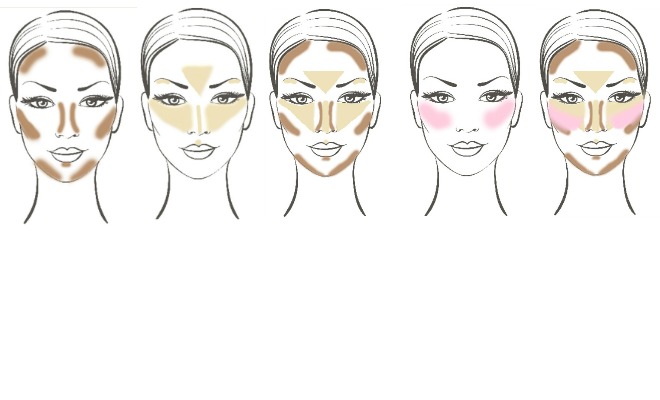
Dot on a primer followed by a foundation that's one shade lighter than your skin tone. Next, apply the lightest shade in your Too Faced contour kit to the top of your cheekbones, above the bow of your mouth, under your eye area, down the bridge of your nose and in an upside-down triangle on your forehead.
Step 2: Be Shady
When it comes to contouring, its all about being shady. Choose a shade from your contour kit that is deeper than your skin tone, and sweep it into the hollows of your cheek. Having trouble finding the perfect spot? Make a "fish" face then follow the line of the hollow in a crescent shape -- be sure it's somewhat parallel to the jaw line and reaches all the way up to your hairline. Looking for a more defined and chiseled look? Sweep a dark powder or bronzer from your contouring kit just below your cheekbones to create an illusion of more elevated cheeks. Blend upward towards the cheekbone mixing the two shades on your face to create the subtle illusion of depth.
Step 3: Get Blushed To Perfection
Finally, get blushed to perfection by adding a cream or powder blush to the apples of your cheeks in a circular motion to add volume to your face or soften the contour. For an added hint of luminosity, gently pat brightening highlighter from your contour kit onto the ridge of the cheekbones and brow bones; this helps to create a more radiant "J-lo" look. Focus on achieving a natural-looking highlight by hitting all the points where the sun would naturally kiss your face: the top of your forehead, bridge of your nose and your jawline to make it look more prominent.
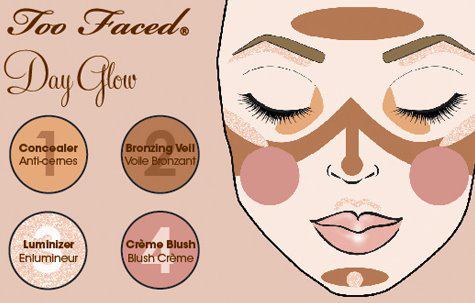
*To achieve my final look Tavi used Too faced Primed and Powerless primer and Cocoa Contour Makeup Palette, Shu Uemura Eyelash curler, Dior Show Mascara and Armani foundation.
Looking for more beauty or makeup tips? Follow me on Facebook
By Zoey Gulmi