
I started this blog back in October with the hopes of ironing out every aspect of wedding-cake making. My goal was to have everything baked, filled, frosted, and frozen at least a month before the wedding. Fast forward to two days before the wedding, and I still have to frost the top tier and practice decorating. Honestly, I'm not sweating it. (Famous last words, right?) I took off today so I can finish the last few elements, so tune in next week to see how it all turned out. In the interim, here's the most imperative advice I can share with fellow rookie bakers.
1. Start early. This was the first piece of advice Ron Ben-Israel told me when I started this project back in October. I did the bulk of the work about a month ago -- not exactly early -- but if I didn't, I would be buying Entenmann's right now and cutting it into three circles.
2. When frosting, use a pastry bag. My first attempt at frosting a cake was a royal failure. The white chocolate frosting came out gloppy and was impossible to spread. My second attempt was more successful (though it took me two hours to frost one layer). I relied on a classic pâte à bombe buttercream from my culinary school days, which is a silky buttercream that has the perfect consistency to spread across each cake. To make a more even layer, I piped the sides and top of the cakes and then used a hot spatula to even it all out.
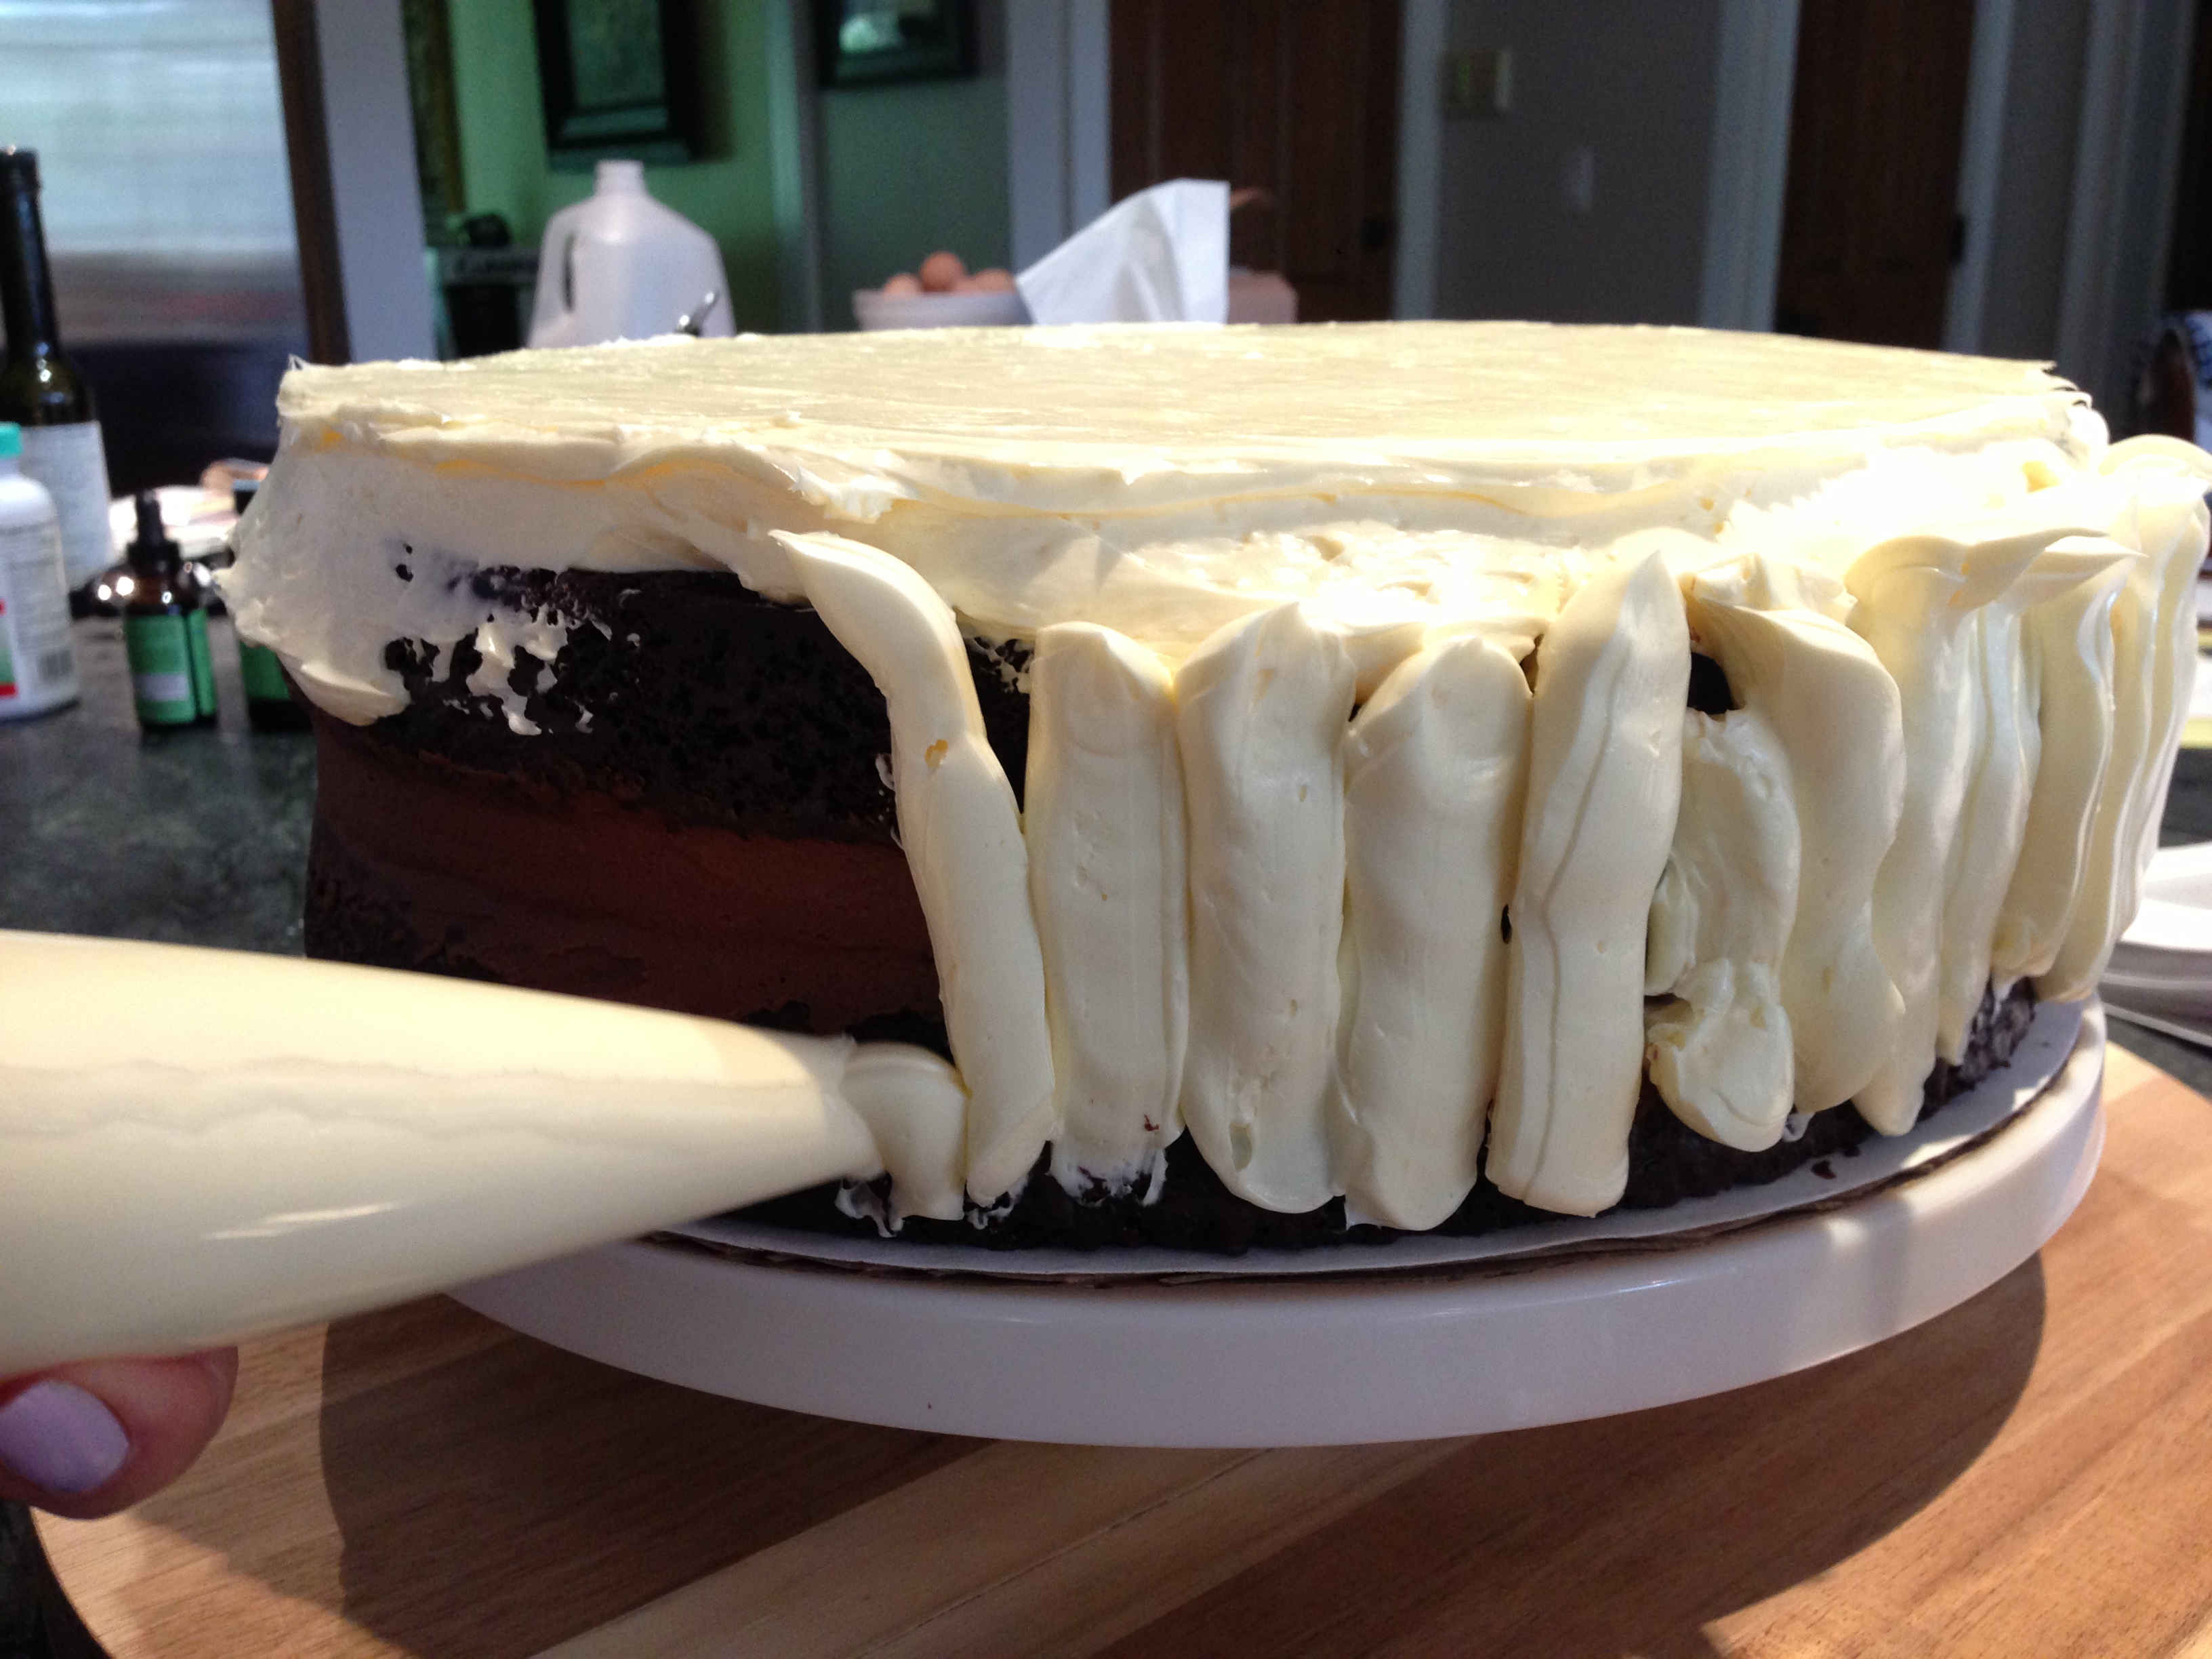
3. Buttercream solves everything. I hate decorating things, so this was one of the most frustrating stages. I'm not a detailed-oriented person, and you need to be to get the frosting perfectly polished. Every time I got close, and went to turn the cake, my thumb would brush against the side of the cake, skidding the surface. By the end, I begged for death by offset spatula. So I took a decorating class in New York City at Sugar Flower Cake Shop to ease my worries, and learned a valuable tip: More buttercream usually solves any decorating problem. That, and chilling your cake before fixing that inescapable dent.
4. Do your research. There are a lot of moving parts to making a wedding cake. Luckily I did some homework in the months leading up to the wedding. I took a piping class so I could learn the ins and outs of decorating a cake. I went to the N.Y. Cake store to pick the brains of veteran bakers who knew what I needed for a wedding cake: pans, cake board rounds, a base (I'm repurposing a wooden door), cake dowels (for supporting each layer), and an offset spatula. Seventy-five dollars later I was prepared to make the cakes. (Full disclaimer: I had everything else.) Then I reached out to poison control centers to make sure I wouldn't be killing anyone with the flowers I selected for decorations on their wedding cake.
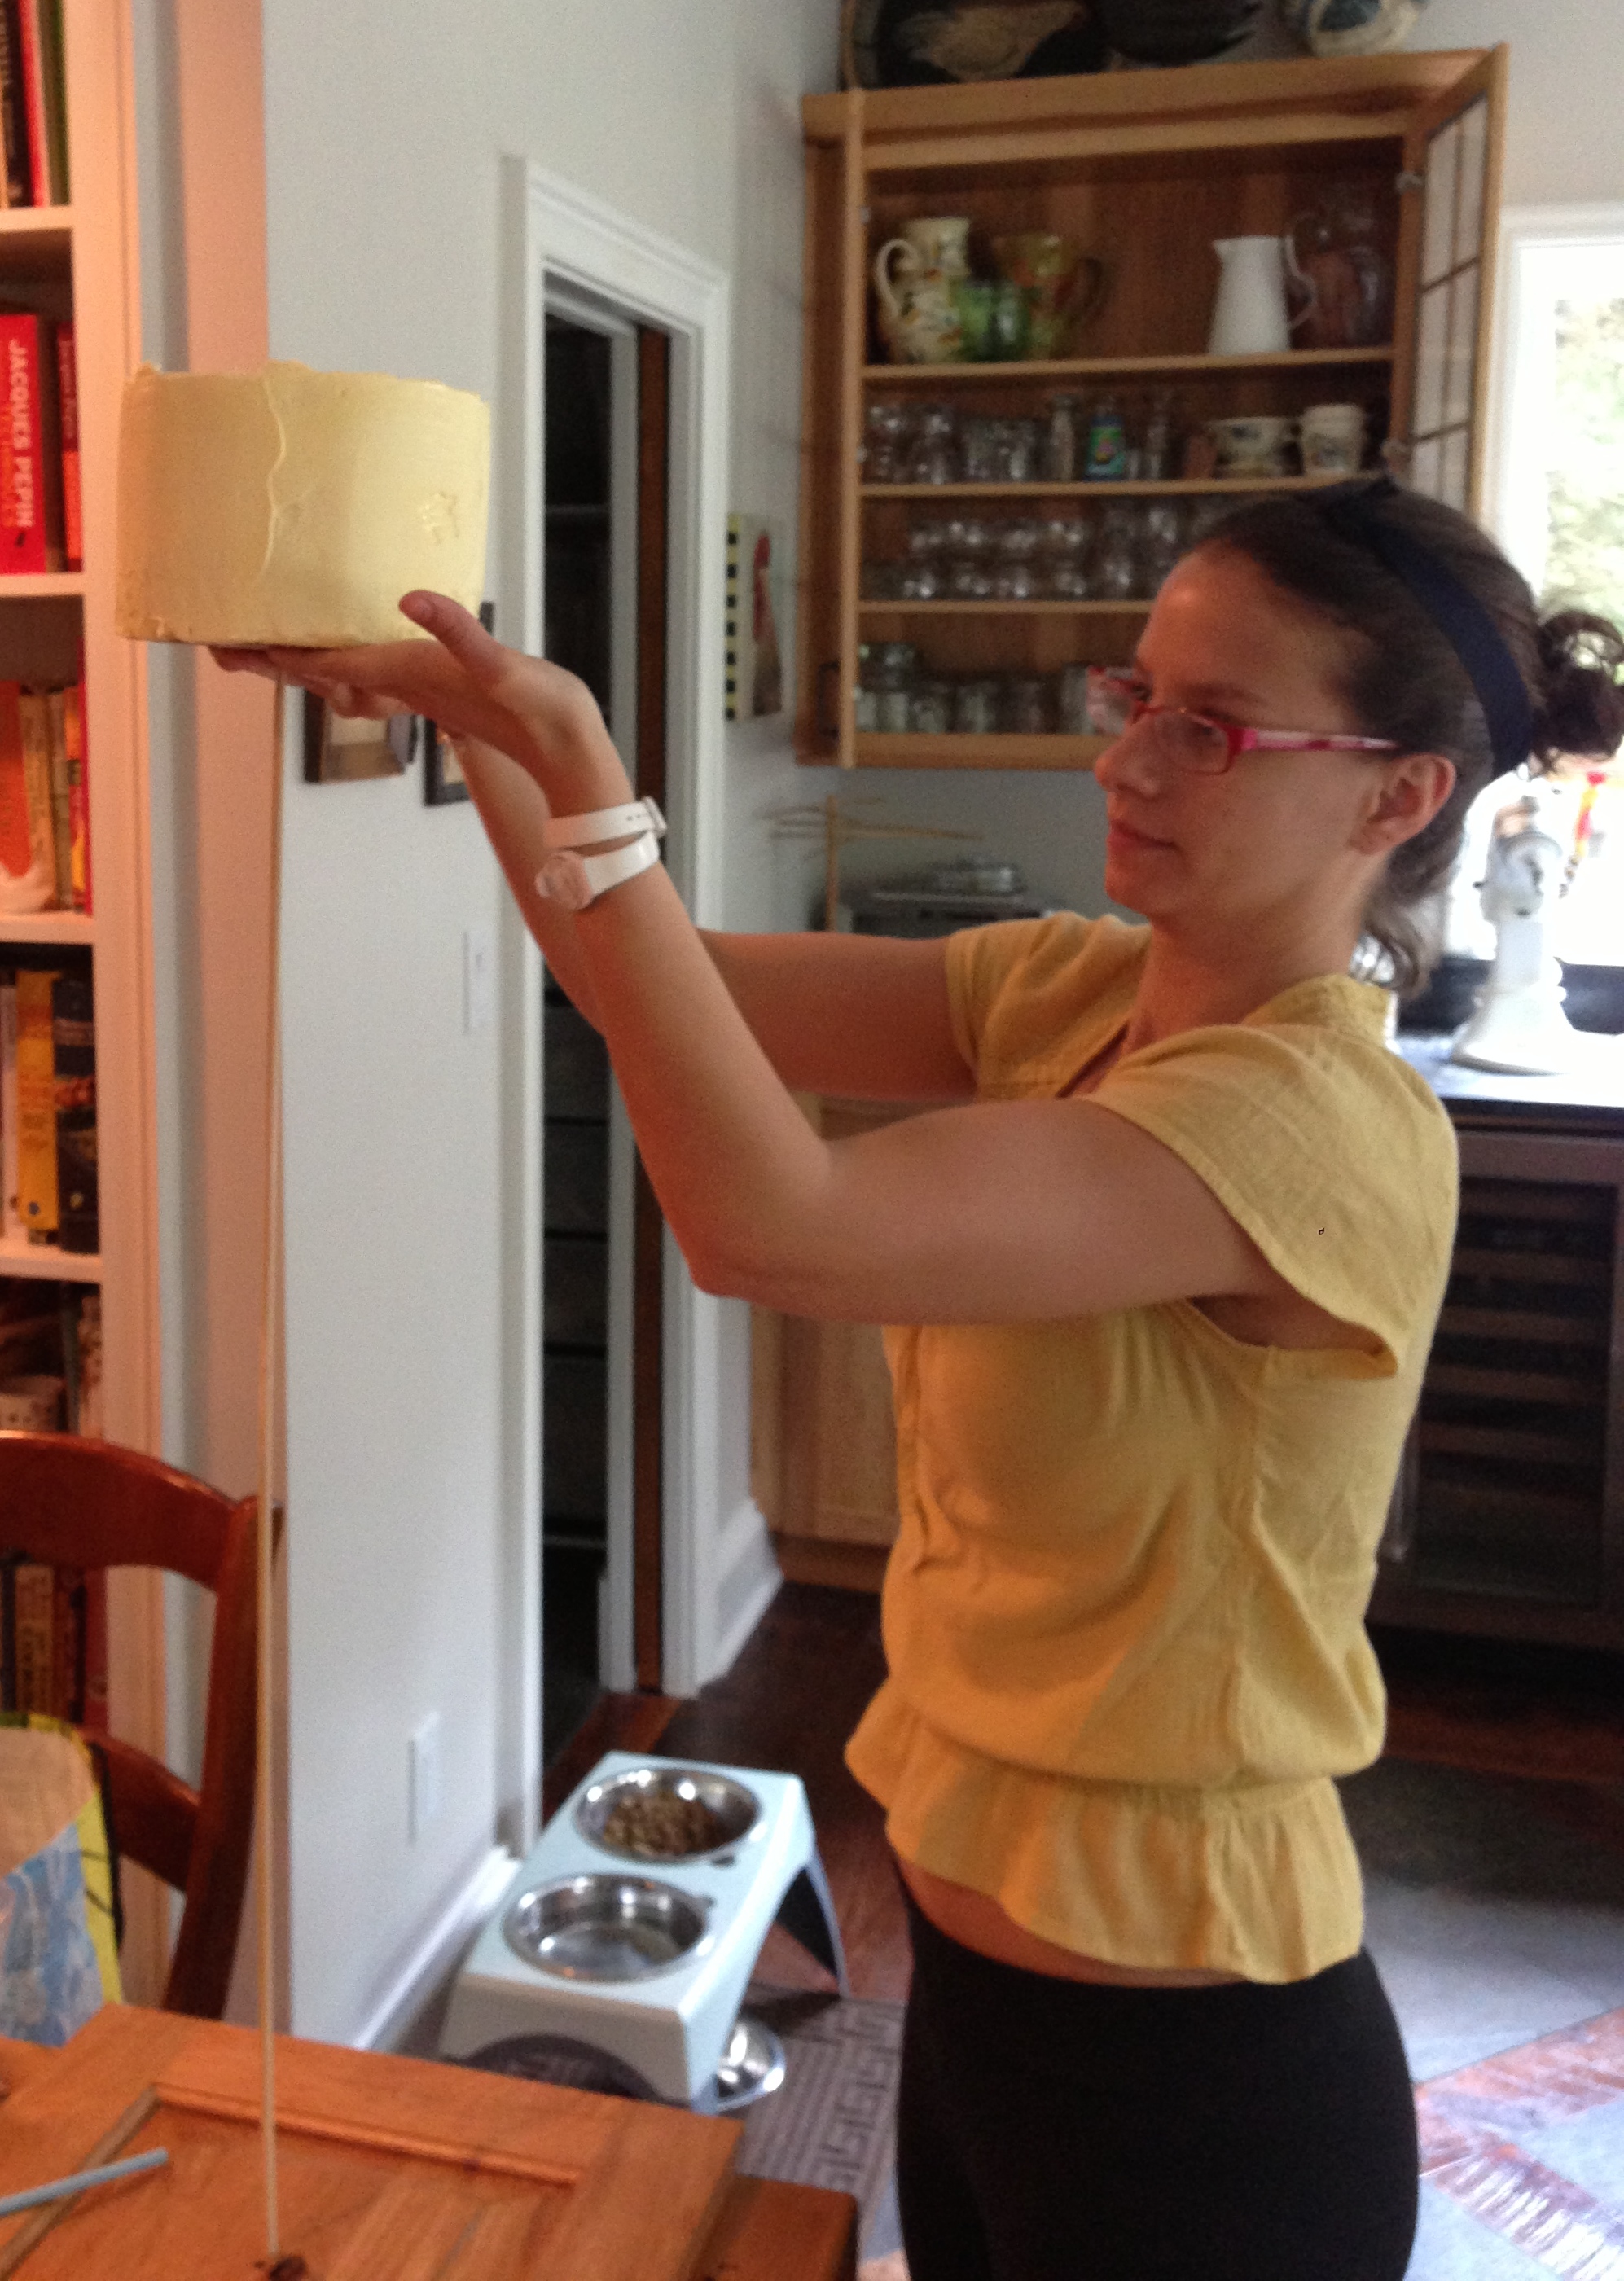
5. Don't let the cake defrost before removing the plastic wrap. I learned that the hard way when I served the top layer to my family; if the buttercream defrosts before you remove the plastic wrap (I wrapped each layer once they were partially frozen to help them stay moist), it'll leave wrinkles in the buttercream.
6. Don't bake when you're exhausted. Seriously. Don't. I carved out some time on a Sunday when I knew I wasn't up to baking, and ended up making the wrong layer of the cake -- a layer I had already made. Kill. me. now.
7. Line cake pans with parchment. Cut parchment rounds slightly smaller (like an 1/8") than the cake pan. If it runs up the sides of the pan, it's more difficult to peel off the cake.
8. Reuse and recycle. My first trial of making a frosted wedding tier turned out pretty well. So I froze the layers and after a month, tried one cake to see if it was moist and delicious. It was, so I saved the remaining layers so I wouldn't have to remake the cakes and could spare the time and the expense on the ingredients.
9. Spray your cooling racks. If you don't, the cakes will stick like Velcro to the rack, and pull apart. And bake cakes on a sheet pan -- they will rise more evenly than the ones baked directly onto oven racks.
10. Secure each layer. The architecture of a wedding cake is as following: Each cake is supported by a cake board round (basically a round piece of cardboard paper). Each cake layer is pierced with a dowel, or plastic straw, slightly taller than the cake itself, inserted about an inch in from the top layer. That way, the next layer will rest on these supports rather than the delicate buttercream. Lastly, each layer is threaded through a center dowel that ensures the cake won't fall over. 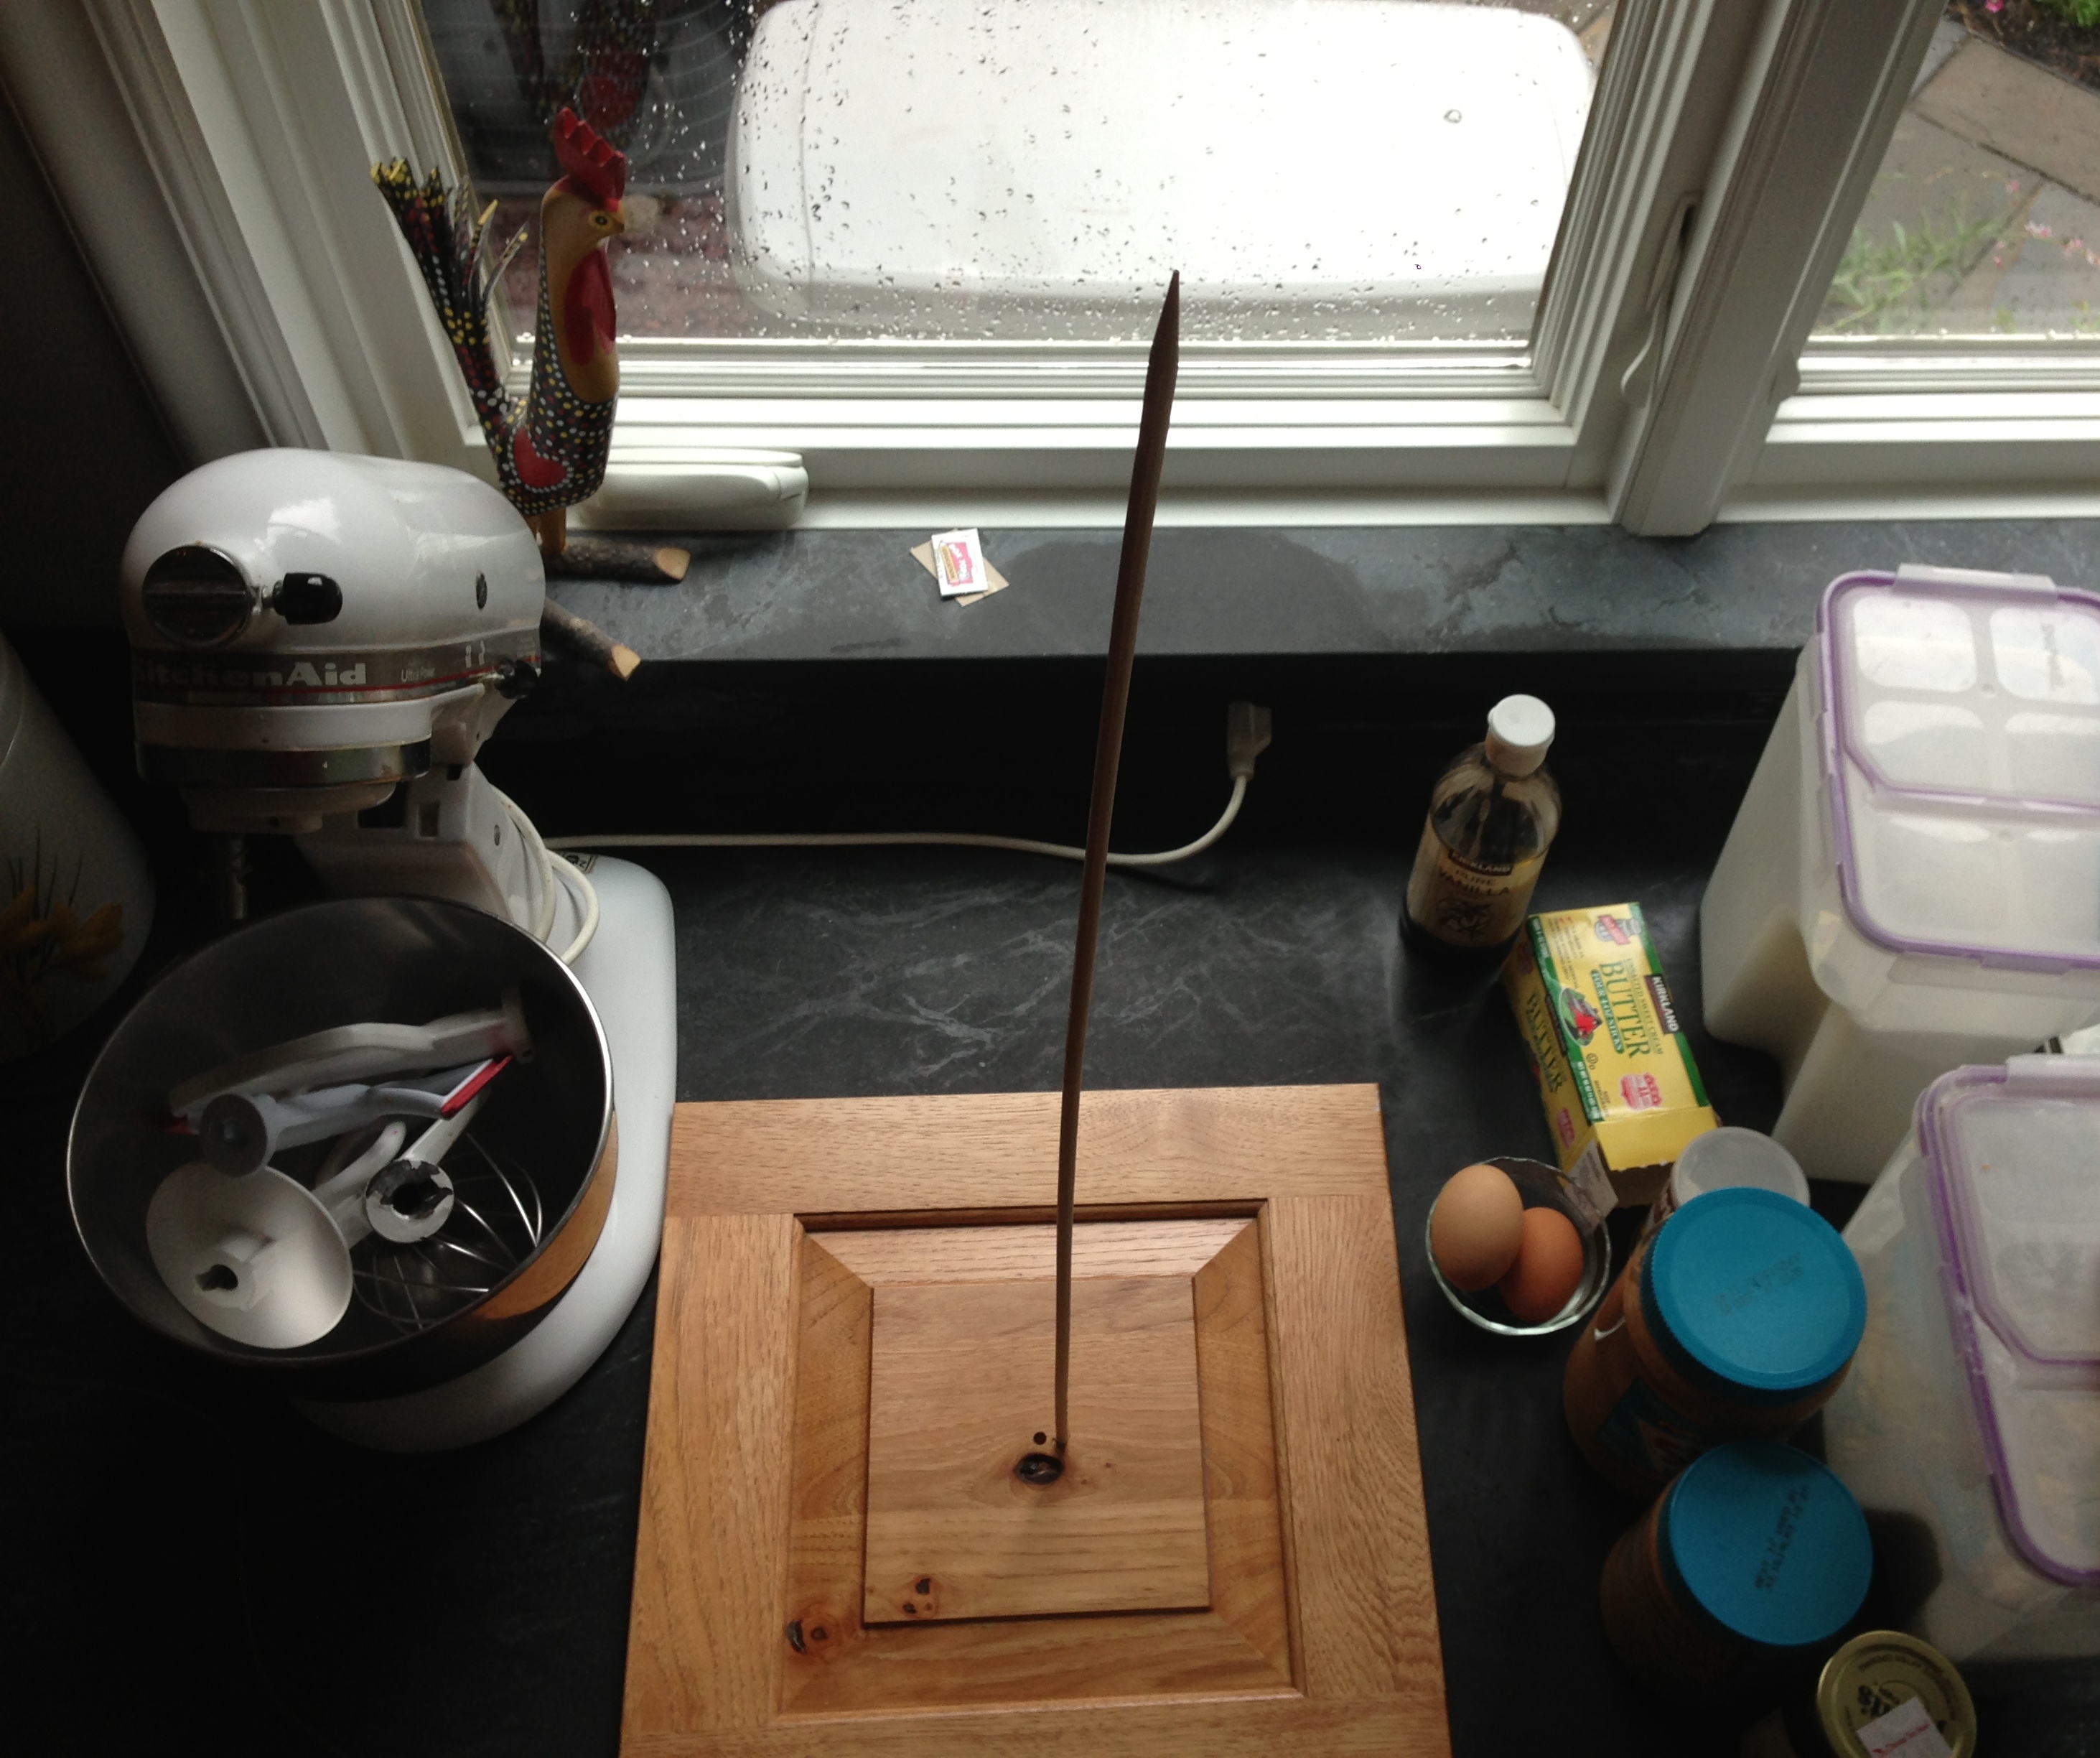
Your job is to make sure everything lines up evenly. I did this by starting with my base. I drilled a hole in the center of the wooden plate I'm using, and lined up the biggest cake board round over the center of it. I marked the circle's edges on the wood, and then measured the diameter to the center drill mark. This is how I knew where to pierce the hole on the cake board round. Then I lined up the remaining cake boards, and flipped them over revealing the hole in the biggest card board layer. I used a pointed skewer and pierced through the hole, cutting the top two layers. 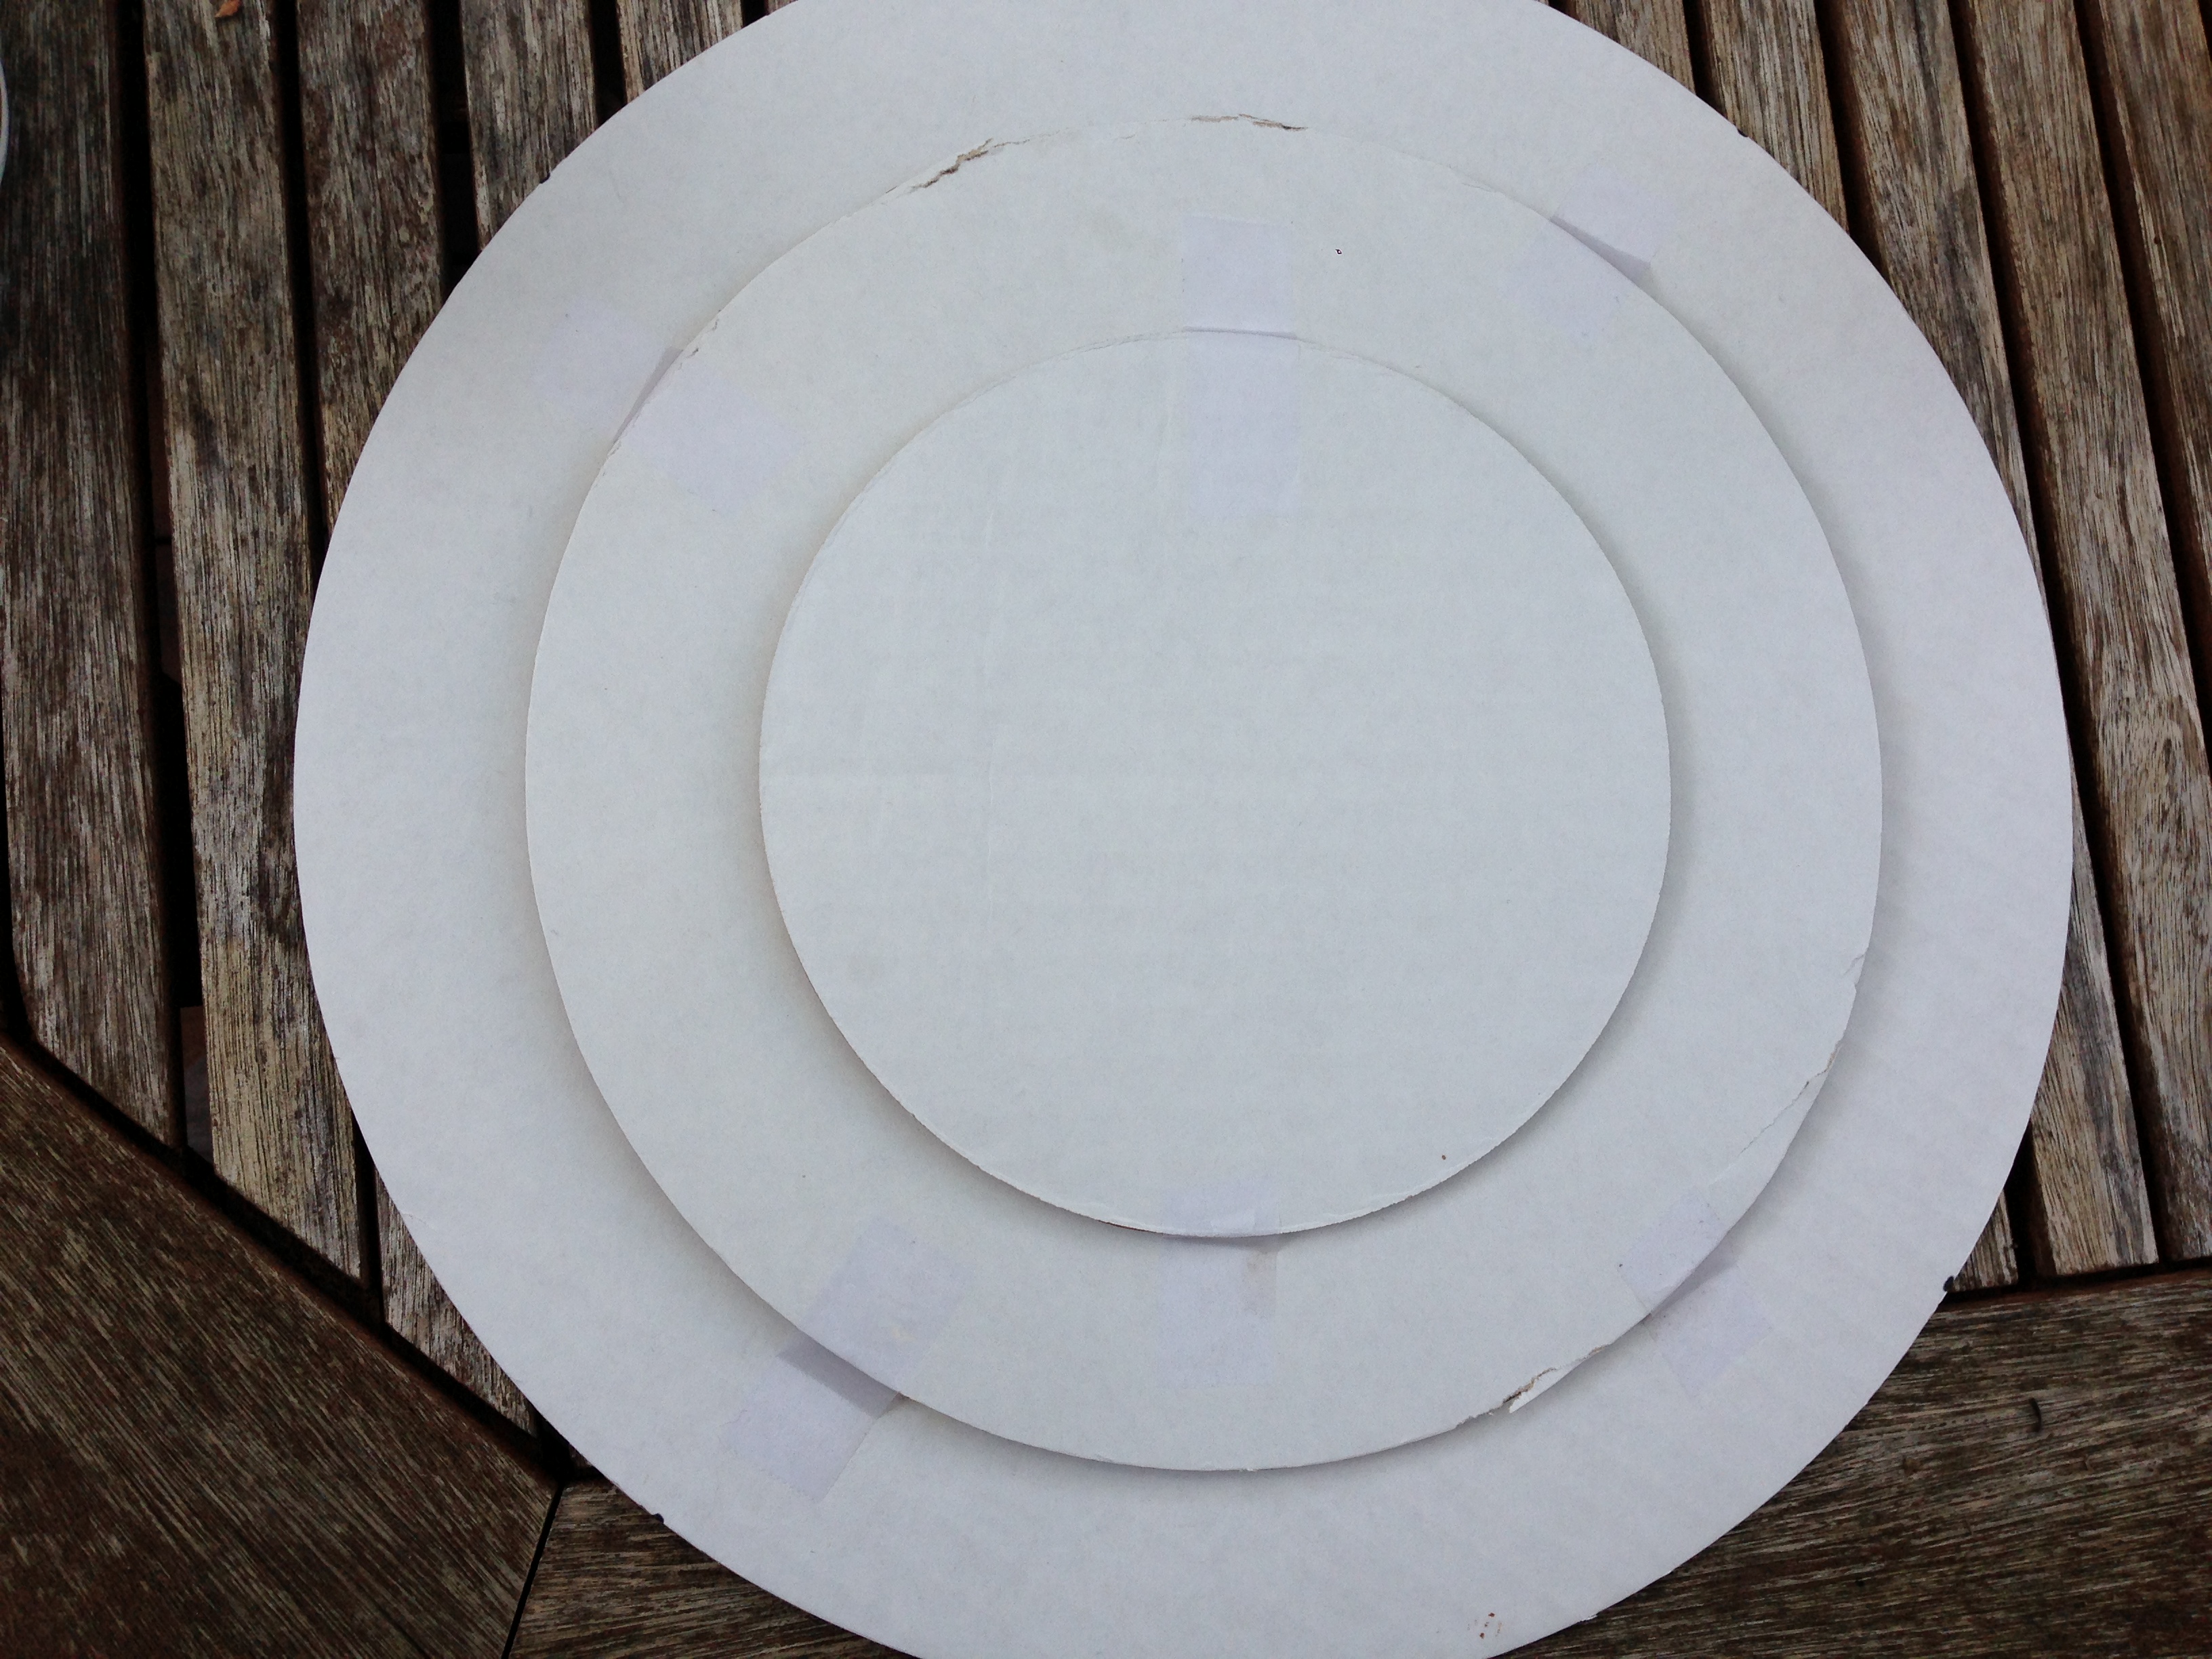

Lastly, when the cakes are ready to be added to the cake boards, smear frosting on each round before lining up the cake. That way, it'll be "glued" to the surface and won't slide around. Then, using the same-sized center dowel, pre-score each layer so it'll go down the center dowel more easily. I did this by starting from the bottom -- where the hole is in the cake board round--and heating a metal skewer to make it slide through cold cake a little easier. Then I took a same-sized dowel that I'm using for the center support, and pushed it through each layer to make a tunnel for the center dowel to travel through.