
Kevin originally posted the following in his blog, MyMediaDiary.com.
Two questions guaranteed to get you a polite "yes" instead of the real "Hell, no!" are:
- Would you like to see the videos from our two-week trip?
- Want to hear about a dream I had last night?
Unless you're bed-ridden or Sigmund Freud, you could well be stuck for at least an hour getting far too much information on what should have been a five minute conversation under the category, "You really should have been there."
But with the magic of a $32 do-dad, YouTube and Facebook, I've managed to release my captives.
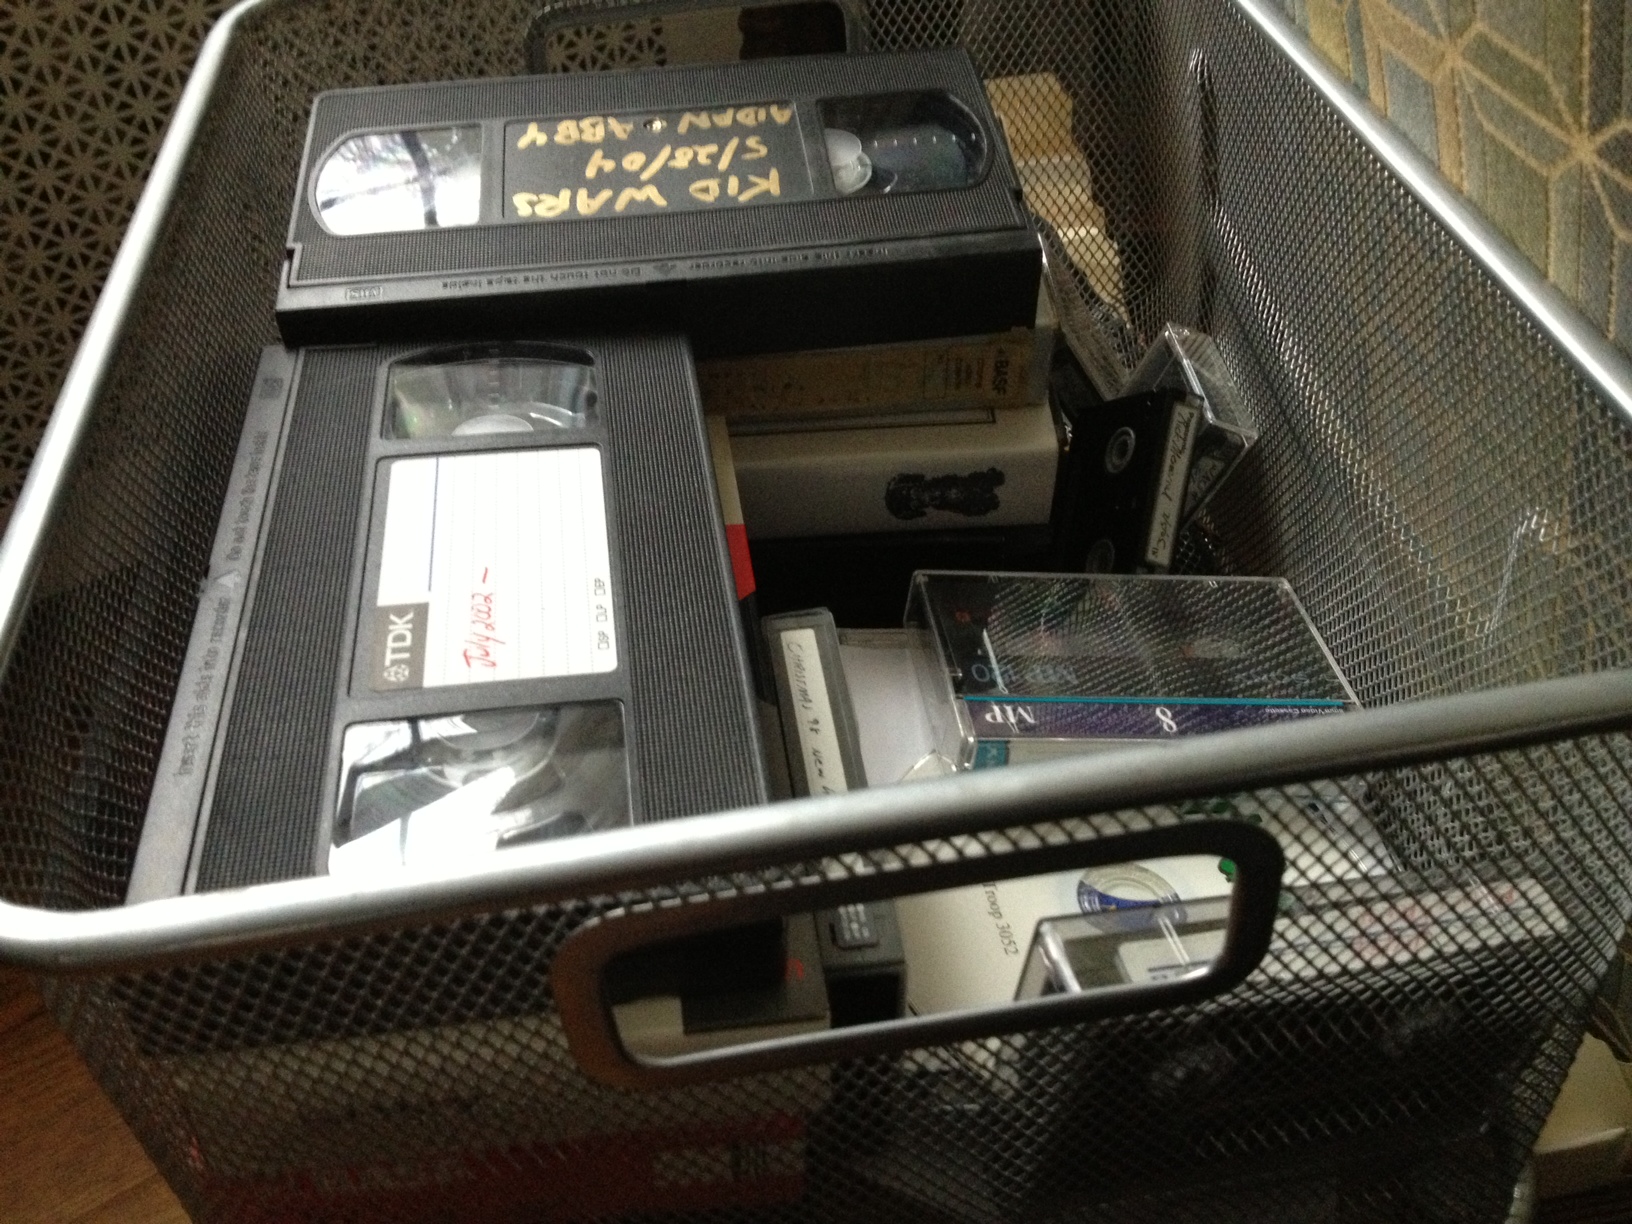
Please, let our basement not flood before I back these up...
In all of our basements and attics, there are boxes of videotapes, photographs, slides and 8mm movies. I've lived in constant fear of losing those treasures to fire, flooding, mold or accidental bouts of cleaning. I've written earlier about my attempts to tackle the hundred pounds of snapshots, but now what to do with all the video (and all of the formats).

Old faithful 8mm (and duct tape)
Our marriage has run the gamut of video formats in 21 years: from the VHS camera I lugged around on camping trips , to my 8mm Sony camera I bought in 1997, to miniDV, HD, DVD and SD cards -- how do you get them all in the same place? How can you share them easily --without the water-torture method of forcing someone to sift through a two-hour mega-file?
Over the holiday, I was on a mission to move all the old tapes and at least get them all on a flash drive to put in a safety deposit box. But things moved faster than I thought, and in a few easy steps I was sharing long-lost memories with past students, family and friends. And a few asked me to jot down my steps...
Step 1: Moving that Footage
I was at Meijer waiting to pick up some pictures when I saw the box for Video2PC and thought it was too good (and cheap) to be true.
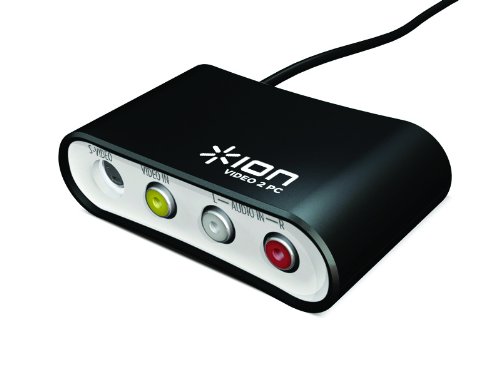
Ion's Video 2 PC
But when I unpacked the little guy and hooked my camera's yellow-white-red cords it worked effortlessly with the included PowerDirector software...

CyberLink Power Director (included with Video2PC)
It captured my tapes without a problem -- it even offered a two-hour limit so I could just get the capture running and leave.
The end-result is a large MPG-2 file, but that leads to the next step...
Step 2: Crunching Video Files with Handbrake
There's a great free software for the PC, Handbrake (site) that will not only rip video files from any of your home movies you may have on DVD (whether you transferred them there or recorded from one of those cameras with the cute little discs).
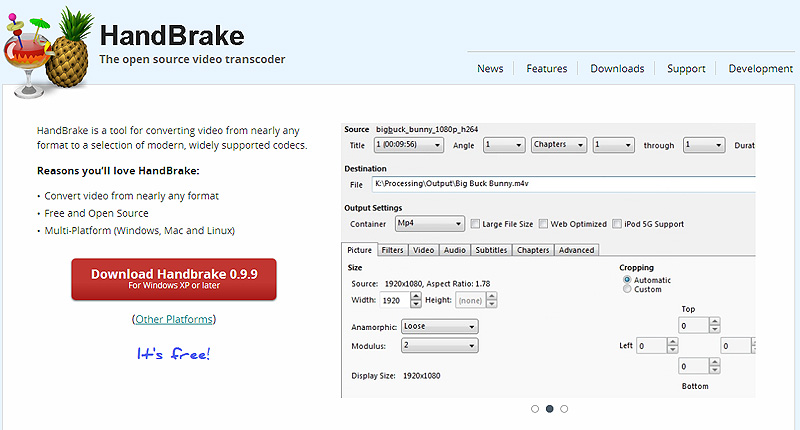
Great free software for ripping video from discs or converting video files.
One of the biggest rabbit-holes that you can fall into is figuring out video formatting. For example, using videos inside a PowerPoint presentation isn't as easy as that simple "add video" option sitting up there on the top right. If it's not Bill Gates' WMV format, the software doesn't want to make life too easy for Apple's Quicktime format ("mov" or mp4) that is preferred by most earthlings. DVDs, on the other hand, like to have MPG2 files. So it can be rather daunting.
But with Handbrake, you can drag the DVD icon or your video file right into the box, tell it what format you'd like it to become, then just click the green "Start" button. (My experience with DVD uploads is that it moves the files over at about twice the speed of the original clip.)

MP4s are the safest bet for playing nearly anywhere (and for uploading quickly to YouTube). You'll also see them listed as H264s in some export features of Premiere, etc.
If you really want to drop further down the rabbit-hole, take a look at the folks at Dummies (link)...
It's an open-source software platform and the altruistic folks always welcome donations, so if you find it useful, please consider helping the guys out!
Step 3: Editing those Monsters into Nice Small Gifts
Let's face it, if you sent a two-hour video clip to relatives, they're never going to look at it. But if you're zipping through your clips and notice, as I did, a forgotten visit to a newborn at a cousin's home in 1998, I knew that the parents would love to see the footage of their freshman way back when...
Fortunately, editing software has dropped in price from $25,000 in the mid 1990s to the low-low price of, well--free. Software such as Lightworks is also an open platform, but most computers and tablets come with basic editing. Cyberlink PowerDirector featured above also lets you do basic editing.
The trick is to only create clips that people want to see. Those 30 second cat videos get way more hits than the 5 part mini-series on your basement renovation. The 26 second video below featuring my kids at three and five from 13 years ago sums up their personalities perfectly. Abby is a giver, she is more interested in seeing her present to Aidan get opened than see her own present. She also is a great hugger. My son wasn't too concerned with the impact of his gift -- and he looked a bit out of sorts with the hugging part of the hug...
Step 4: Loading Them Onto YouTube
If you don't have a YouTube account, it will only take a few minutes to get one. If you've already got a Gmail address, you're nearly there.
YouTube has made it easier over the years to upload multiple files at the same time (and to edit the settings while it's a-loading).

3 Levels of Privacy in YouTube
Before you start sharing private lives on the web, consider the privacy of those involved. YouTube has three settings for privacy:
- Public (anyone can see it)
- Unlisted (only people who have the URL can see it)
- Private (only approved email addresses can see it)
"Unlisted" and "Private" get a little confusing, but if you see the partially locked icon beside your video, you're unlisted -- the clicked lock means that only those email-approved get in.
Step 5: Share Those Videos on Facebook
Certainly email and Twitter are quick ways to share the video, but the most fun way I've had in recent weeks was to share it with Facebook in a conversation. In 2004, some seniors at my high school decided to roast me in the studio. For nearly ten years the VHS tape sat in my basement, never seen since they handed it to me after the show.
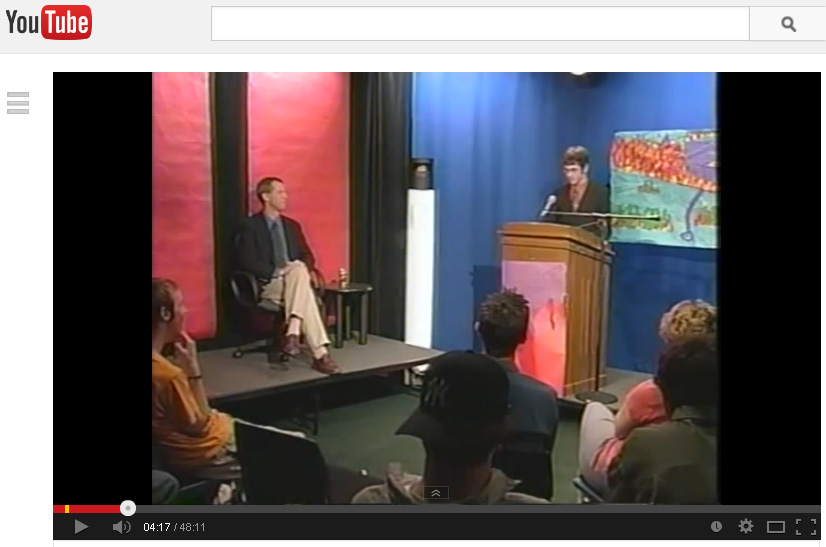
2004 Roast of a Teacher
During my recent flurry of conversions, however, I did manage to send the fragile tape through the steps above. Then I created a conversation with the twelve or so folks on my friends list. Granted, the 48 minutes in length violates my rule, exceptions make life interesting. (And I didn't want to clip anyone out.) Here's a snippet of eight minutes of their Facebook discussion as it was suddenly watched in Los Angeles, Chicago, Detroit, North Carolina and Florida...

Excerpts from a Facebook conversation
It was like we were all in the same living room sharing the moment.
In the past week, I've been able to send friends and relatives similar private videos that mean something to them. The feedback has been extremely positive and excited.
So why not head down to the basement now, spend $35 on a gadget and get the streaming going?